Follow the below documentation to create a mega menu in your desired menu with WCF Builder:
Step – 1:
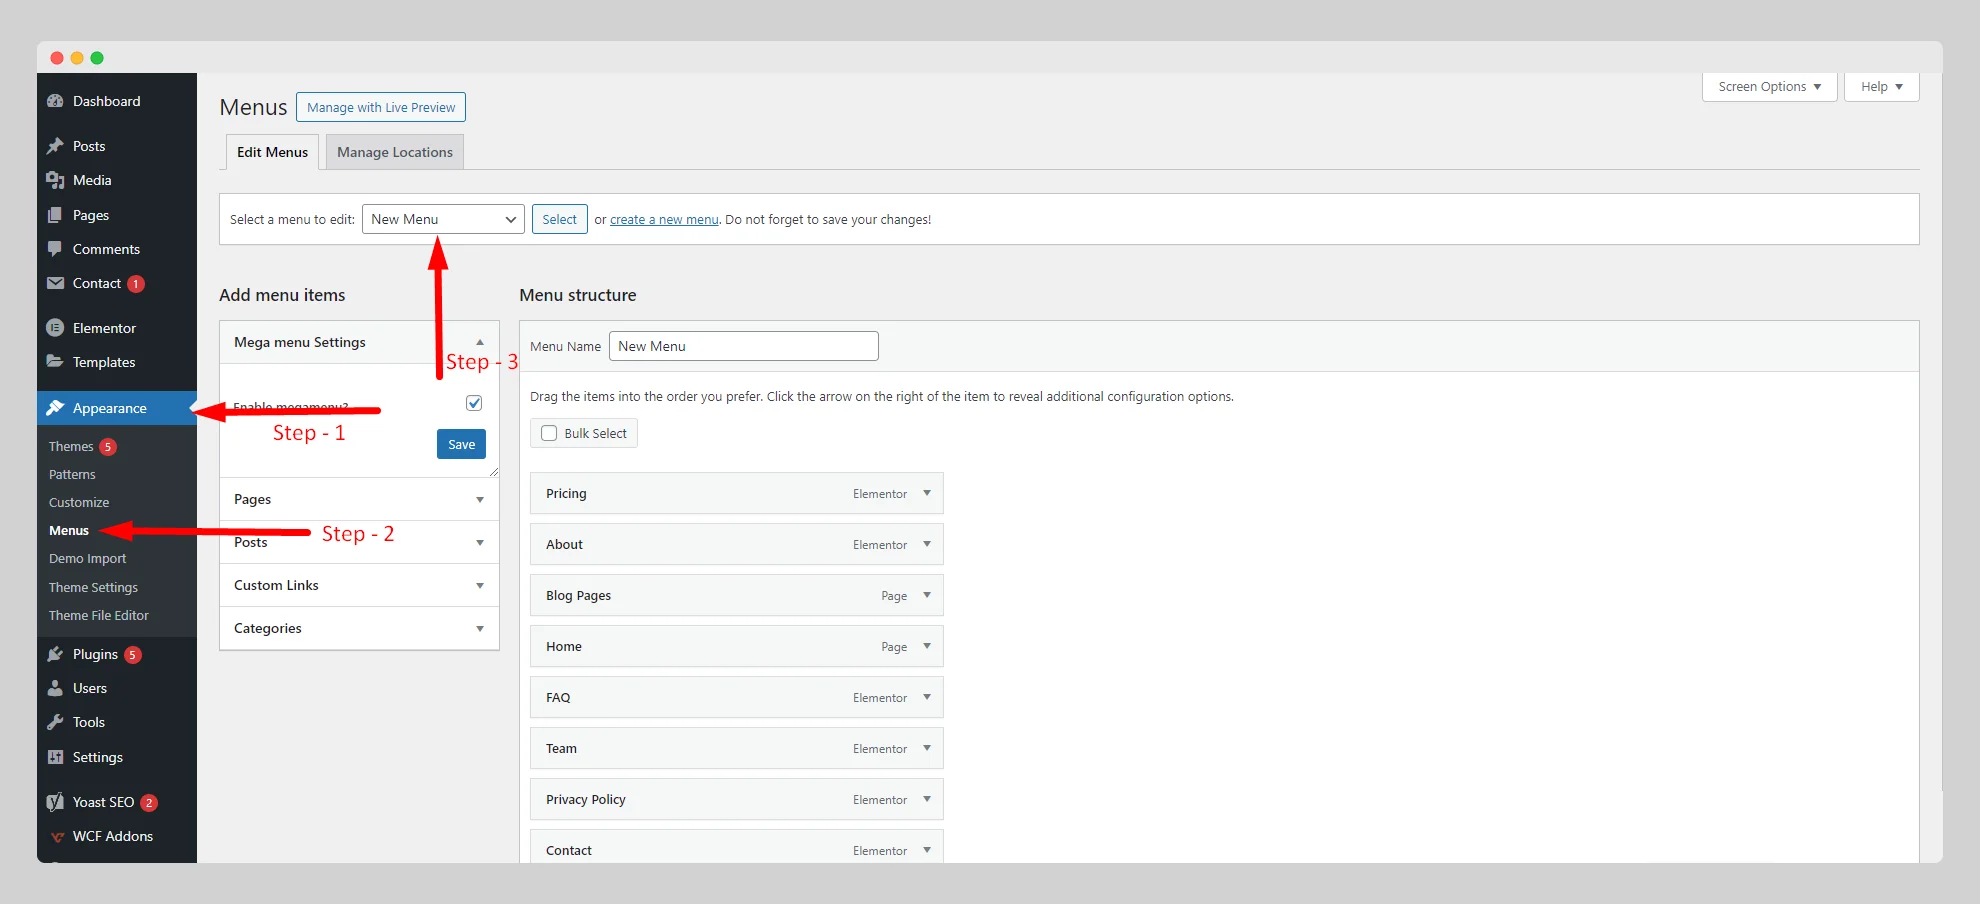
From the main dashboard, navigate to Appearance > Menus first. Then select your menu from the “Select a menu to edit” option to what you want to add the mega menu.
Step – 2:
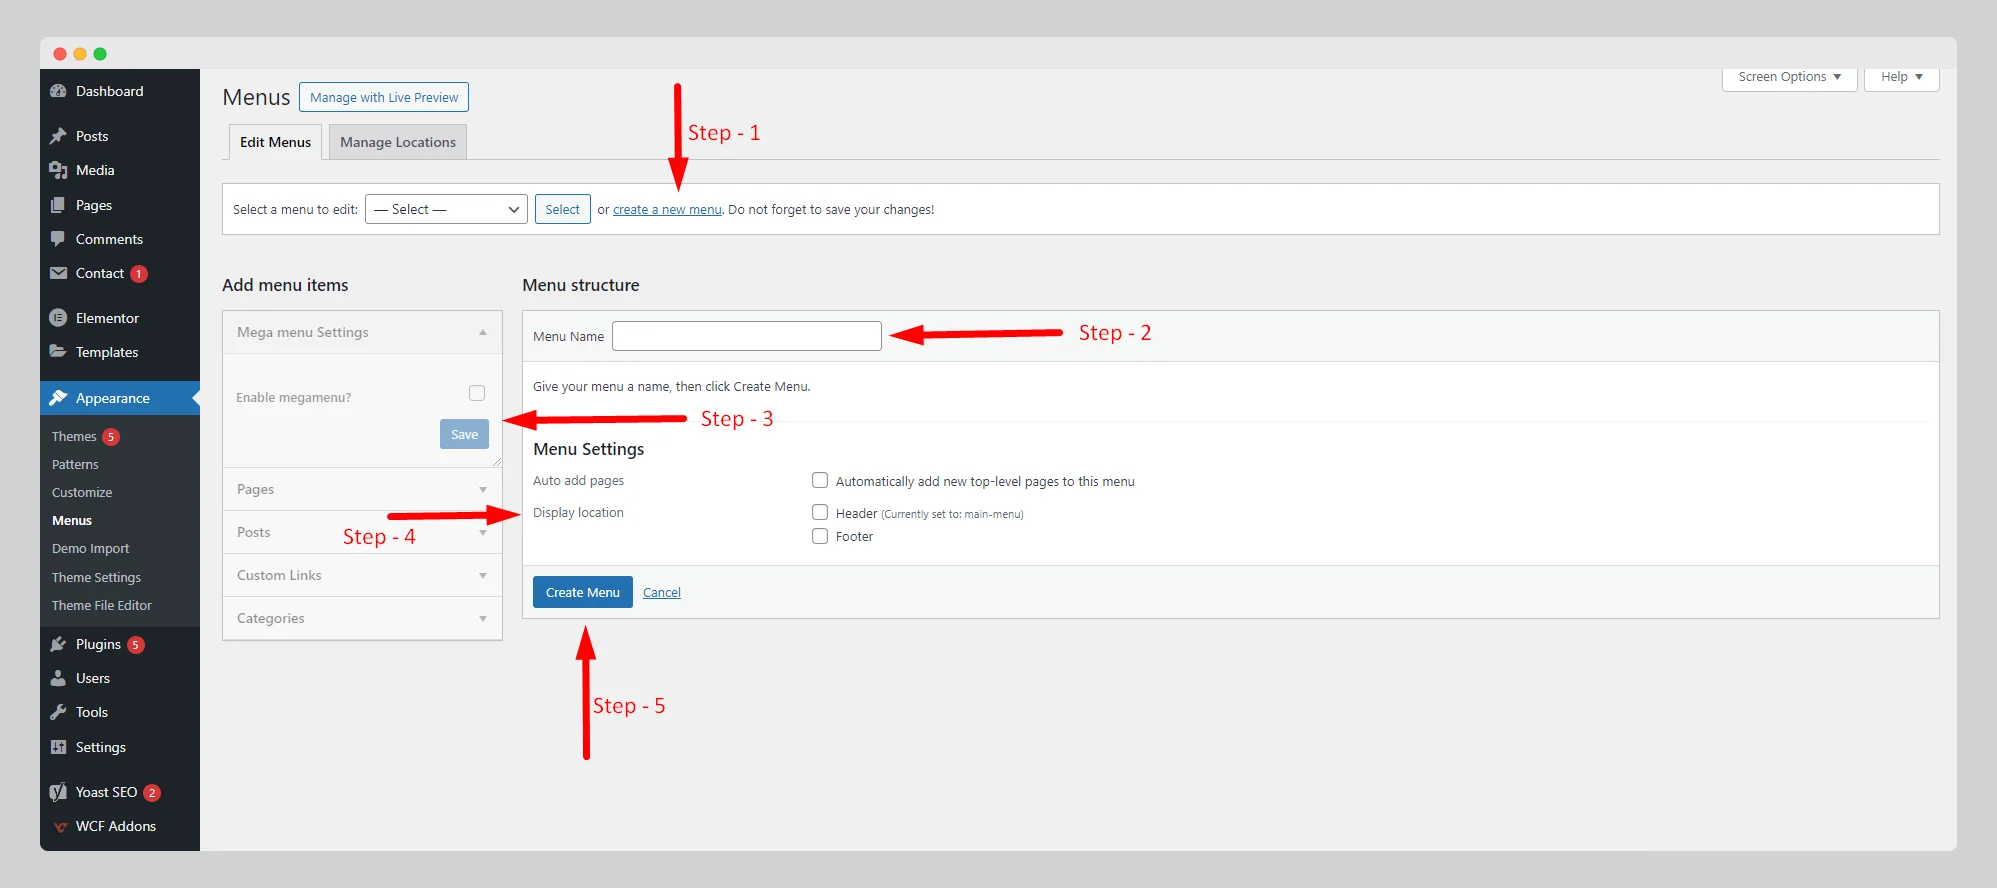
If you don’t have any menus on your website, then click on the “create a new menu” option and customize the menu with a precise name, items, and other necessary settings.
Step – 3:
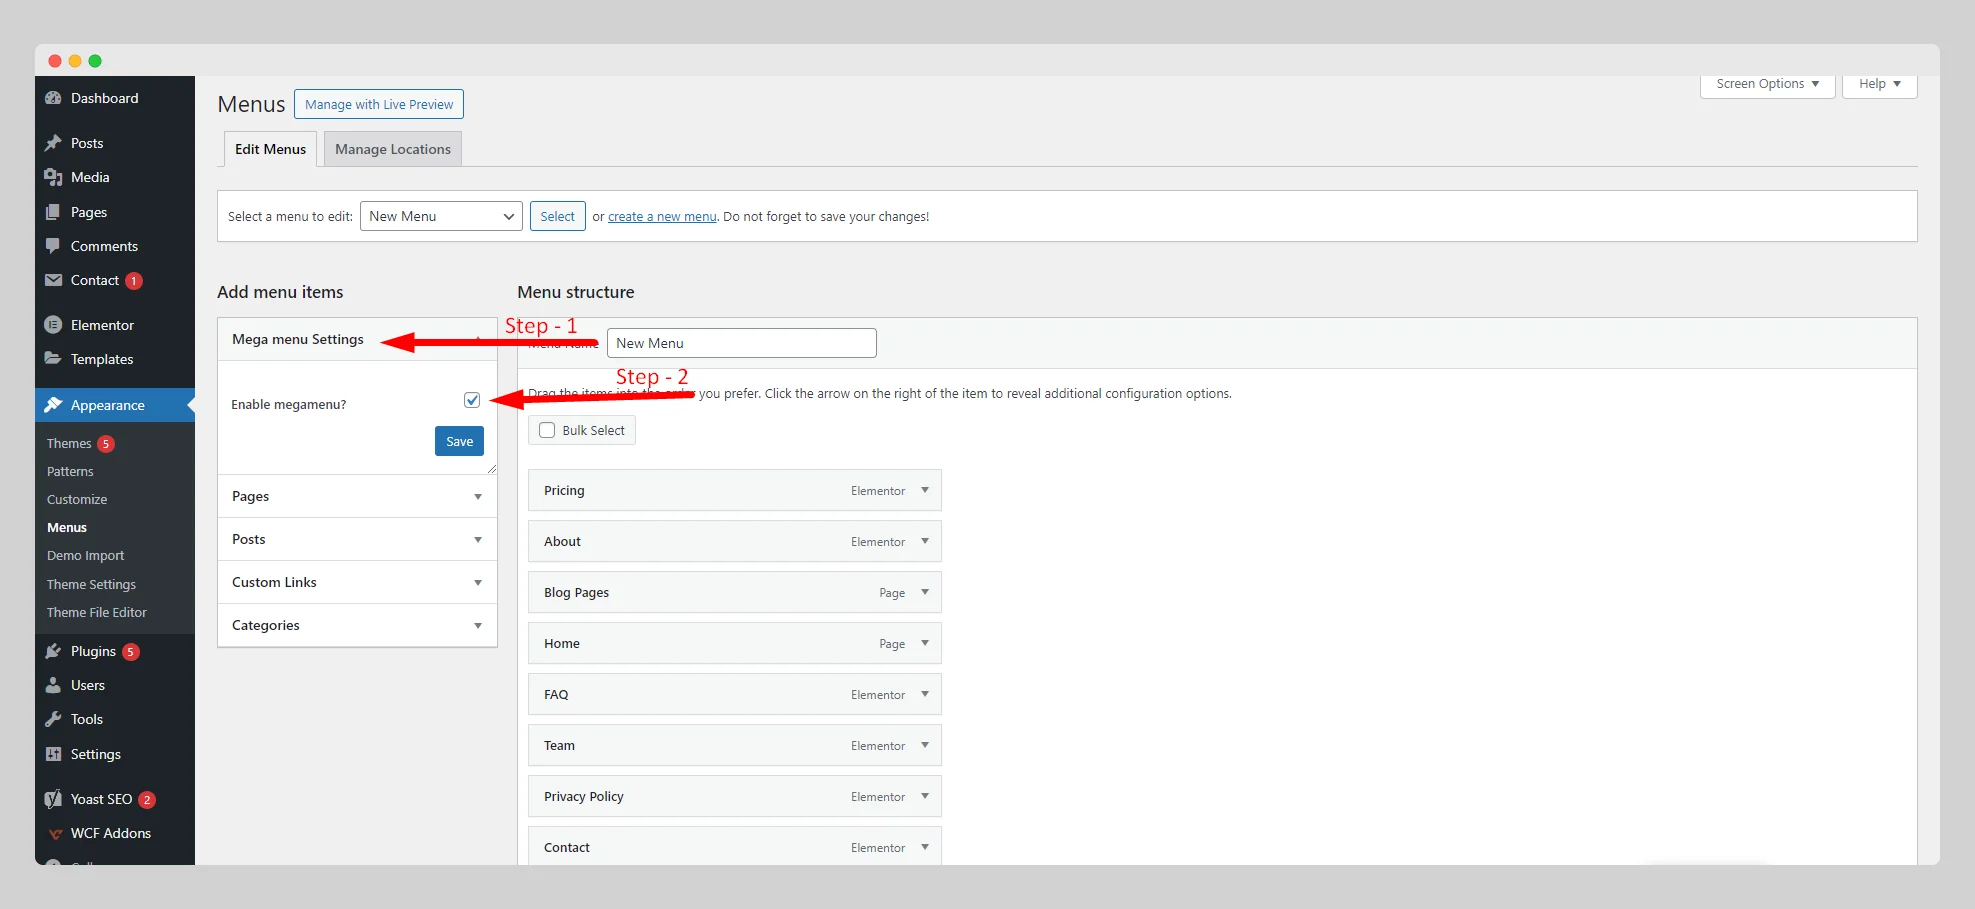
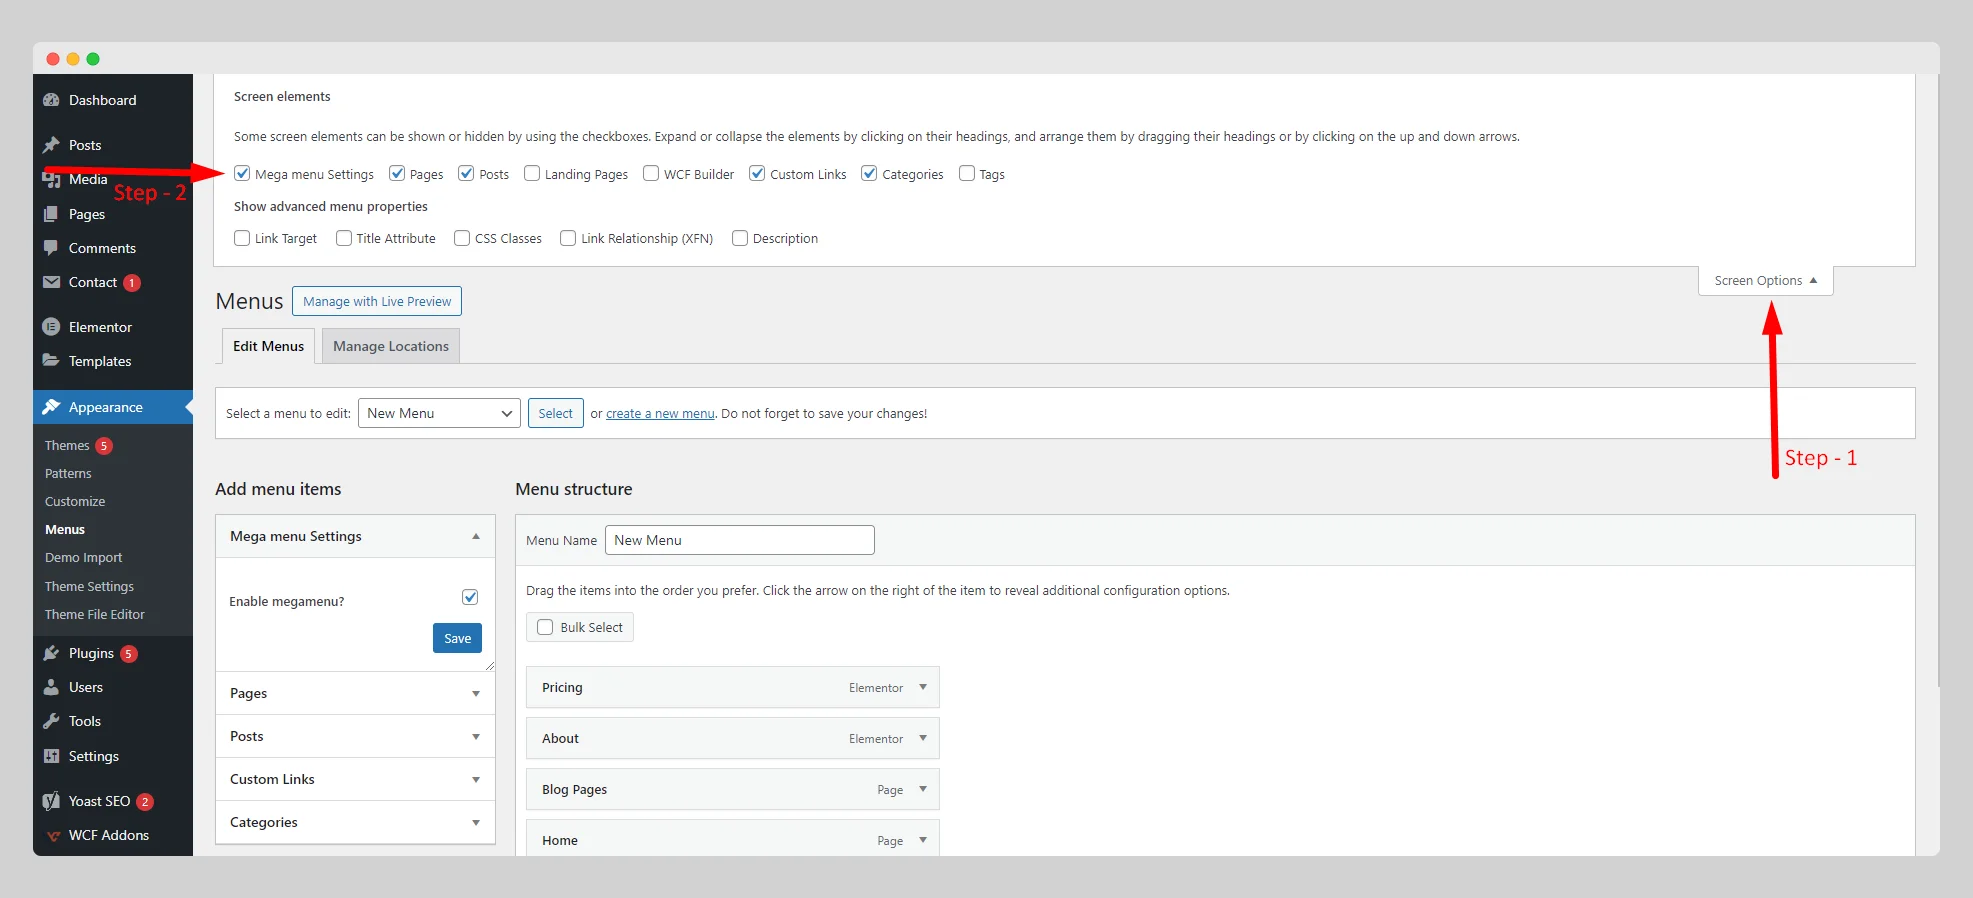
Under the “Add menu items” panel, click on “Mega menu Settings.” Then enable the “Enable megamenu” button and save it.
If you don’t find “Mega menu Settings” in the panel, then click on “Screen Options” at the top-right corner of the page and select the “Mega menu Settings” option.
Step – 4:
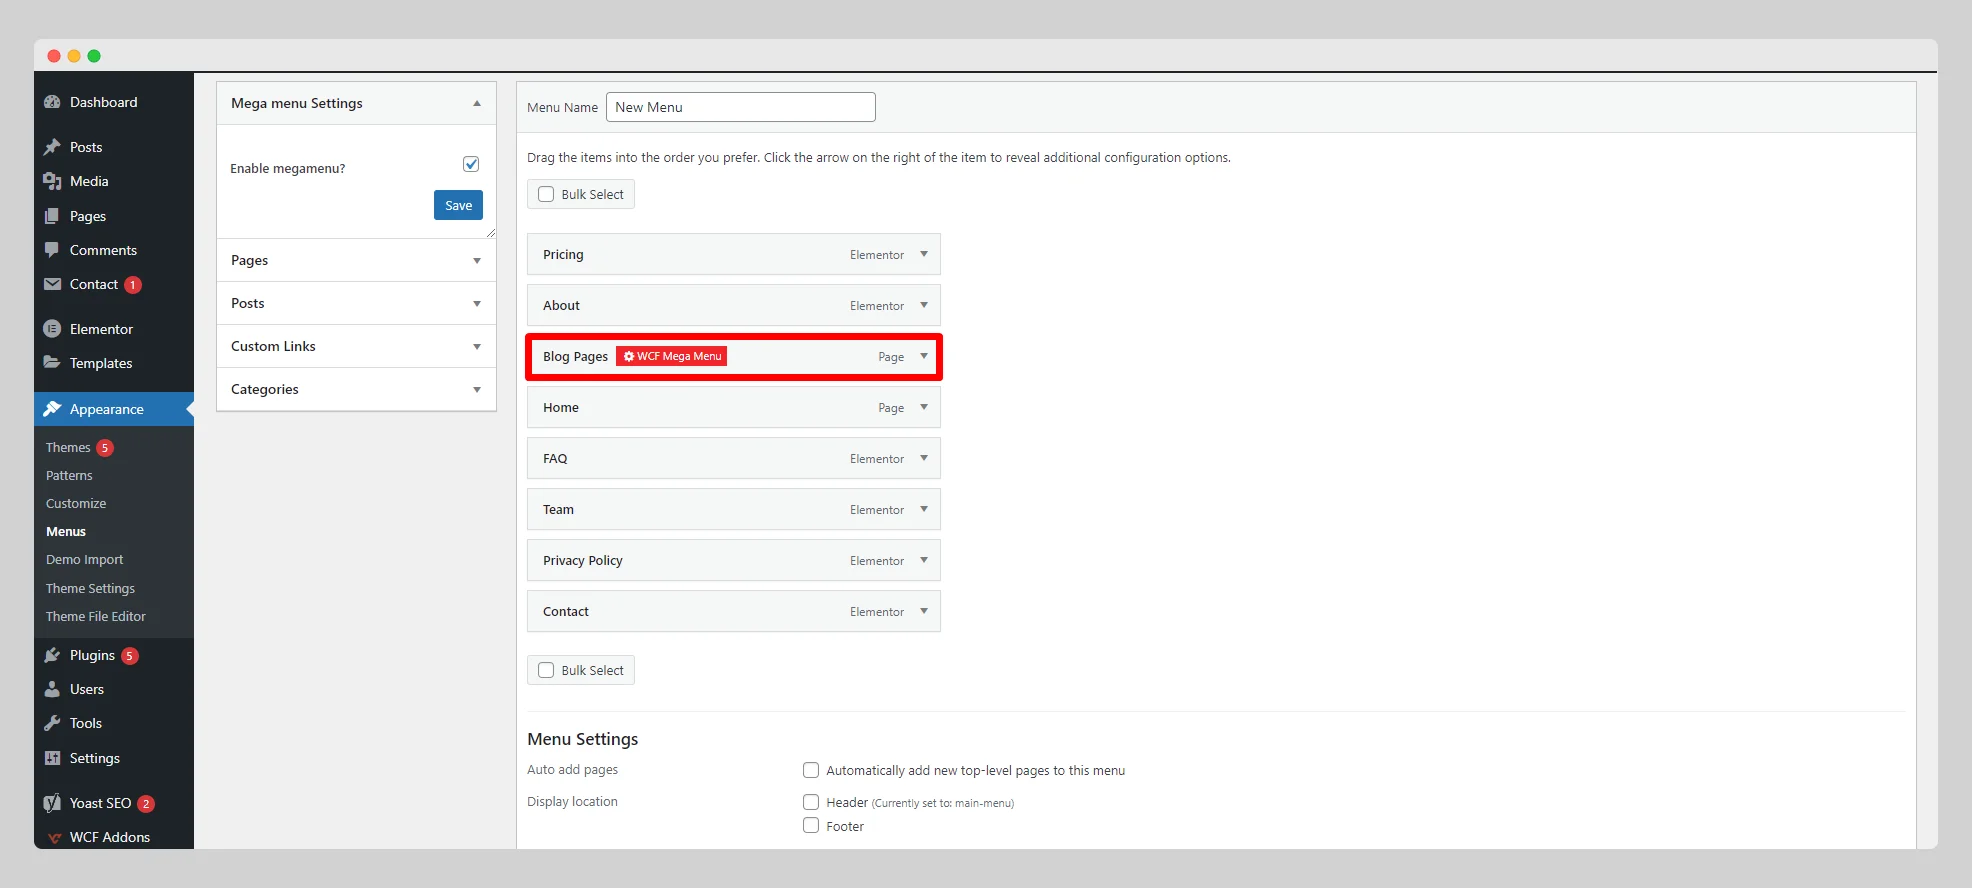
As soon as you enable the mega menu, you can see the “WCF Mega Menu” button while hovering over every item in your main menu. Just click on the particular menu item to which you want to add the mega menu.
Step – 5:
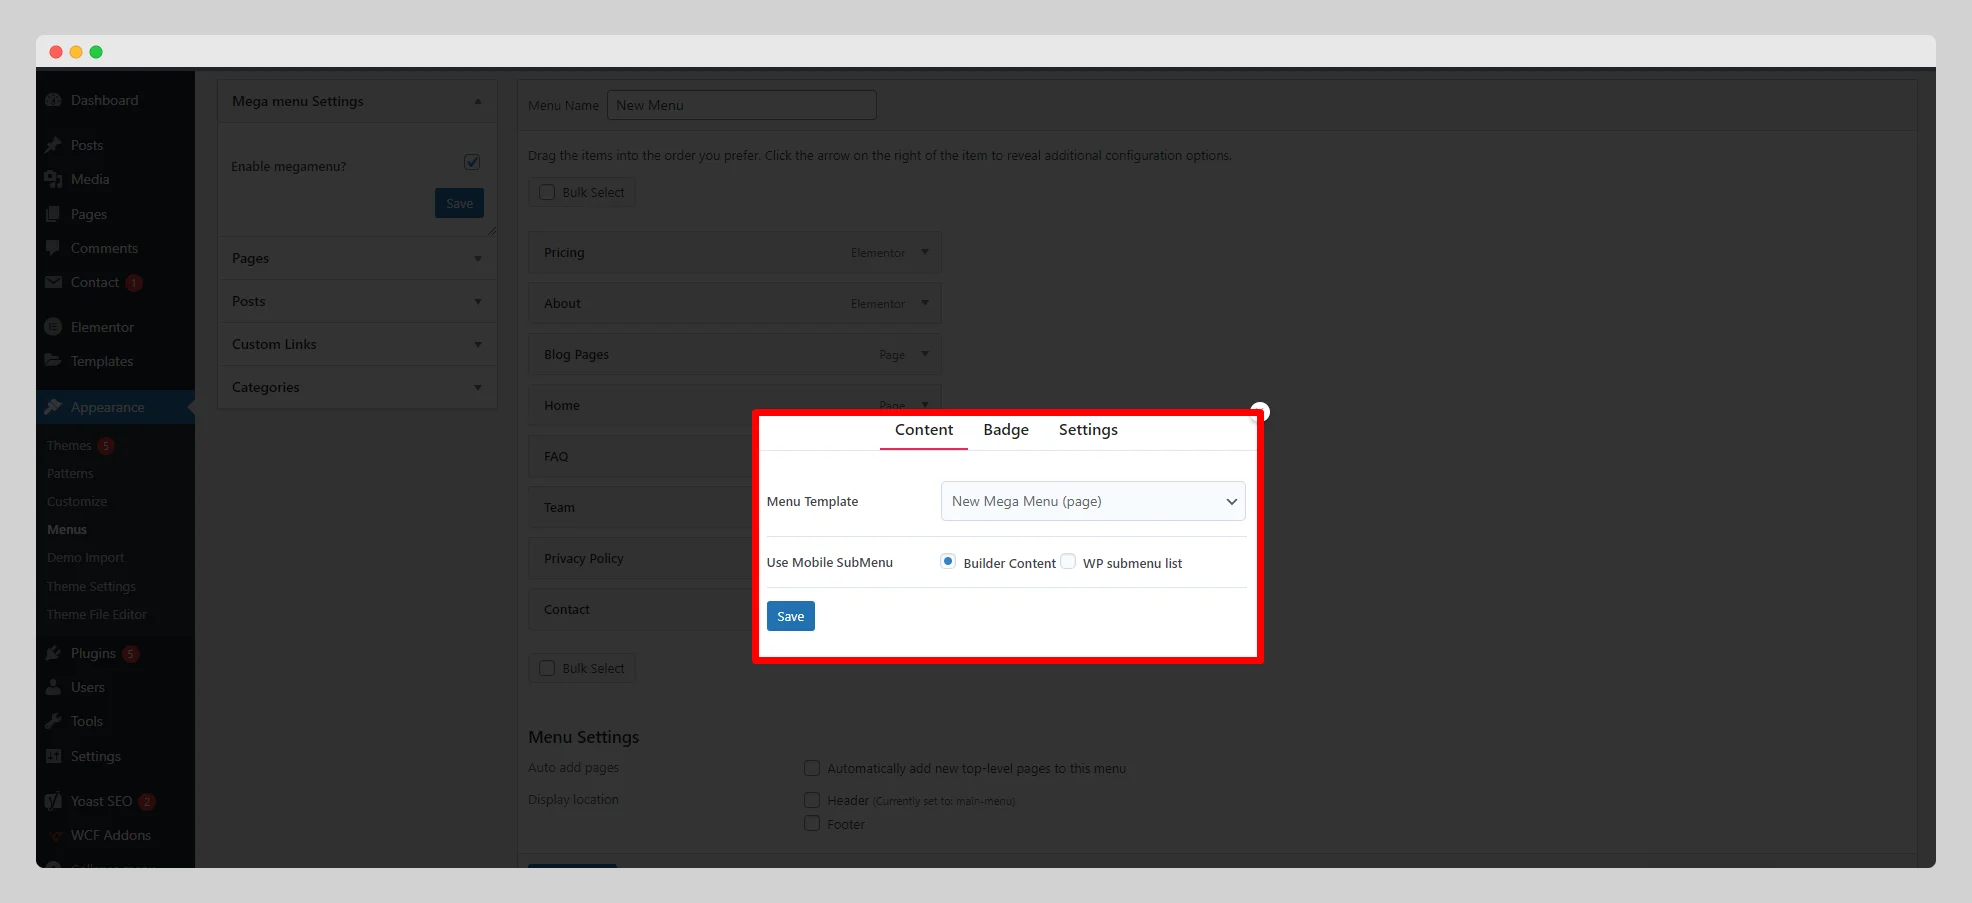
On the new pop-up page, simply select a pre-built template for the mega menu from the drop-down list located next to the “Menu Template” option. Select either “”Builder Content” or “WP submenu list” for the “Use Mobile SubMenu.”
Step – 6:
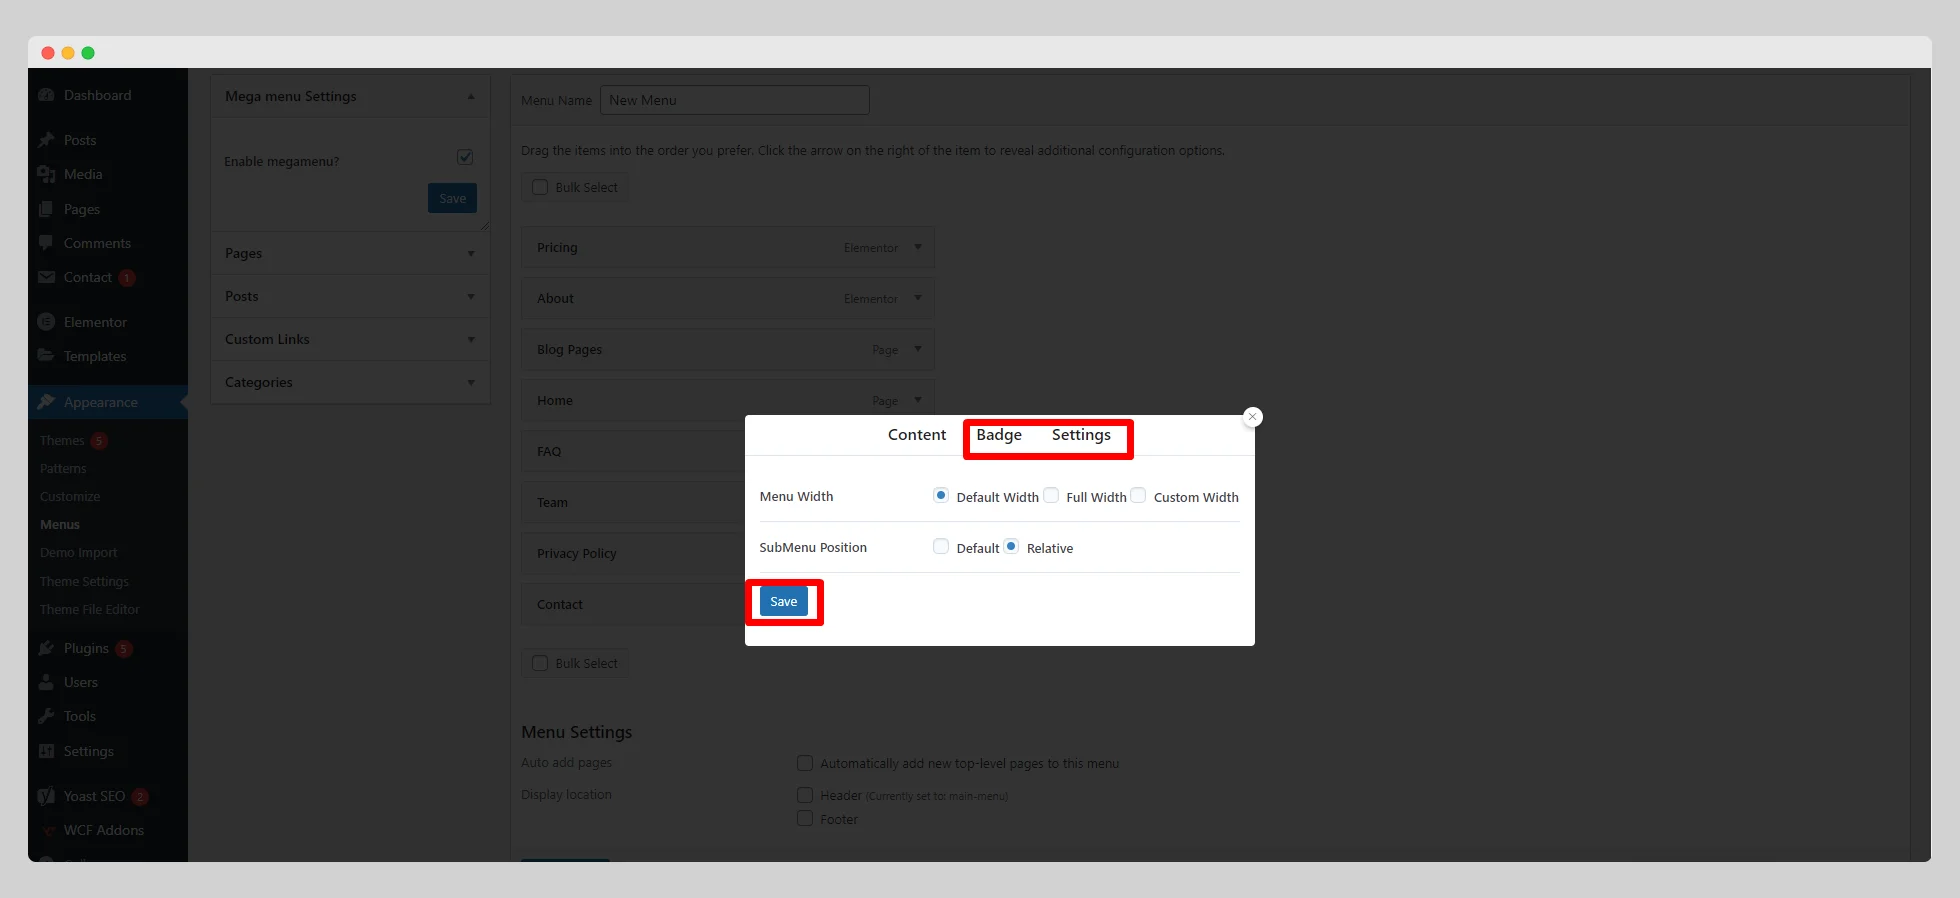
Then adjust the “Badge” and “Settings” as per your requirements. Finally, click on the “Save” button to start using your mega menu on your chosen menu.
