Look into the below documentation to create a custom post type:
Step-1:
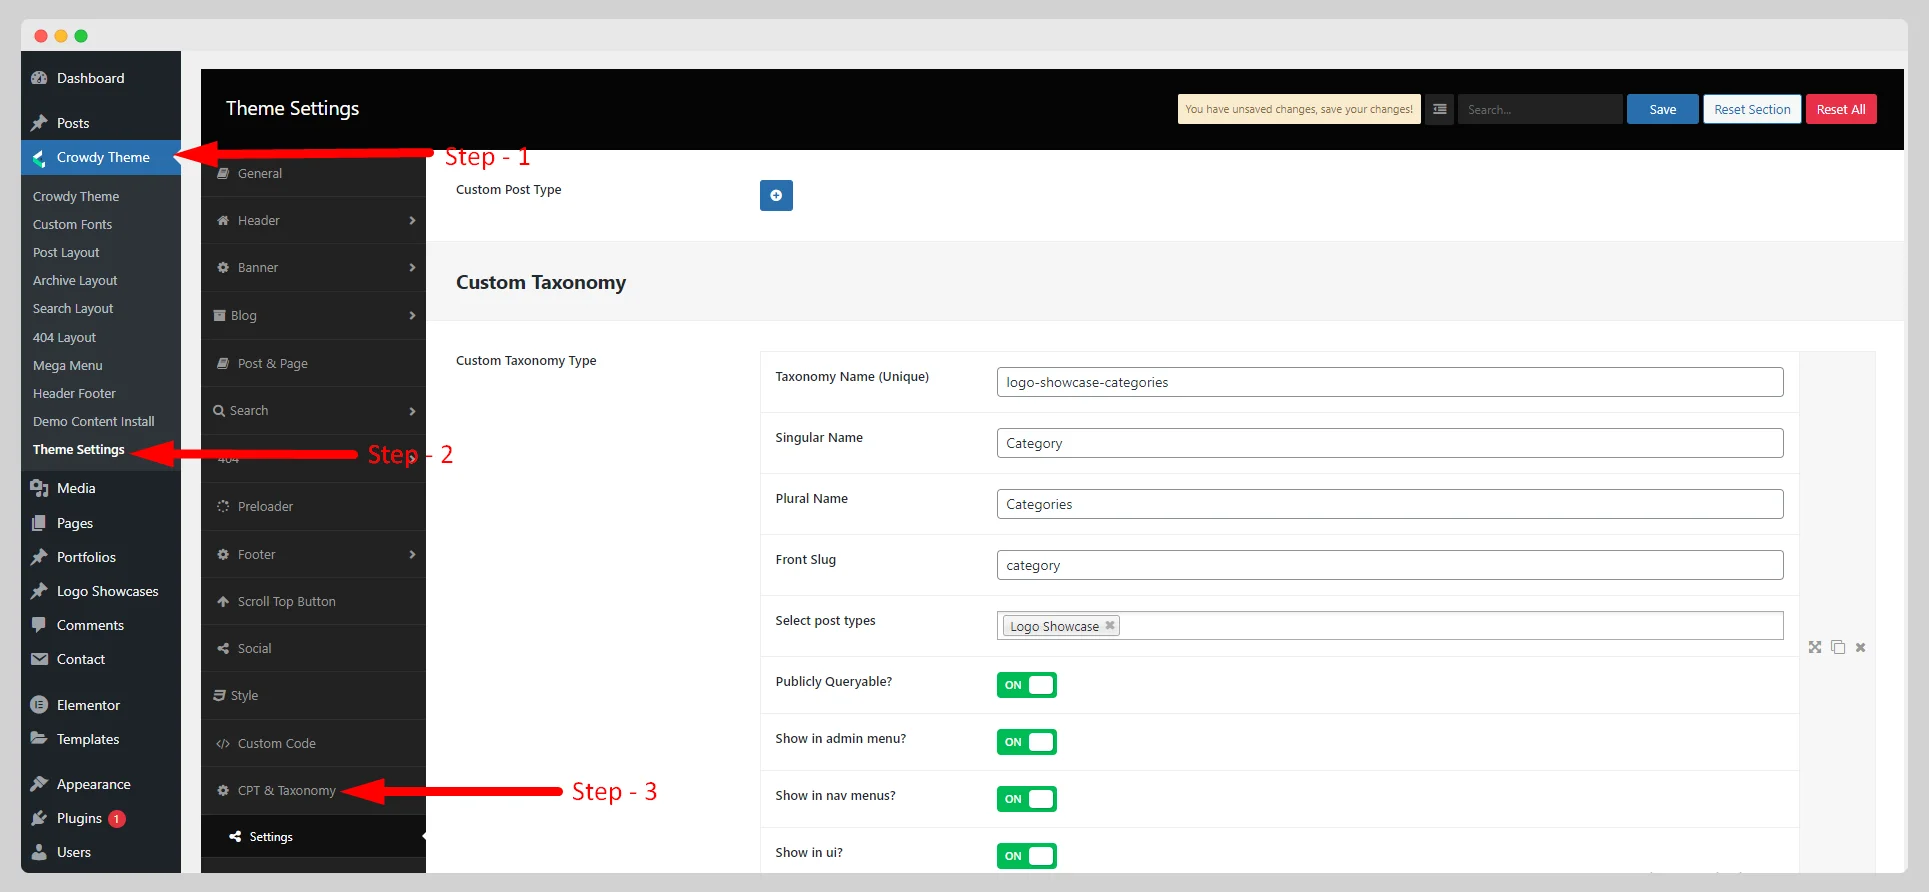
Navigate to Crowdy Theme>Theme Settings first. Then click on “CPT & Taxonomy” from the new pop-up option panel.

Step-2:
Next to the “Custom Post Type” text in the “Settings” page, tap the “Plus” icon.

Step-3:
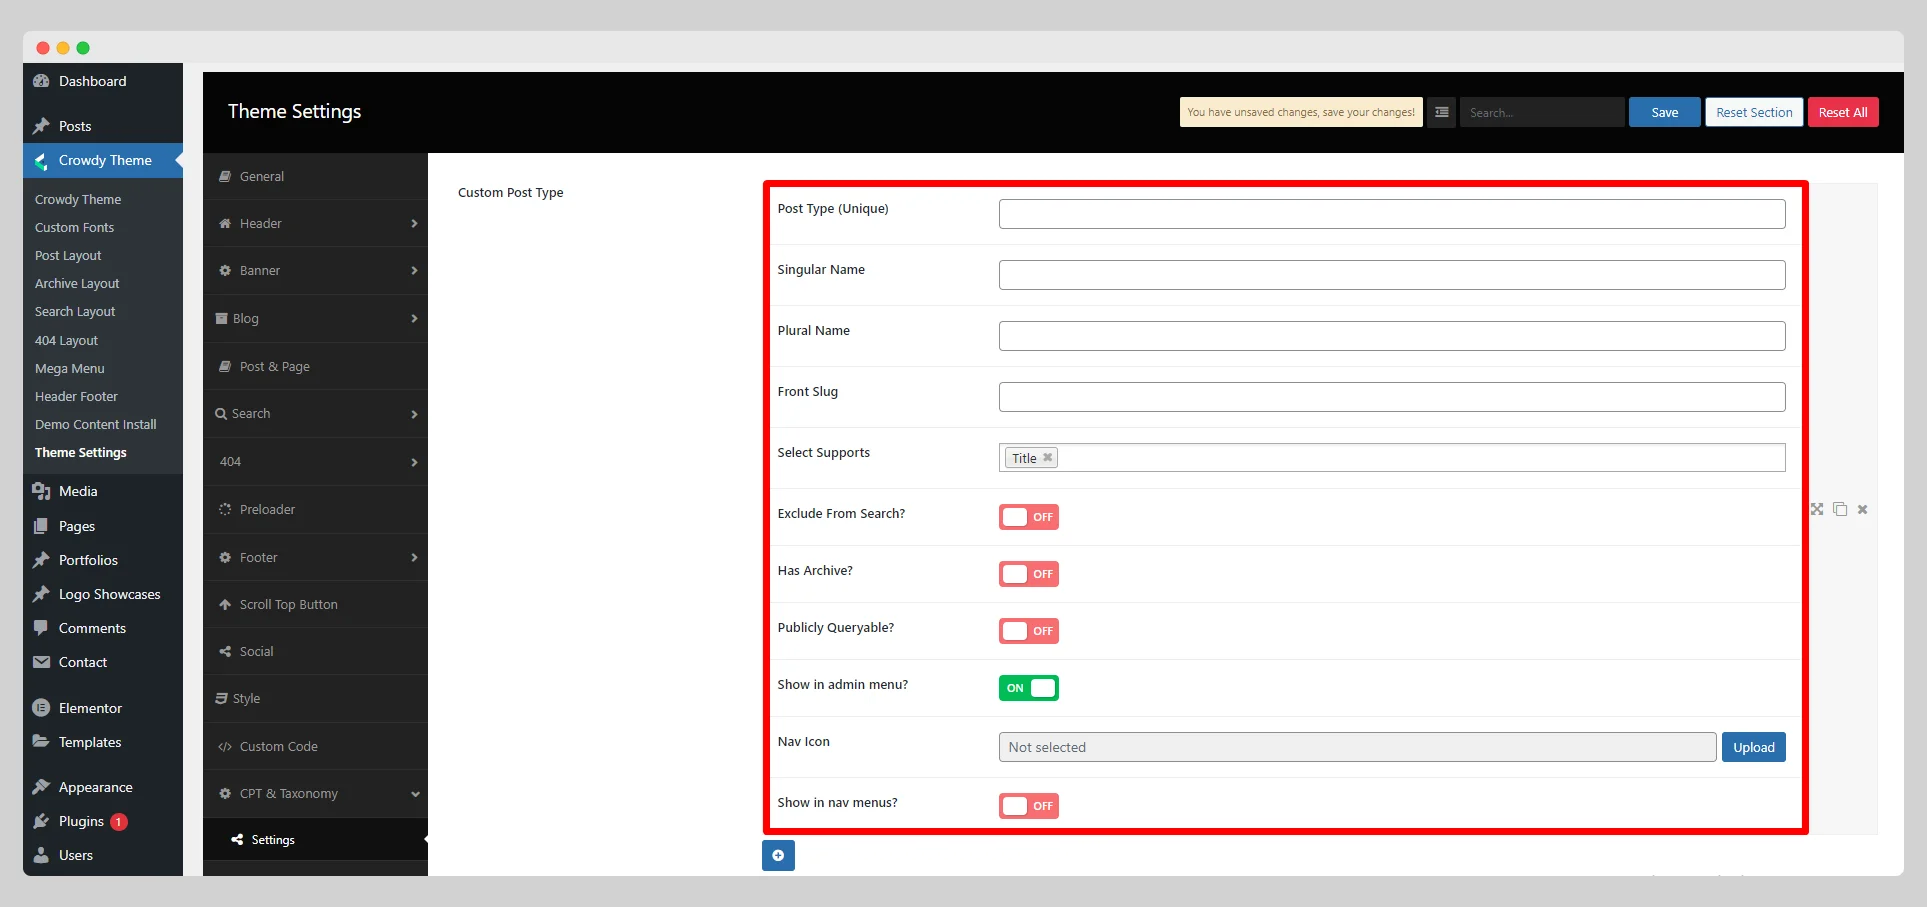
In the new pop-up page, fill up the Post Type, Singular Name, Plural Name, and Front Slug fields with the appropriate texts. In the “Select Supports” field, choose one or many options from Title, Author, Thumbnail, Editor, Excerpt, and Comments.

Enable or disable the “Exclude From Search,” “Has Archive,” “Publicly Queryable,” “Show in admin menu,” and “Show in nav menus” options as per your requirements.
Step-4:
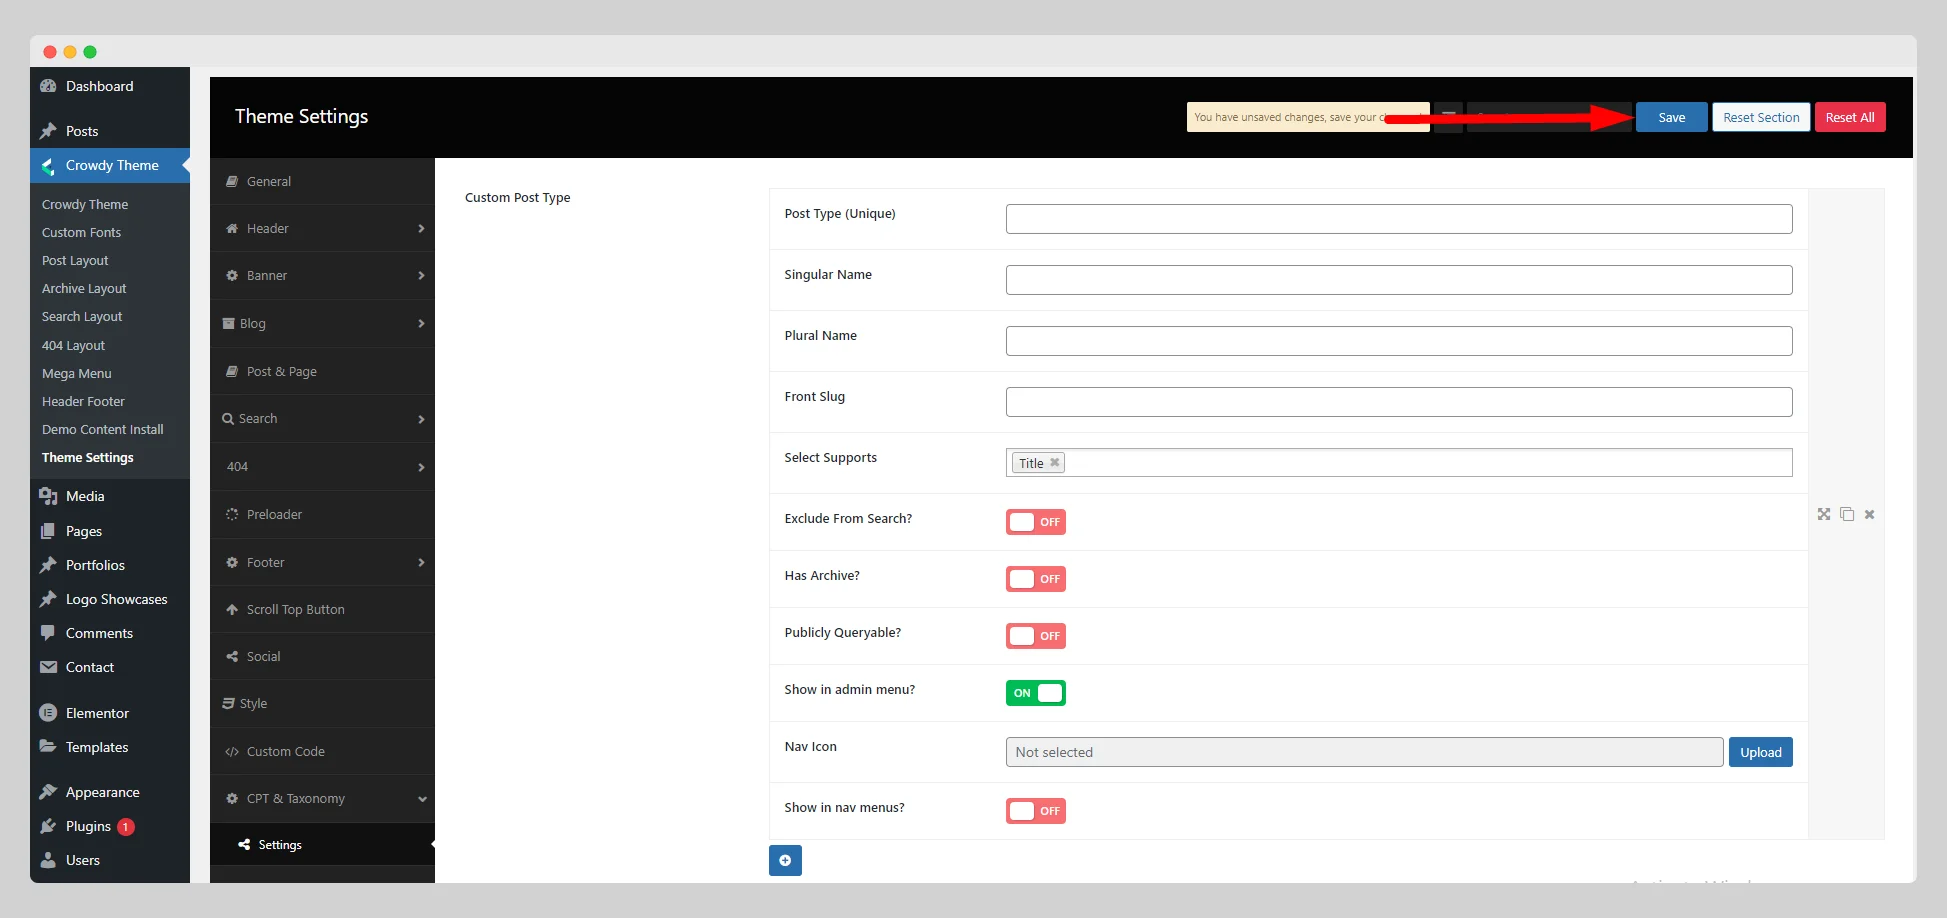
Then upload a navigation icon if you have any. Once you’re done with the basic configuration, you can hit the “Save” button at the top of the page. If everything goes well, the new custom post type will appear on the main dashboard.
