Follow the below step-by-step guides to set up the post layout:
Step-1:
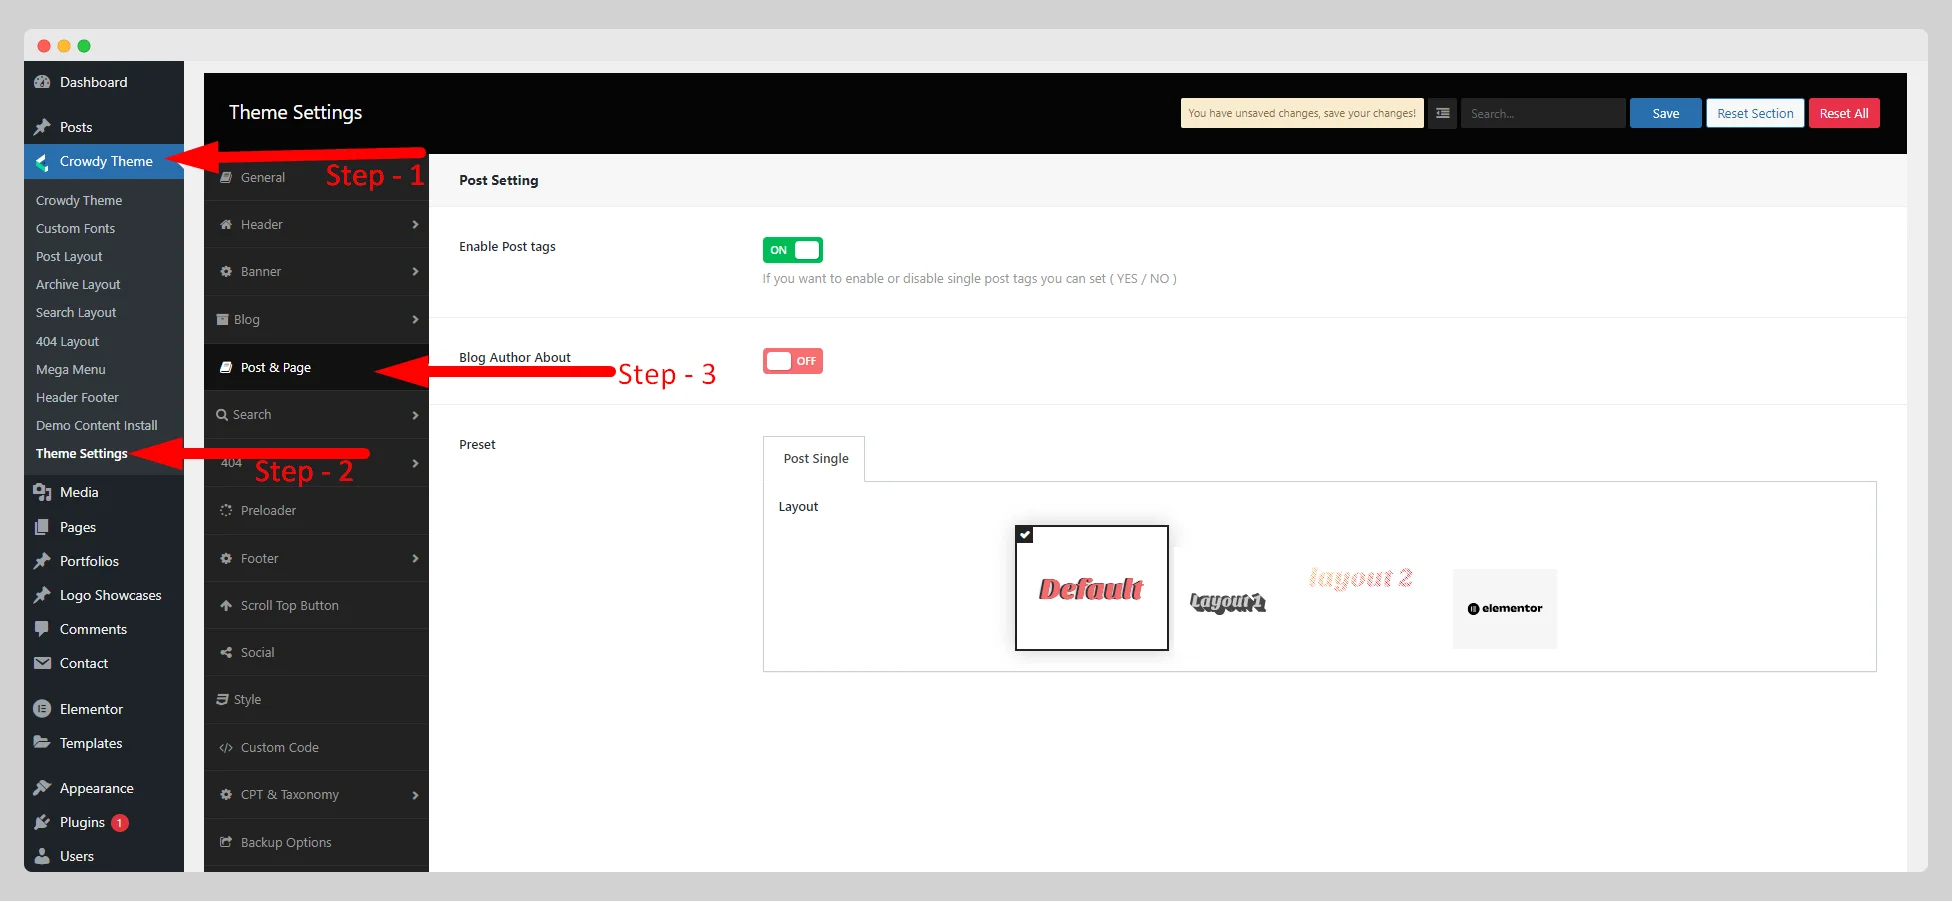
Navigate to Crowdy Theme>Theme Settings>Post & Page first. There you will see several layout options for the single post.
Step-2:
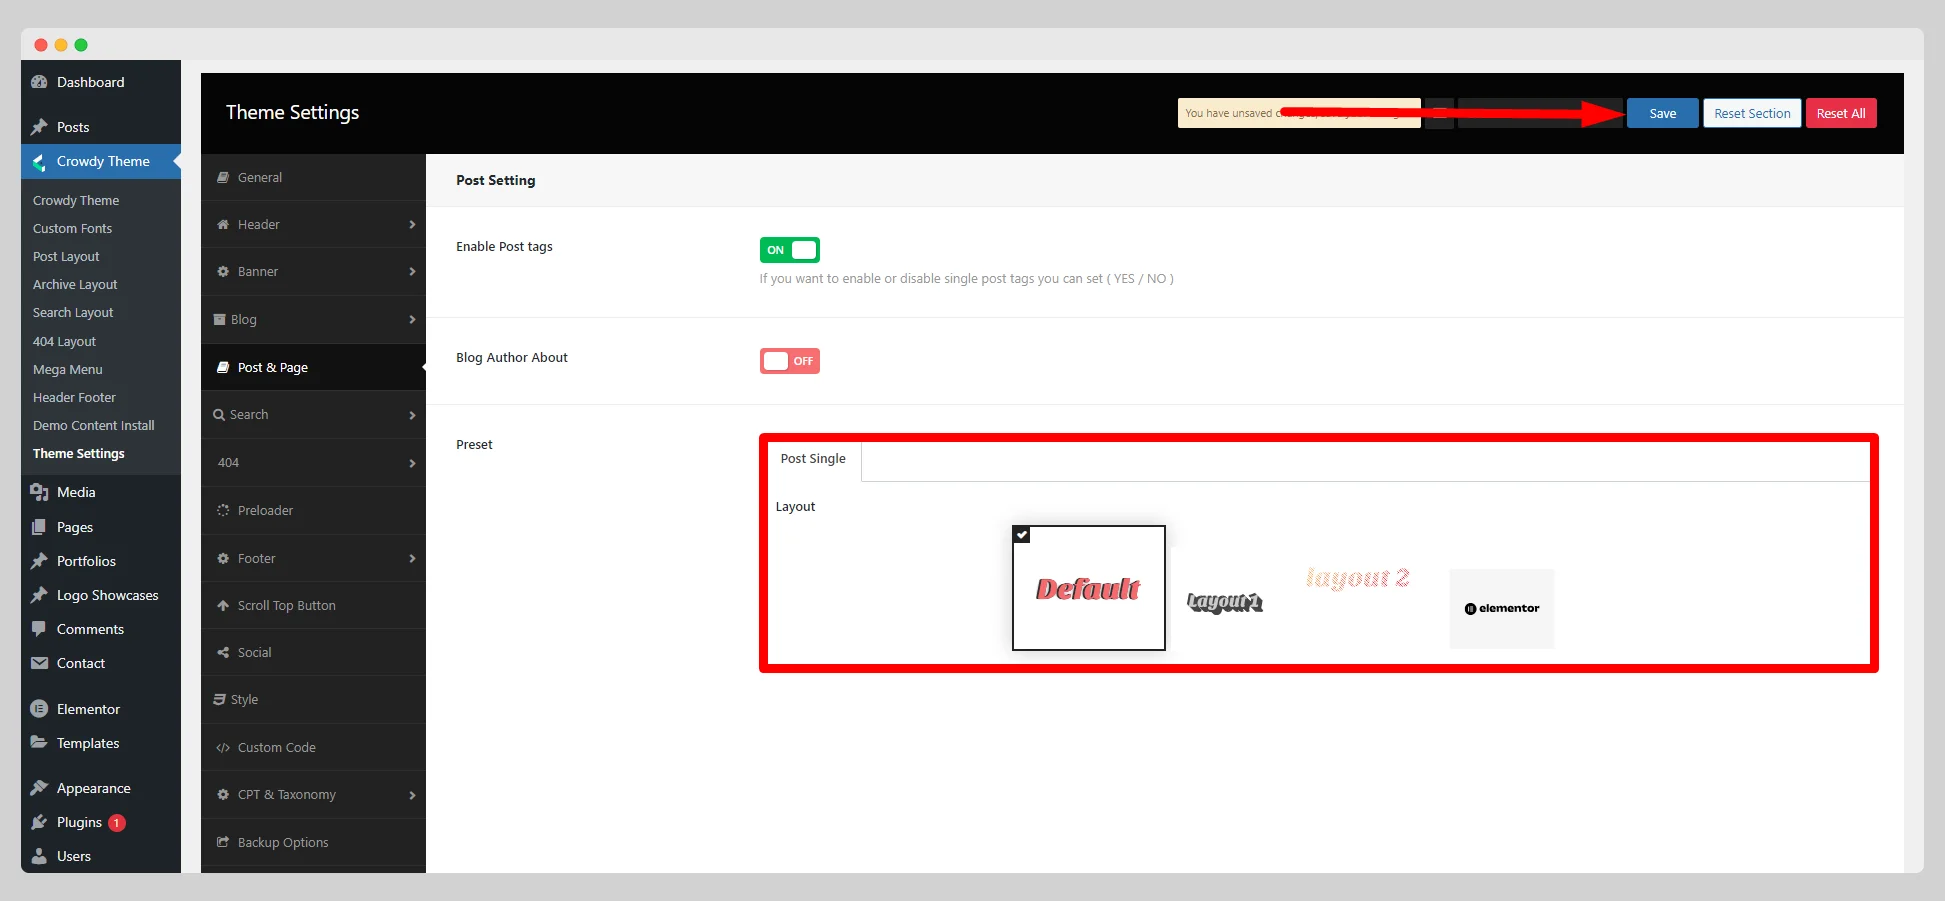
You can select any of the pre-designed layouts labeled default, layout 1, layout 2, and elementor. Then hit the “Save” button. Depending on your selection, the layout of the overall posts across your website will be changed.
Step-3:
If you select the “elementor” option from the layout list, you can see the “Import From Library” below, which will enable you to add ready-made Elementor template layouts directly from here.

Step-4:
As soon as you save the “elementor”, the “Post Layout” option will appear under the Crowdy Theme. So go to Crowdy Theme>Post Layout, from where you can import new Elementor template layouts for your blog posts. As of now, you need to click on the “Import Templates” button.

Step-5:
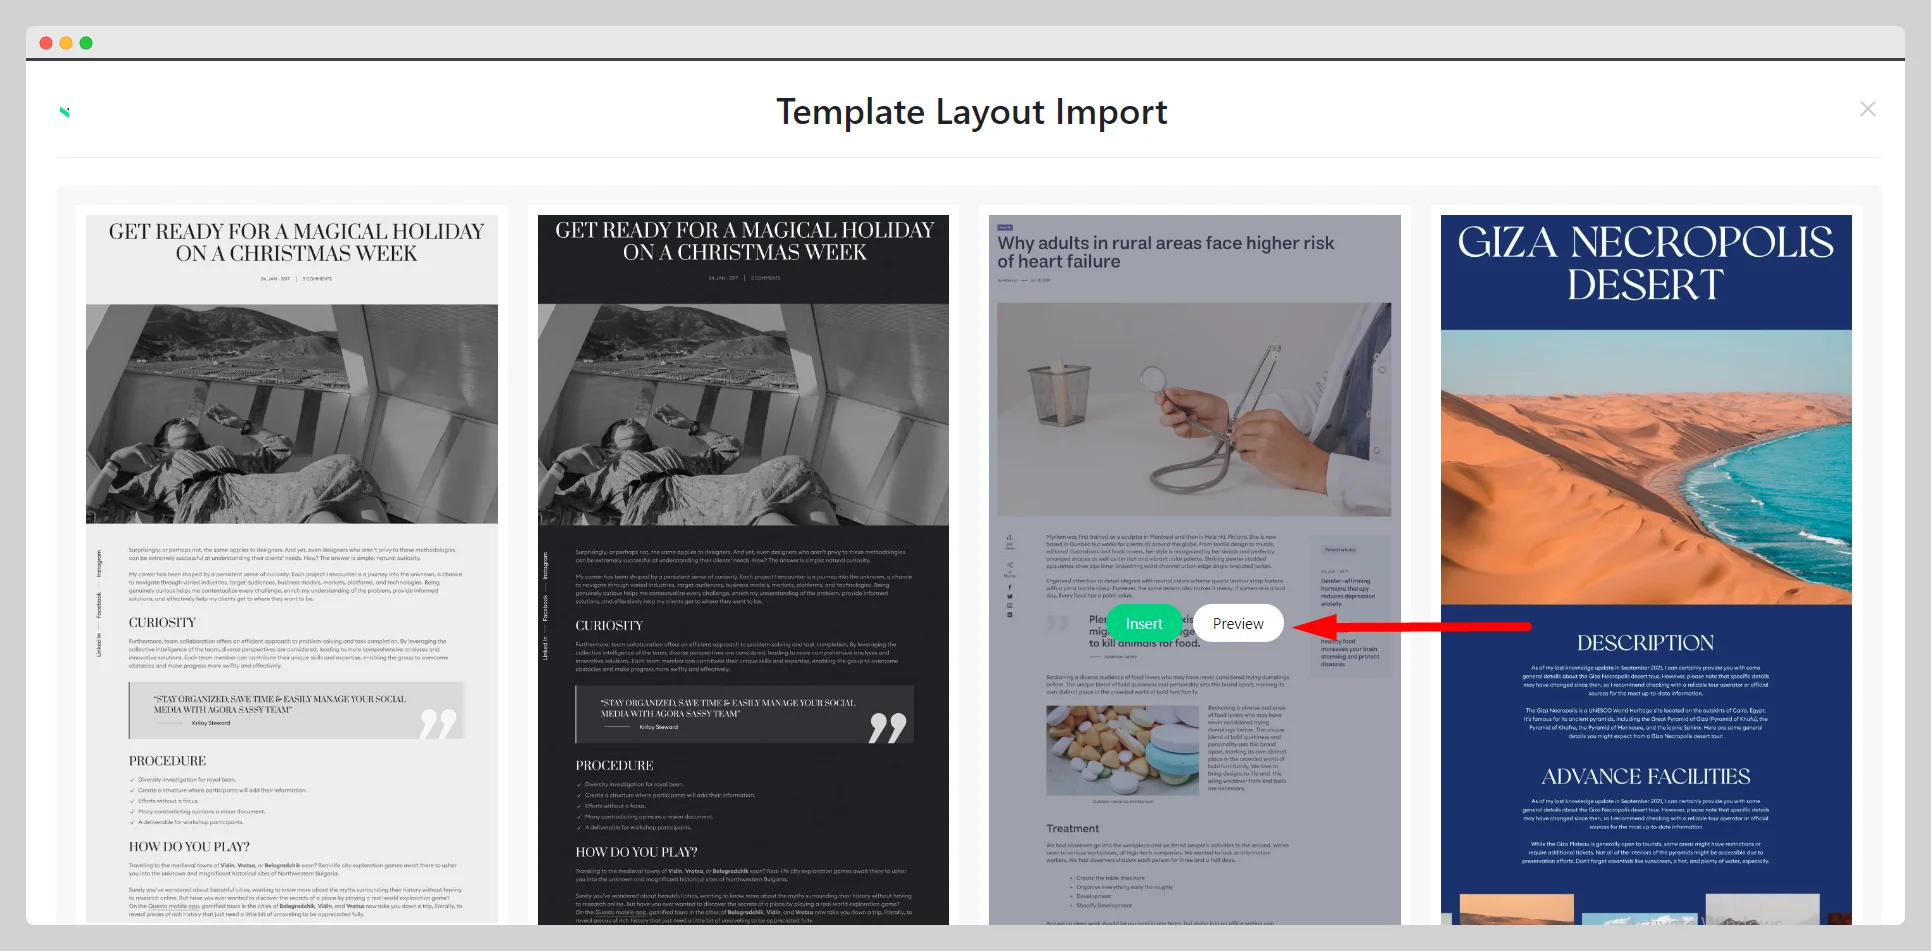
Once you click, you will discover a vast collection of pre-built template layouts. Scroll through them and choose the one that best suits you. You can click on the “Preview” button on your chosen template to grasp its look and feel.
Step-6:
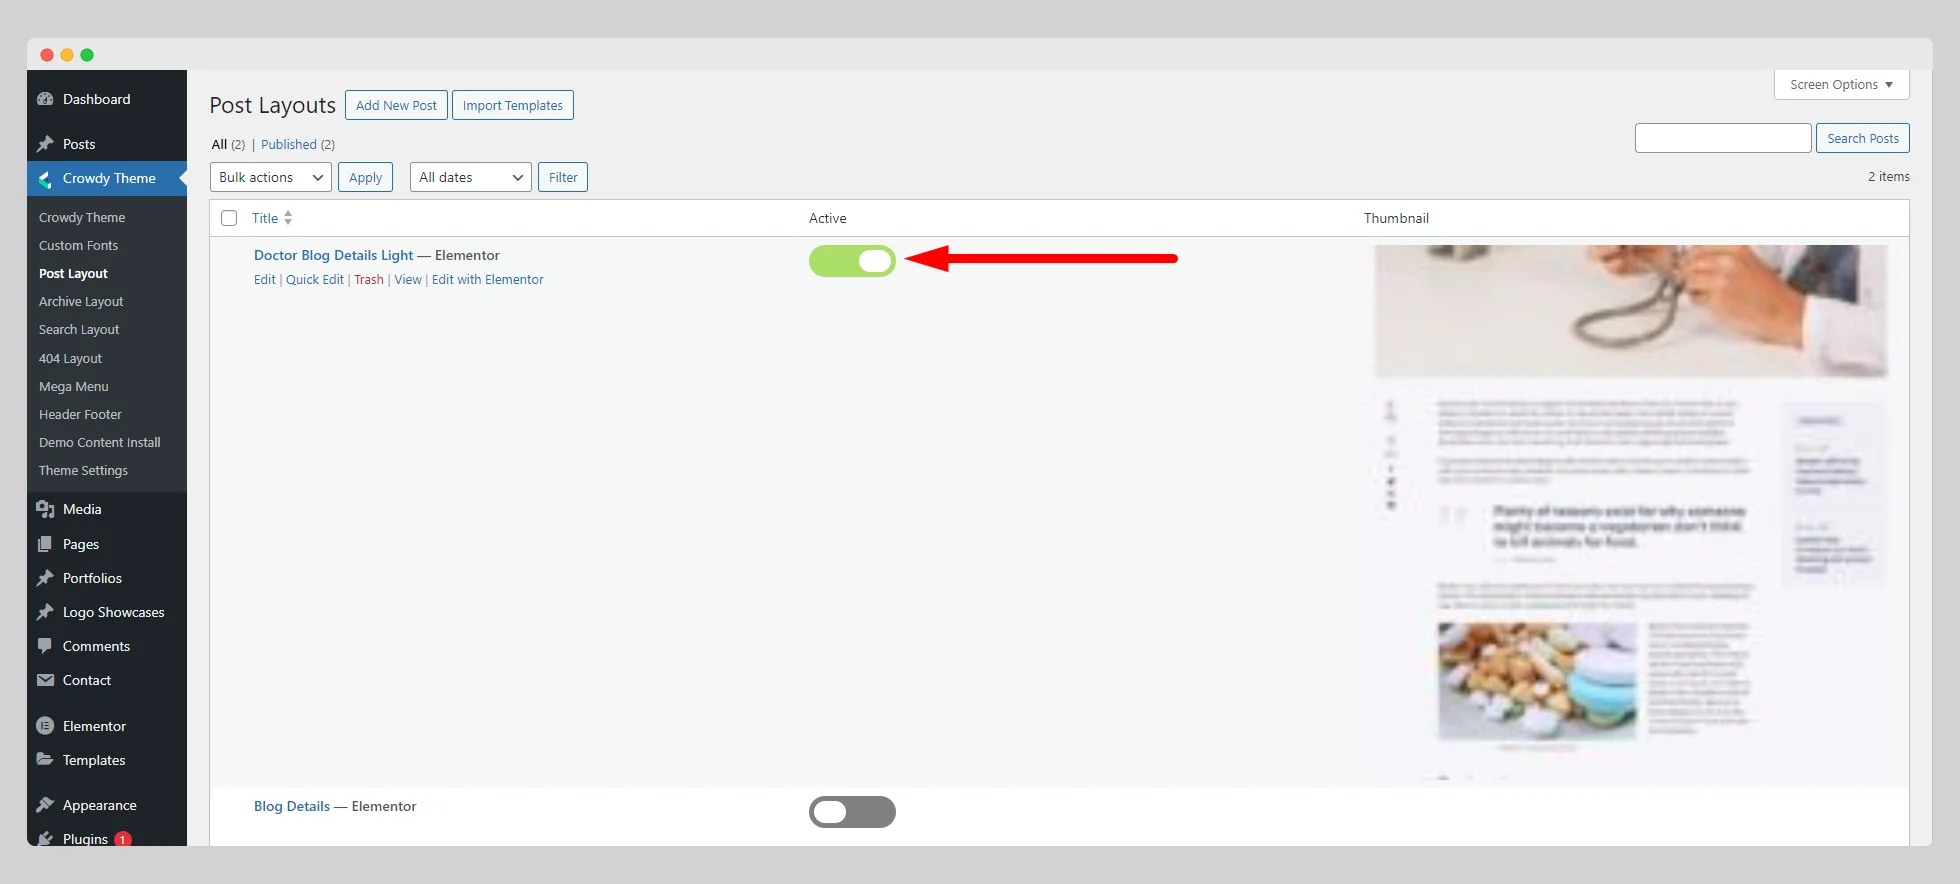
Hit the “Insert” button and then the “Import” button. Once you import it, you have another task to do. This time, you need to click the “Activate” option to get your favorite post layout at your fingertips.


After importing and activating the template layout successfully, you can see it in the “Post Layouts” page as activated. The layout of all posts on your website will replicate it.
Step-7:
In case you want to personalize the design, you can press the “Edit with Elementor” button located under the name of the template. Include the requisite components to make the posts stunning.
