As we mentioned earlier, there is a “Settings” option below the page. You need to click on the option to explore and set up the page. Let’s delve into each option in detail:
General:
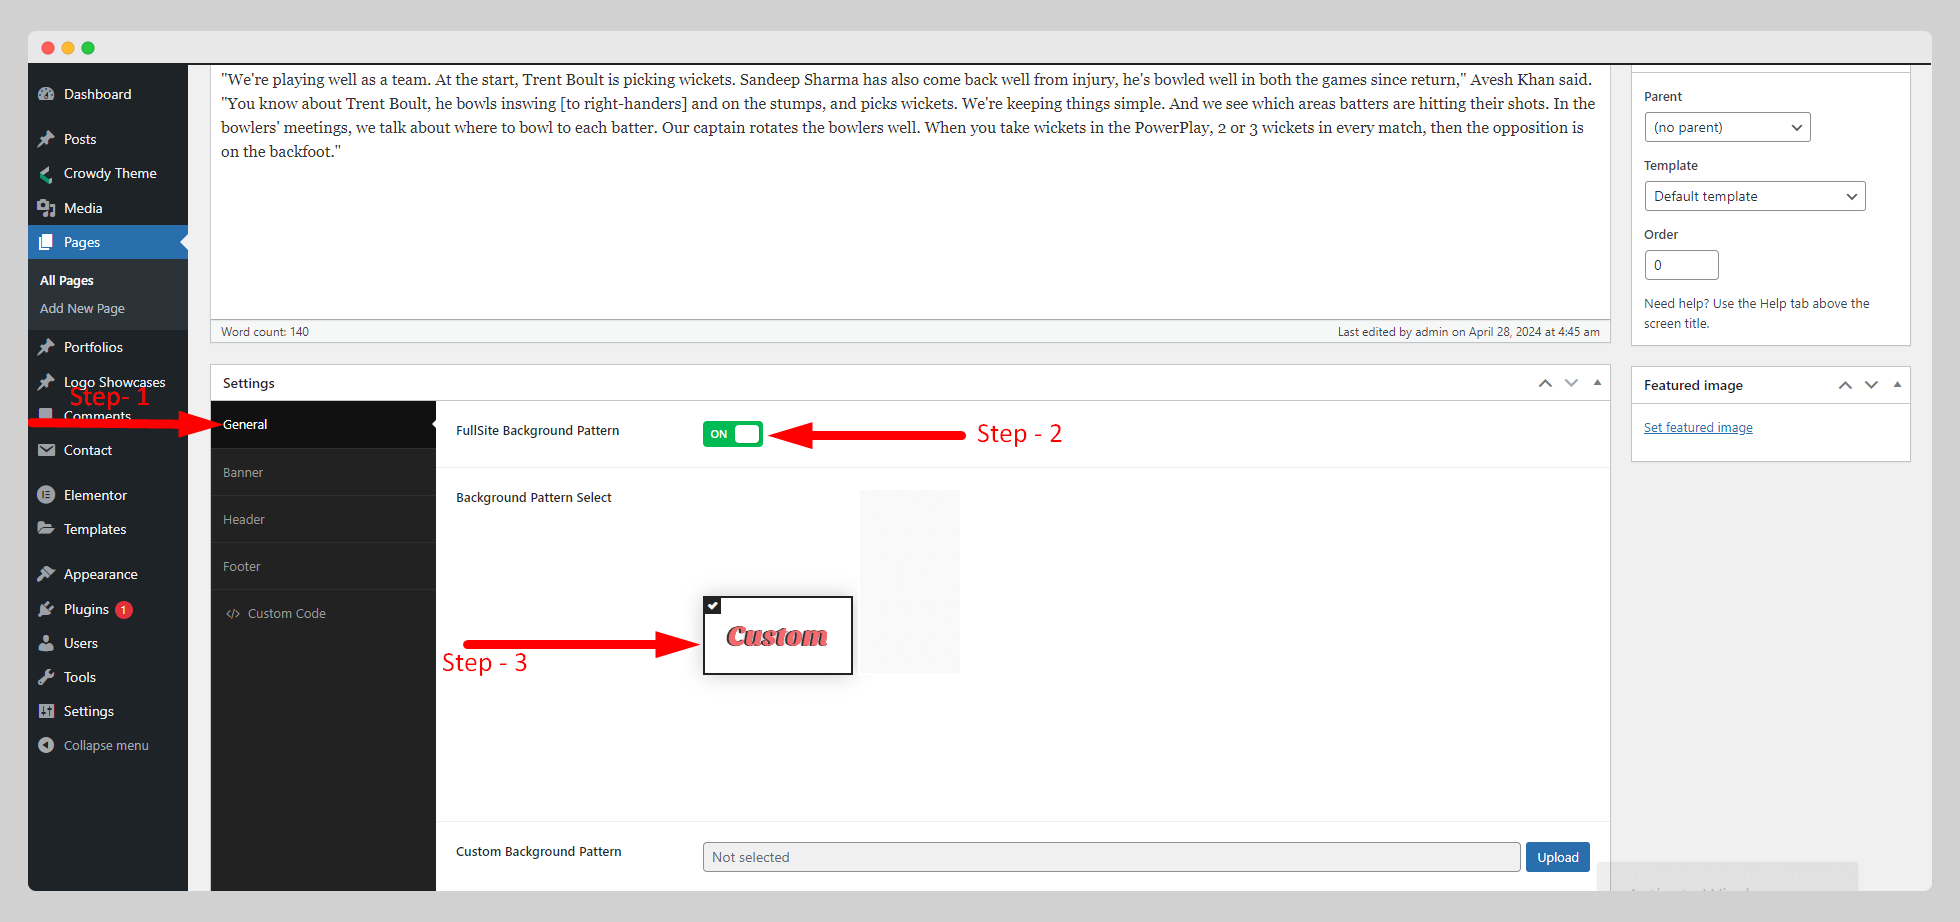
It’s the first option you will discover as soon as you click “Settings.” If you want to have a background pattern across your website, you can keep the “FullSite Background Pattern” button on. Then you need to select a background pattern.
Banner:
Here you can add a page banner and background image, adjusting all the necessary properties. You can fix the content container size, blog content padding, and admin topbar margin in the respective fields.
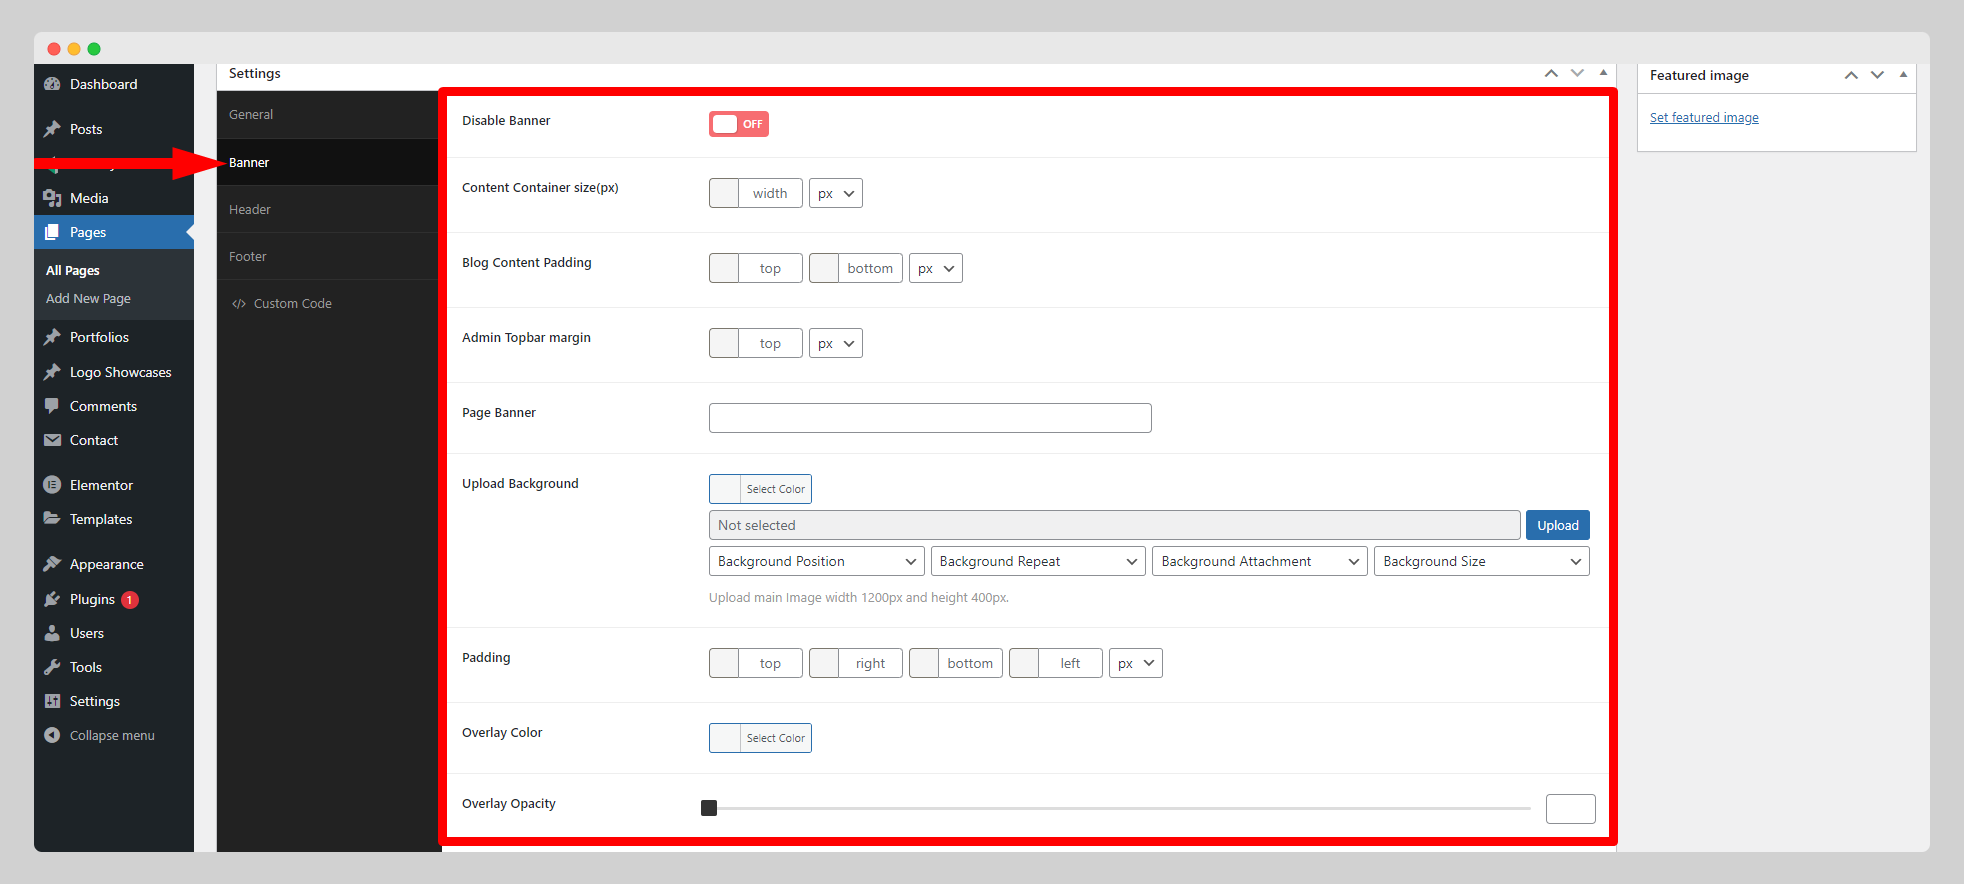
Moreover, you can adjust the overlay color, overlay opacity, page title color, and page breadcrumb color of the banner with much attention. But if you want to disable the banner, adjusting the content container size, blog content padding, and admin topbar margin is enough.
Header:
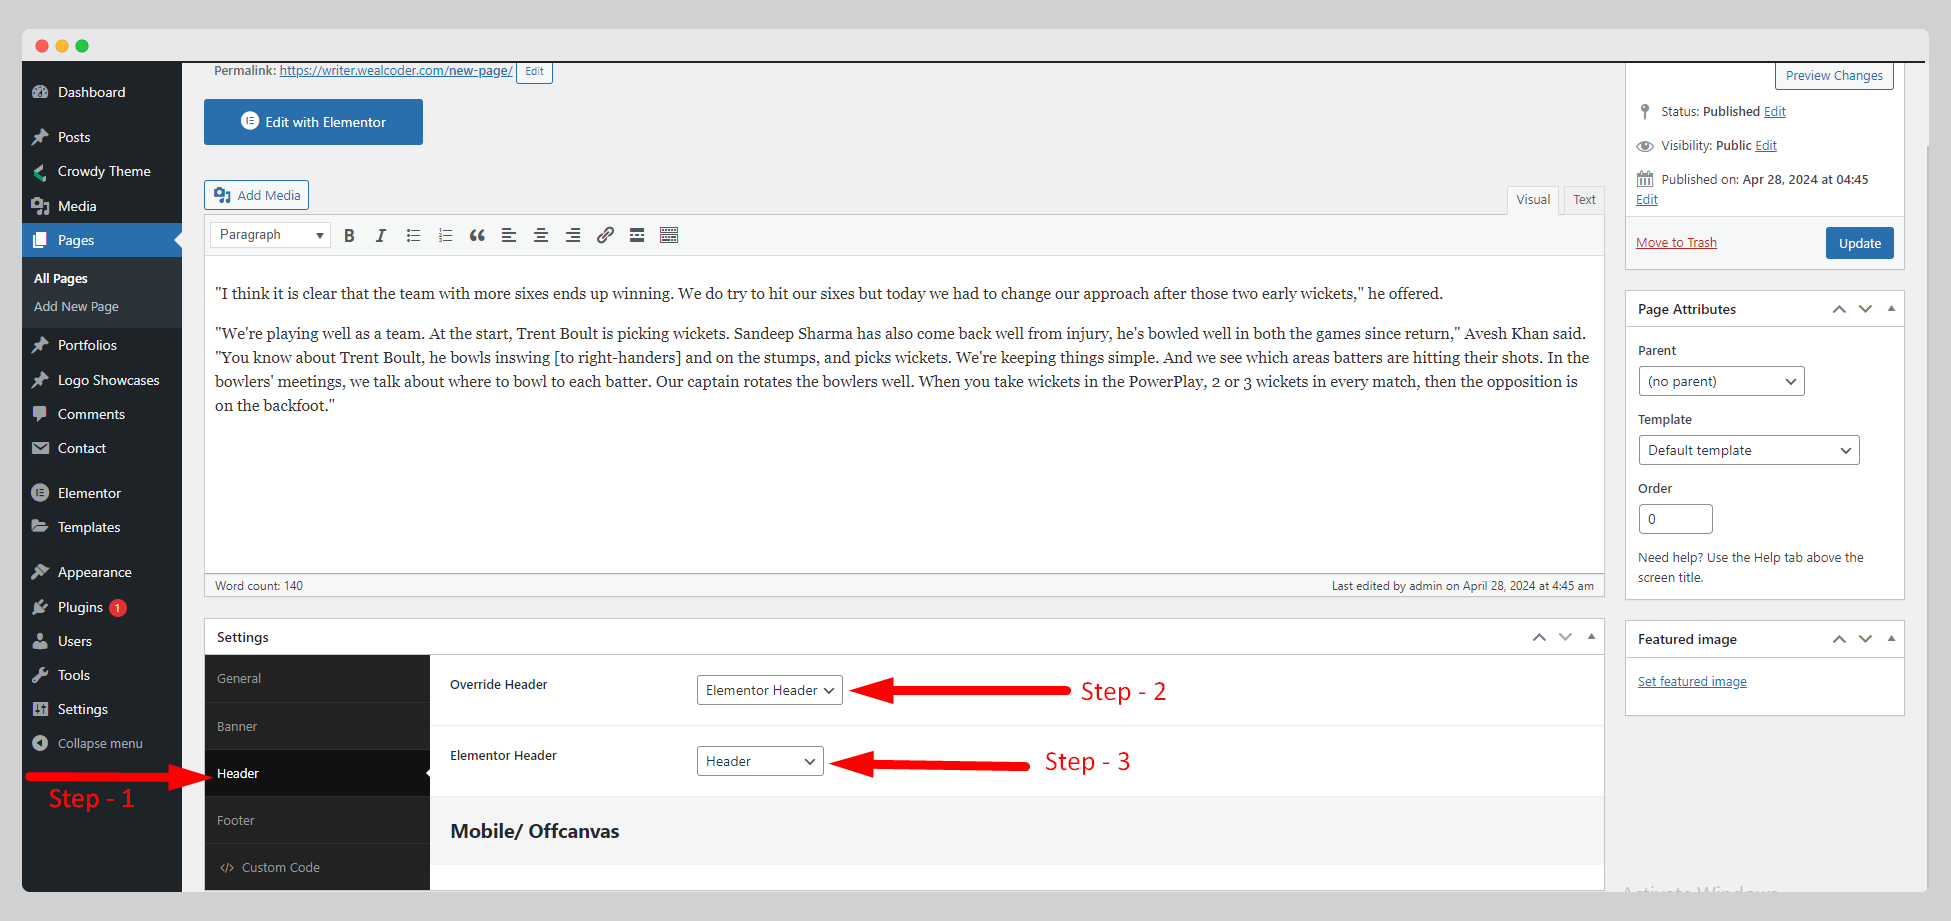
This option lets you set up the page override header in two ways: “Theme Header” and “Elementor Header.” If you choose the “Theme Header” then you have to adjust the header style, menu background, menu color, mobile/offcanvas, and many more parameteres.
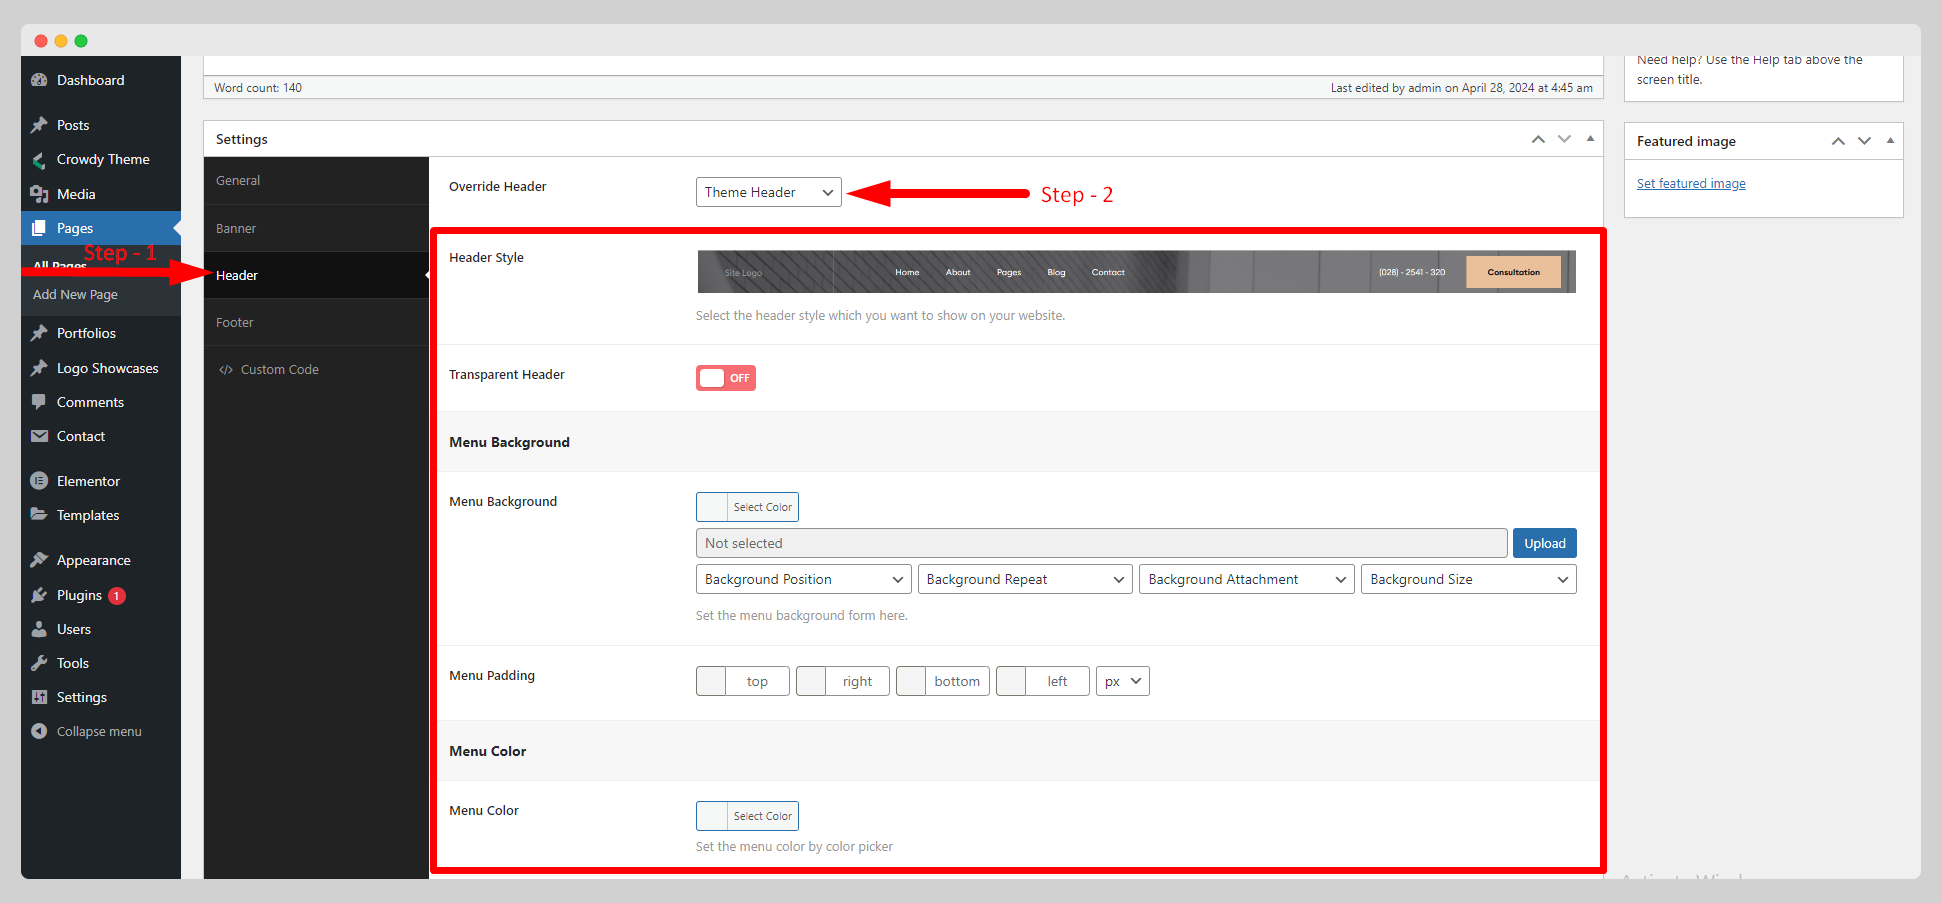
But if you choose the “Elementor Header”, then you need to select the pre-built Elementor header from the drop-down list, located next to the “Elementor Header” option.
Footer:
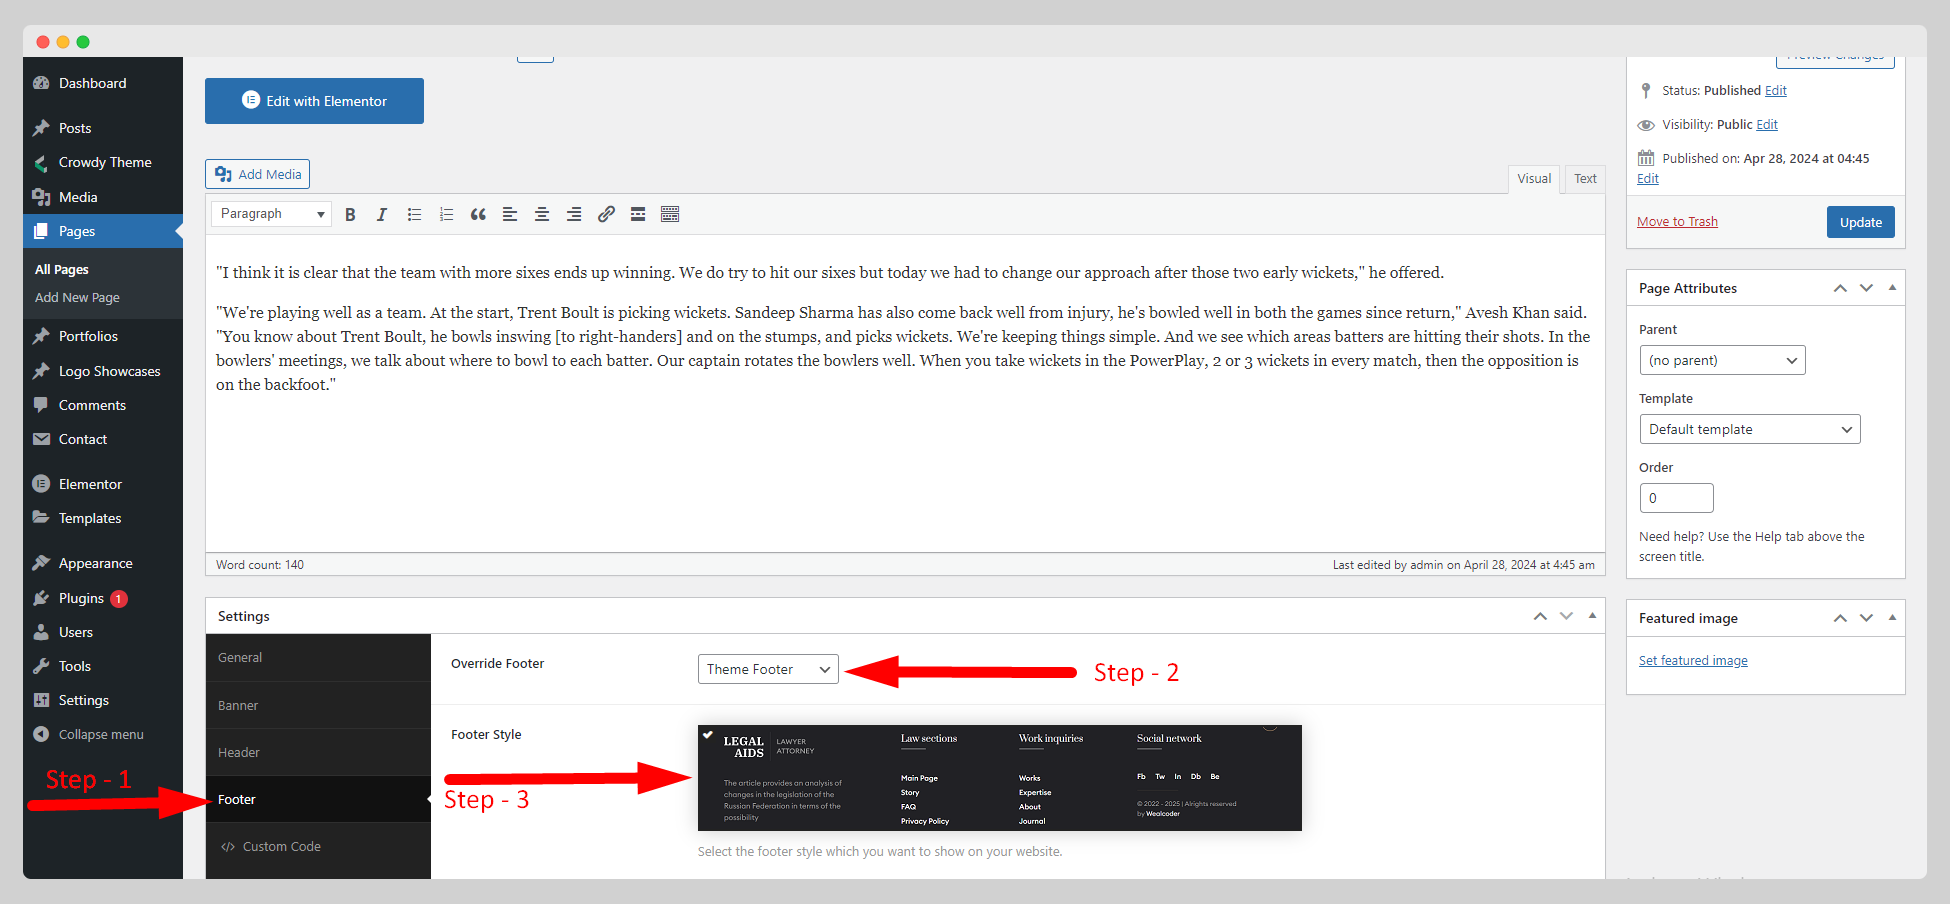
This option also enables you to use either the “Theme Footer” or the “Elementor Footer.” For any option you choose, make some adjustments to the settings to enhance the excellence and elegance of the page.
Custom Code:
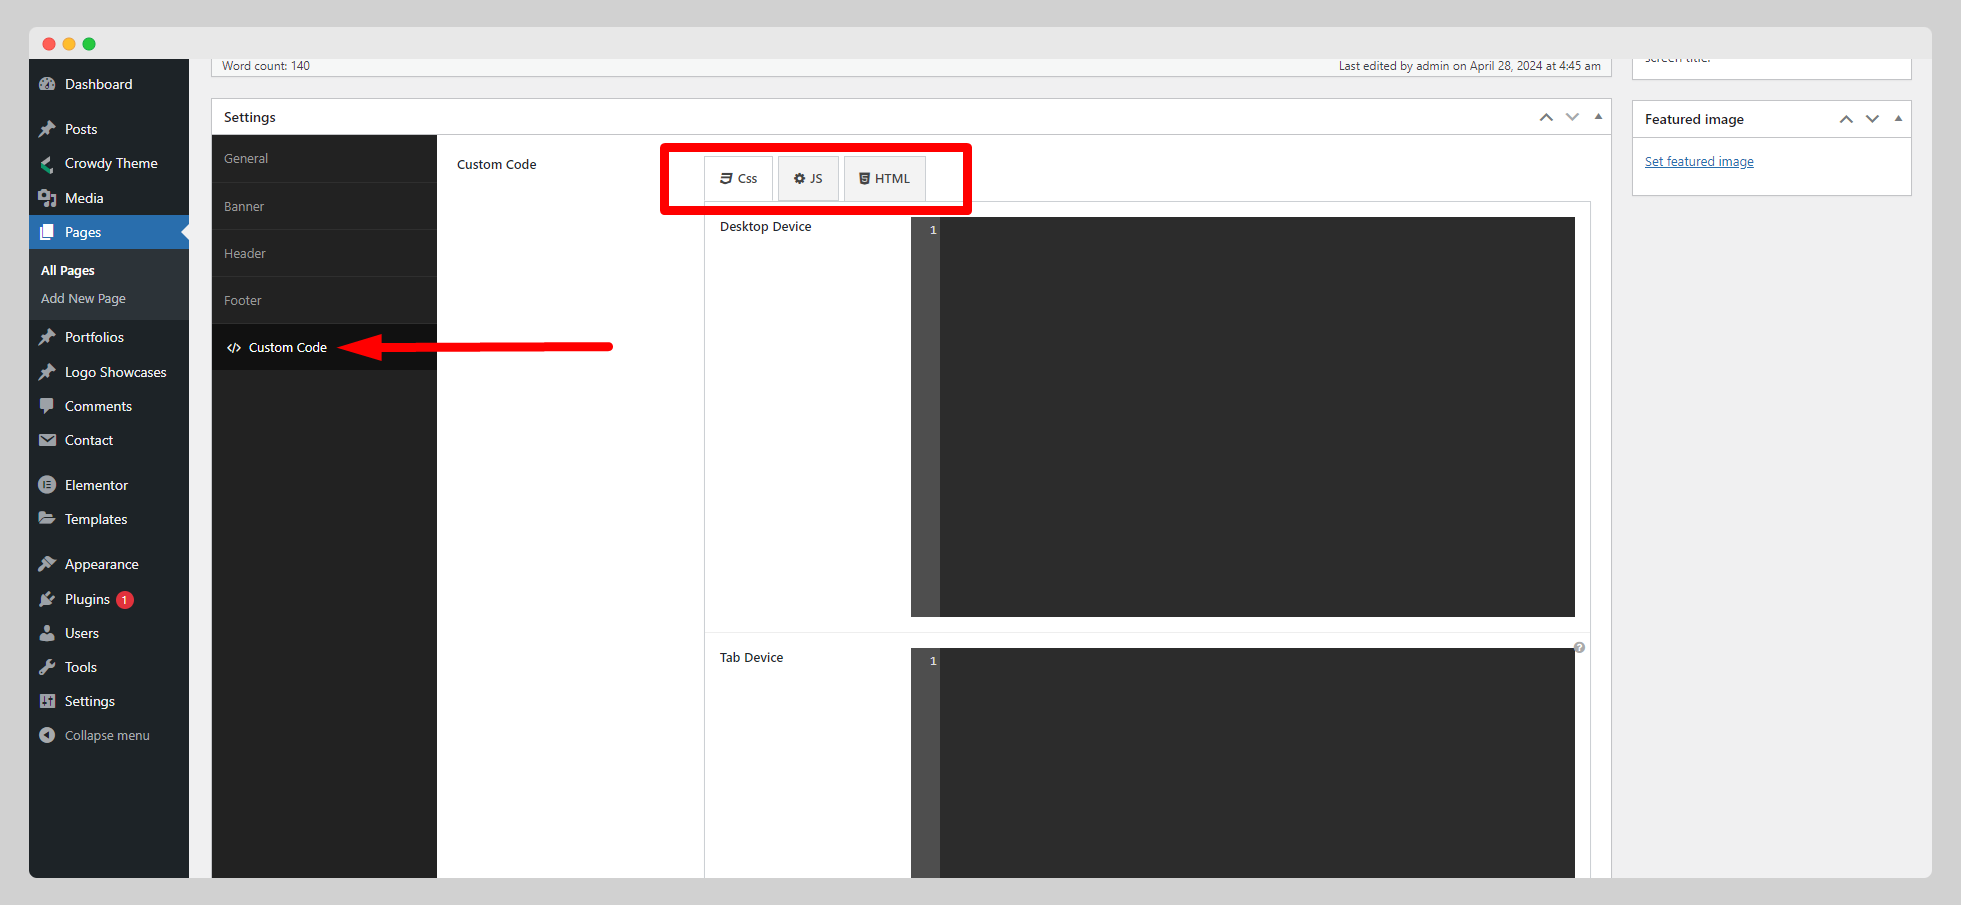
If you want to make a modification in the HTML, CSS, or JavaScript code snippets, you can utilize this option.
