A functional and responsive menu is an integral part of a website. You can create a menu like a breeze by sticking to the below steps:
Step-1:
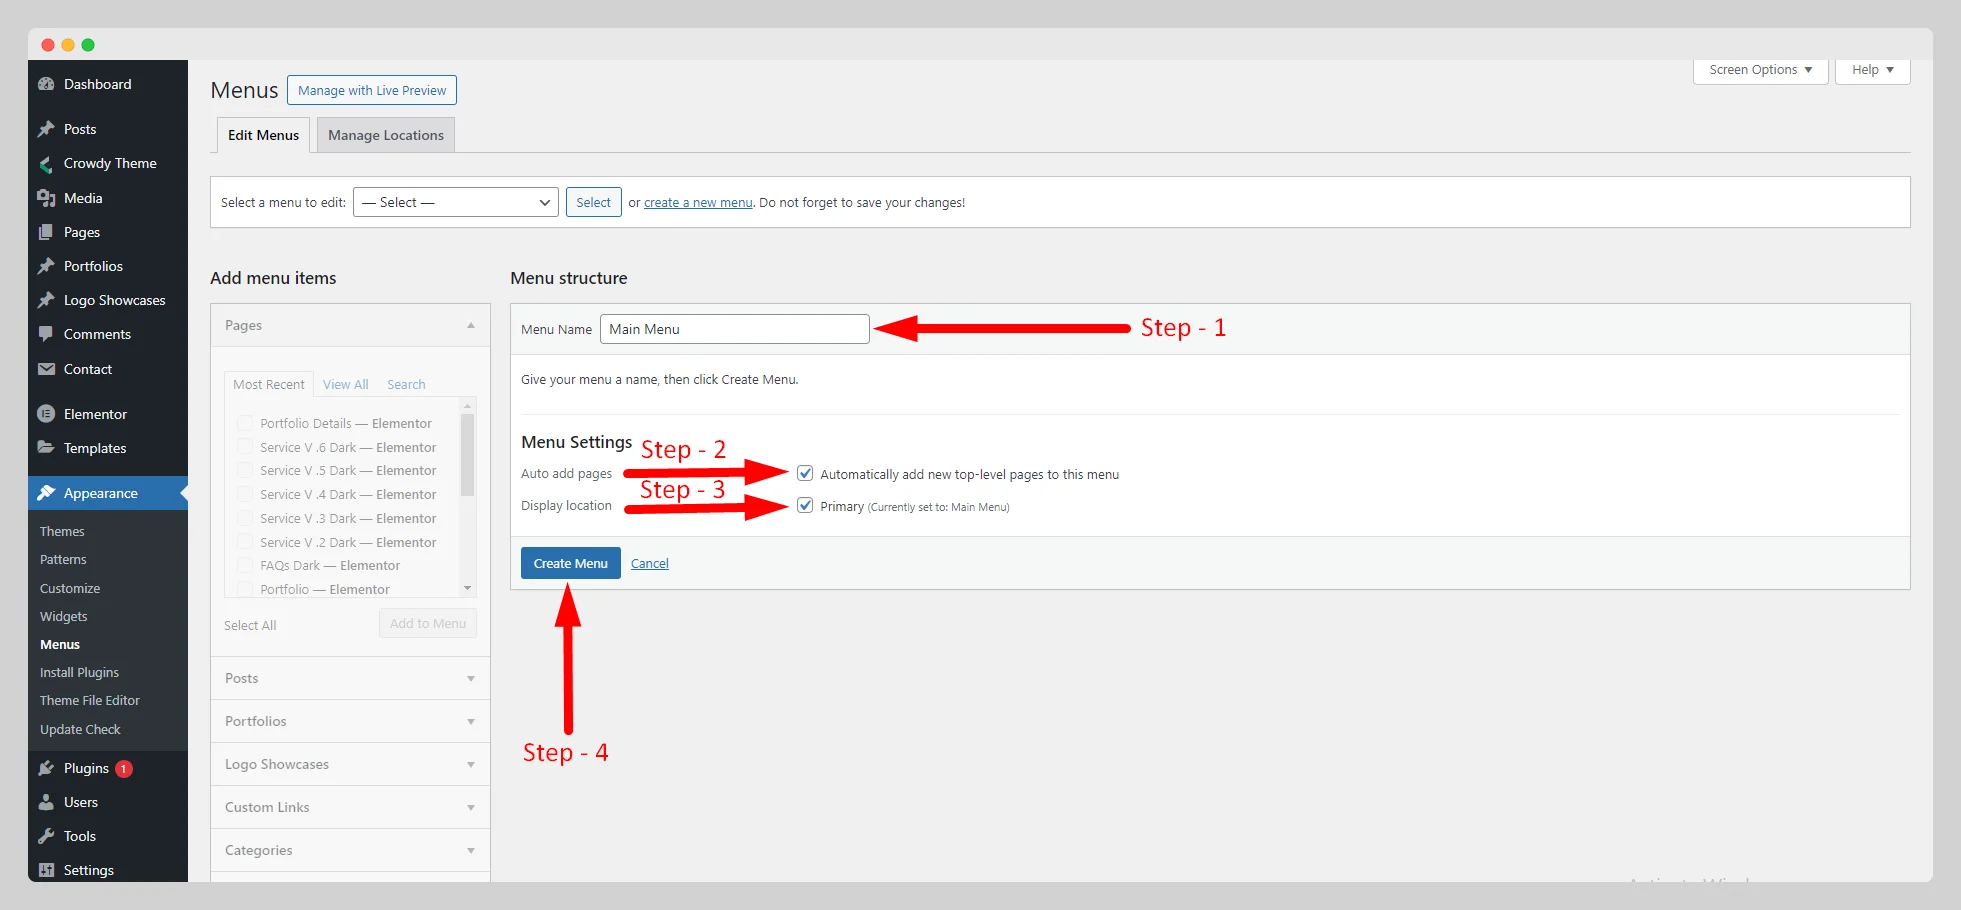
From the dashboard, you first need to go to Appearance>Menus. Then click on the “create a new menu”.

Step-2:
Once you click on “create a new menu,” you will be taken to a new page. Set a name for the menu in the “Menu Name” field. Tick the “Auto add pages” option if you need it and select the “Display location“ as “Primary” under the “Menu Settings” option. Then press the “Create Menu” button.
Step-3:
Select the requisite pages from the “Pages” option, located under “Add menu items”. Click on the “Add to Menu” to add them. From the search console, you can search a particular page to include it.

Step-4:
Similarly, select and add the “Posts”, “Portfolios”, “Categories”, “Custom Links”, and other necessary menu items to your main menu.

Step-5:
Under every menu item, you can add a previously created mega menu. To add the mega menu, click on the arrow sign and enable the “Mega Menu” button. Then click on the “Add New” option and choose your menu to get your job done.

Step-6:
Once you finish adding the items and configuring the settings, you’re ready to make your menu public. Just press the “Save Menu” button.

Note: If you need to know how to create a mega menu, click on “Create a Mega Menu” and read the documentation.