Follow the below documentation to set up the WCF Cursor:
Step – 1:
Click on the “Edit with Elementor” button on a particular page or post.
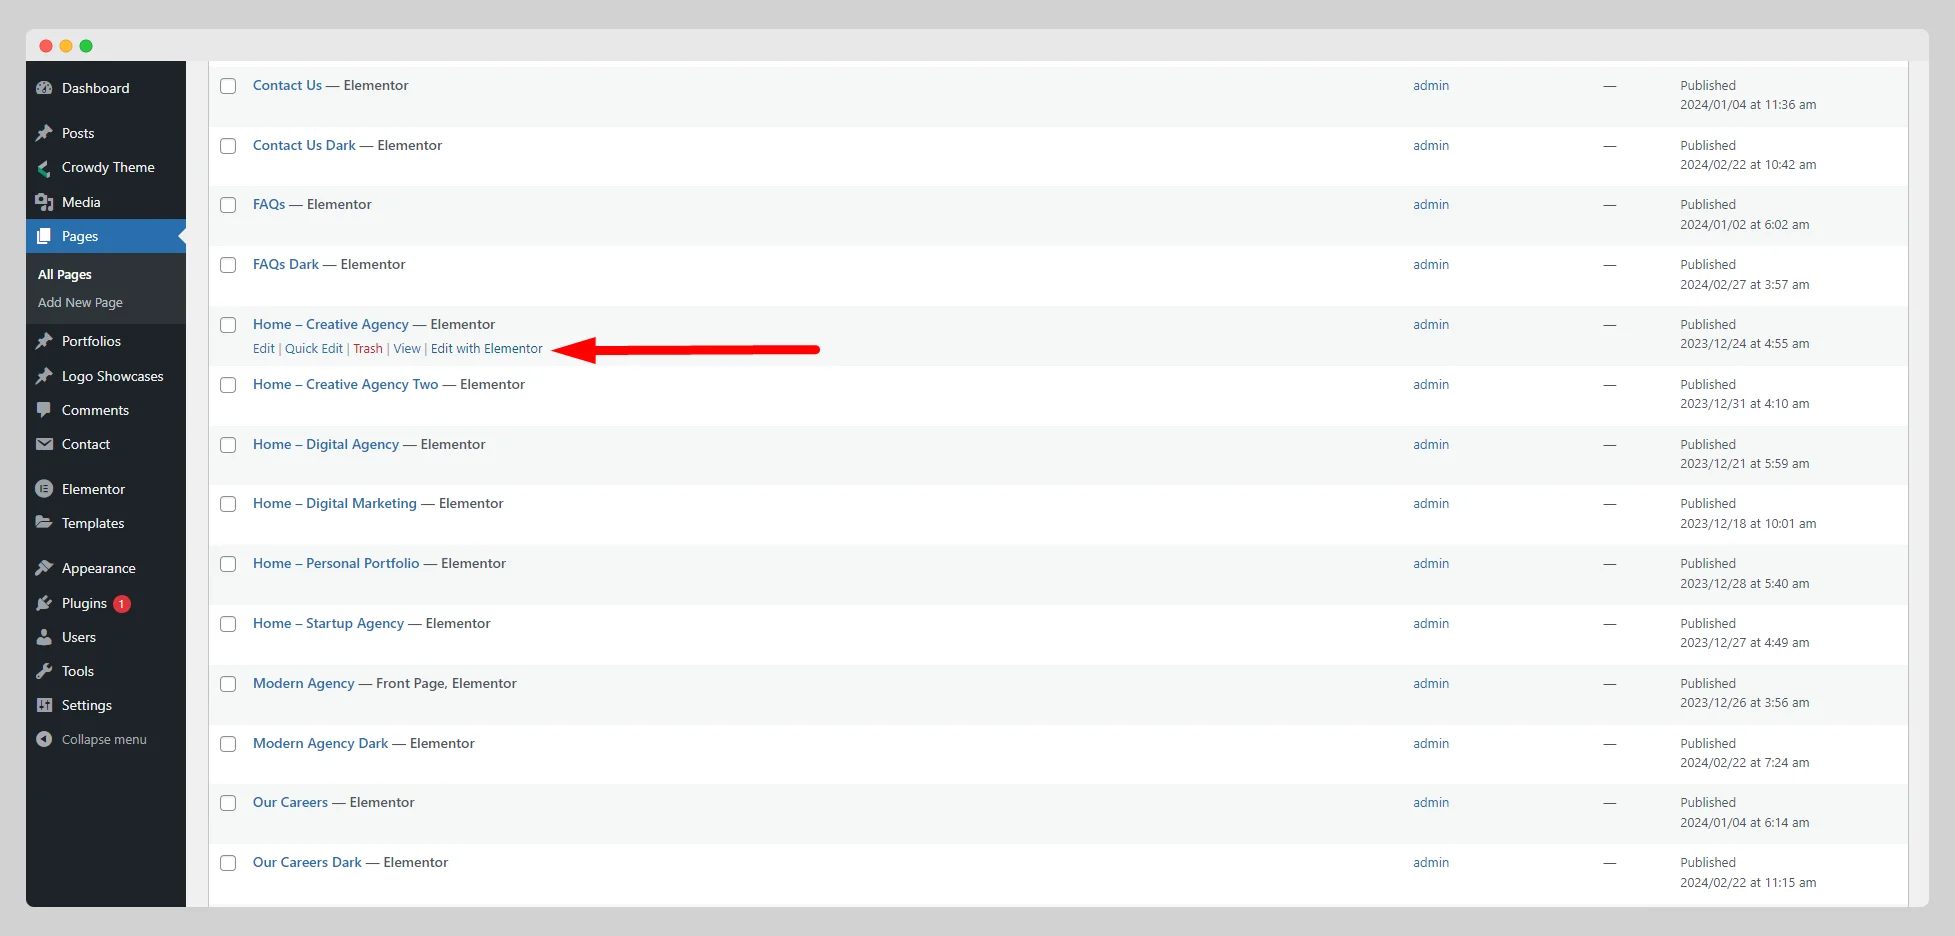
Step – 2:
On the top-left corner of the Elementor panel, click on the hamburger menu. Then press “Site Settings.”


Step – 3:
Look for the “WCF Cursor” and tap on it on the new pop-up page.

Step – 4:
Now enable the “Cursor” button to make the cursor appear. Adjust the cursor size and cursor follower size in the respective fields. Set the cursor color and cursor follower color from the color pickers located next to the “Cursor Color” and “Cursor Follower Color” options.

Step – 5:
From the drop-down menu next to the “Blend Mode” option, choose a particular blend mode from Normal, Multiply, Screen, Overlay, Darken, Lighten, Color Dodge, Saturation, Difference, Hue, and so on.

Step – 6:
Similarly, choose a specific breakpoint from the “Breakpoint” option at which the cursor will work: mobile portrait, mobile landscape, tablet portrait, tablet landscape, laptop, and widescreen. However, once you complete the basic adjustment, just hit the “Update” button and experience the changes.
