Build any type of header template with a fully drag-and-drop header builder for Elementor. Here’s a comprehensive article to explain every method in detail:
Step – 1:
From the main dashboard, navigate to WCF Addons > Theme Builder.

Step – 2:
In the new pop-up page, click on the “Header” option.

Step – 3:
At the top of the page, then press the “Add New” button.

Step – 4:
Look for the “Template Settings” page with some settings options.
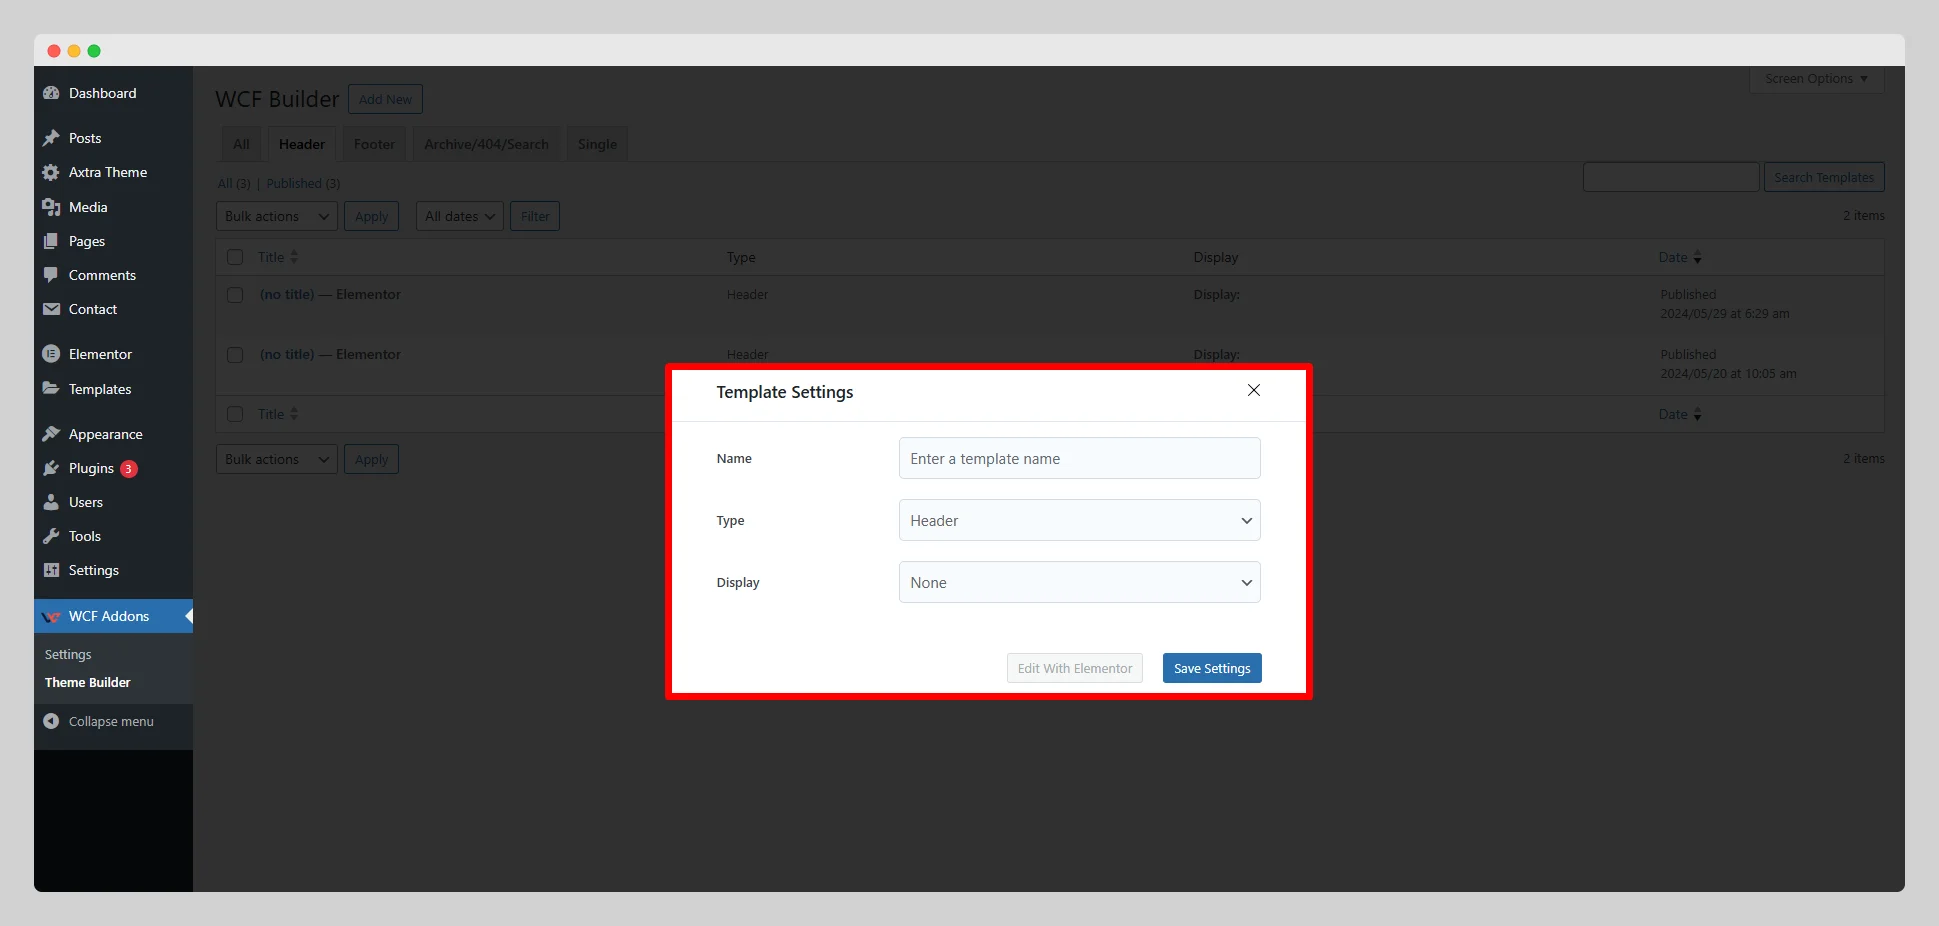
Step – 5:
Write a unique name for the header in the “Name” field. Select “Header” from the “Type” option.

Step – 6:
Click on the drop-down list located next to the “Display” option. Choose a particular type of display for the header from the list.

Step – 7:
Then press the “Save Settings” button. Tap on the “Edit with Elementor” button to customize the look and feel of the header with Elementor.

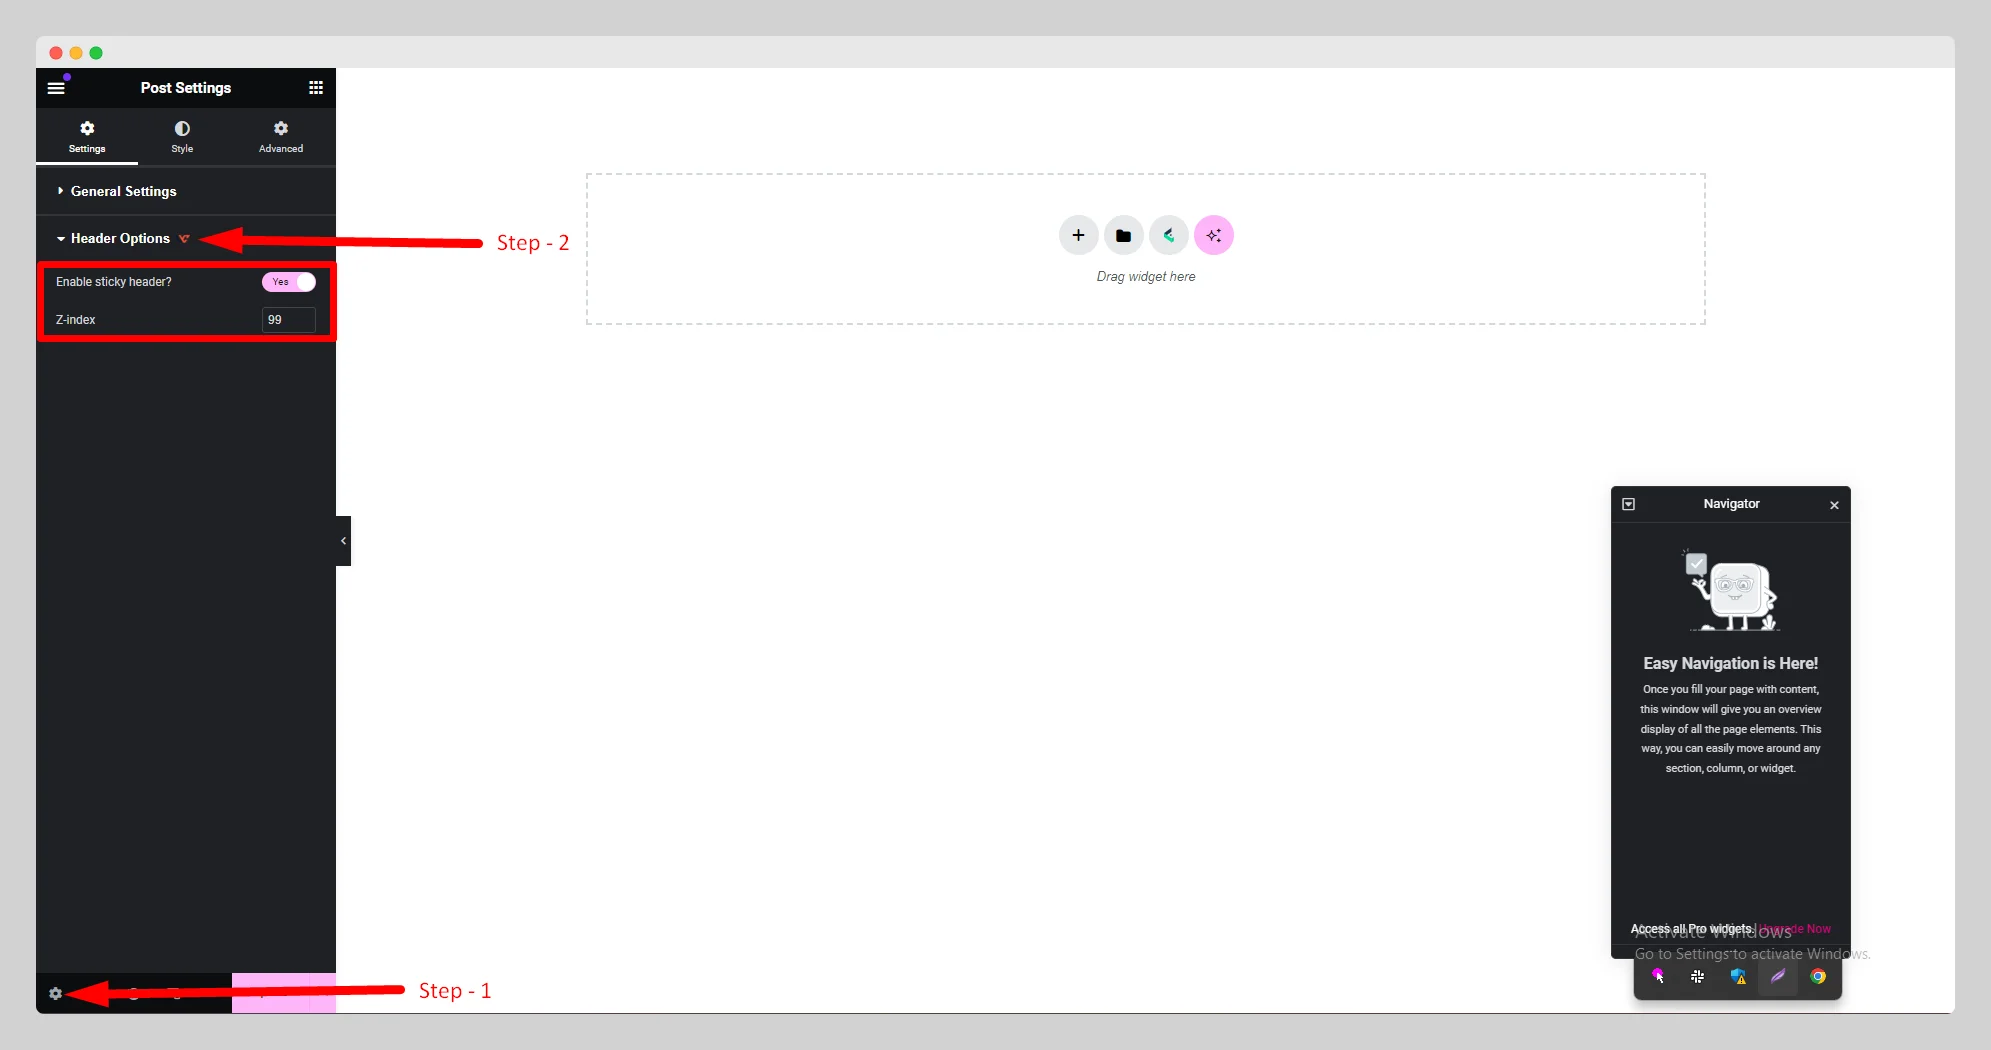
Step- 8:
Once you’re on the Elementor page, simply click on the “Settings” option located in the left-bottom corner of the page. Then click on “Header Options.” Now turn on the “Enable sticky header” button and adjust the z-index. This option is only available in the premium version.