Below are the steps on how to use lottie animations in your web pages with WCF Lottie widget:
Step – 1:
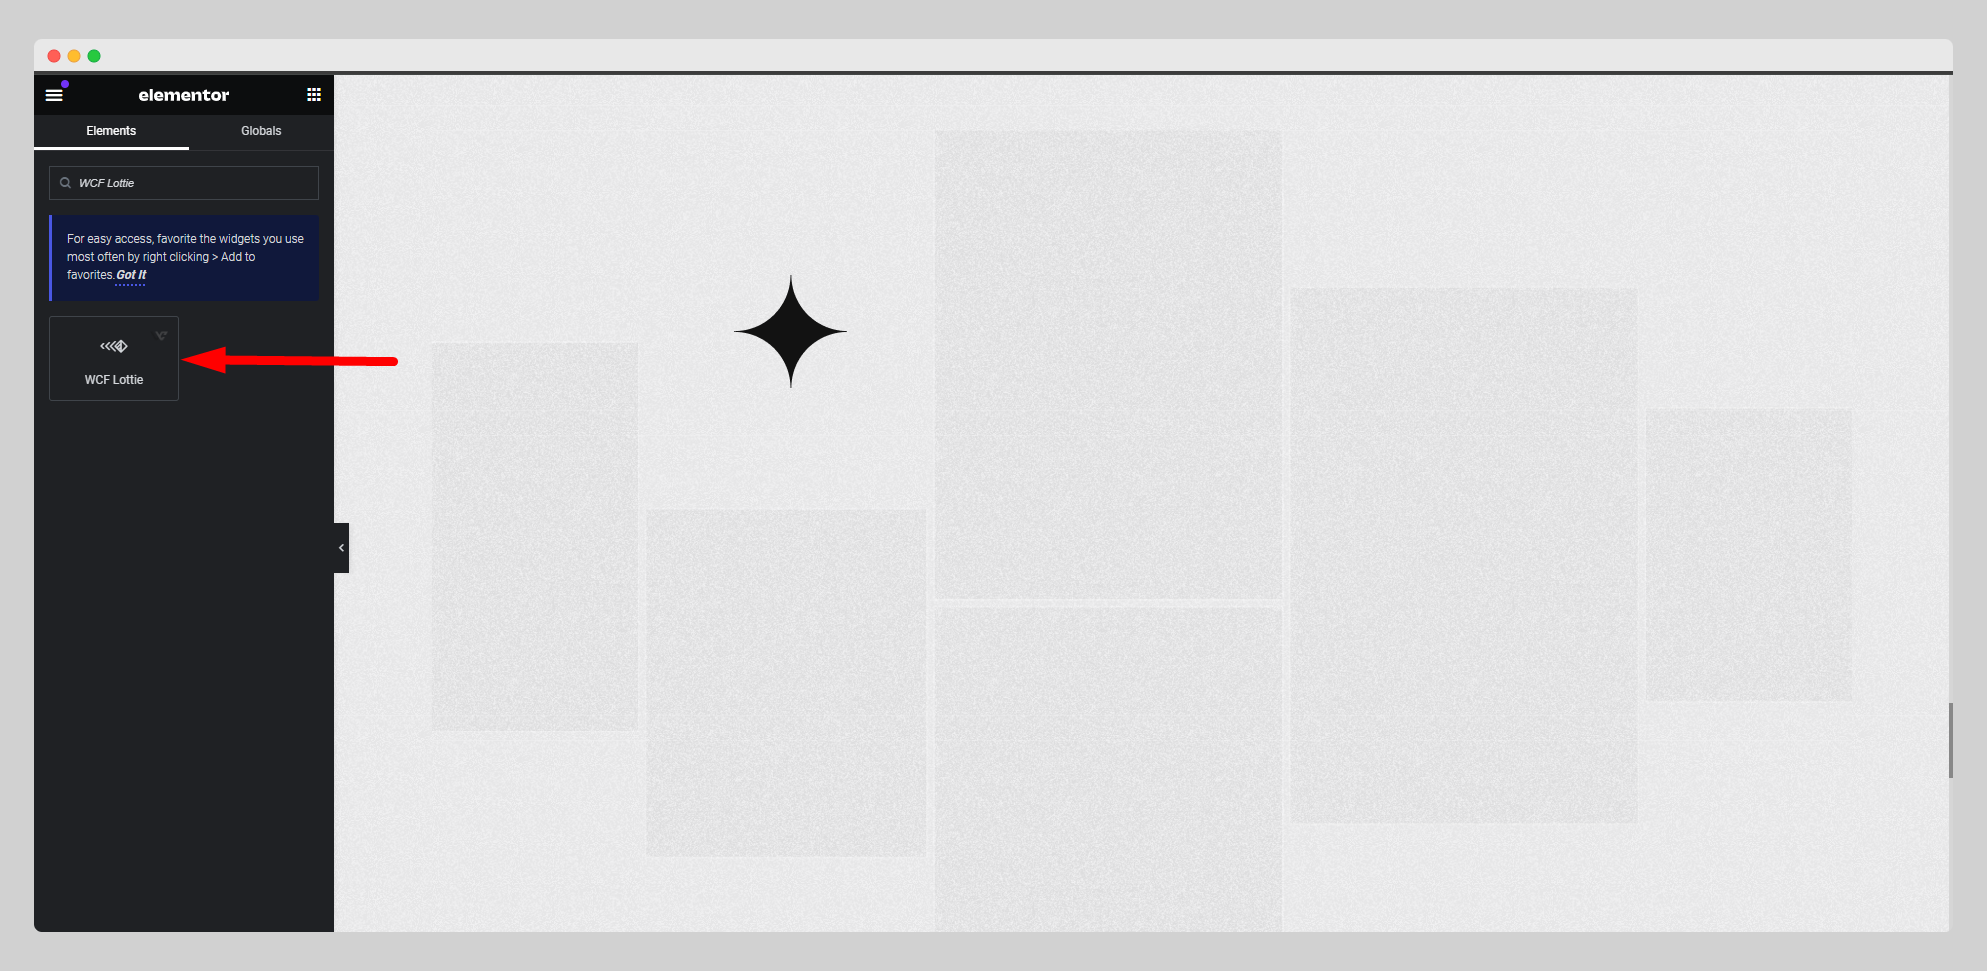
From the Elementor panel, drag the “WCF Lottie” widget to a container on your page.

Step – 2:
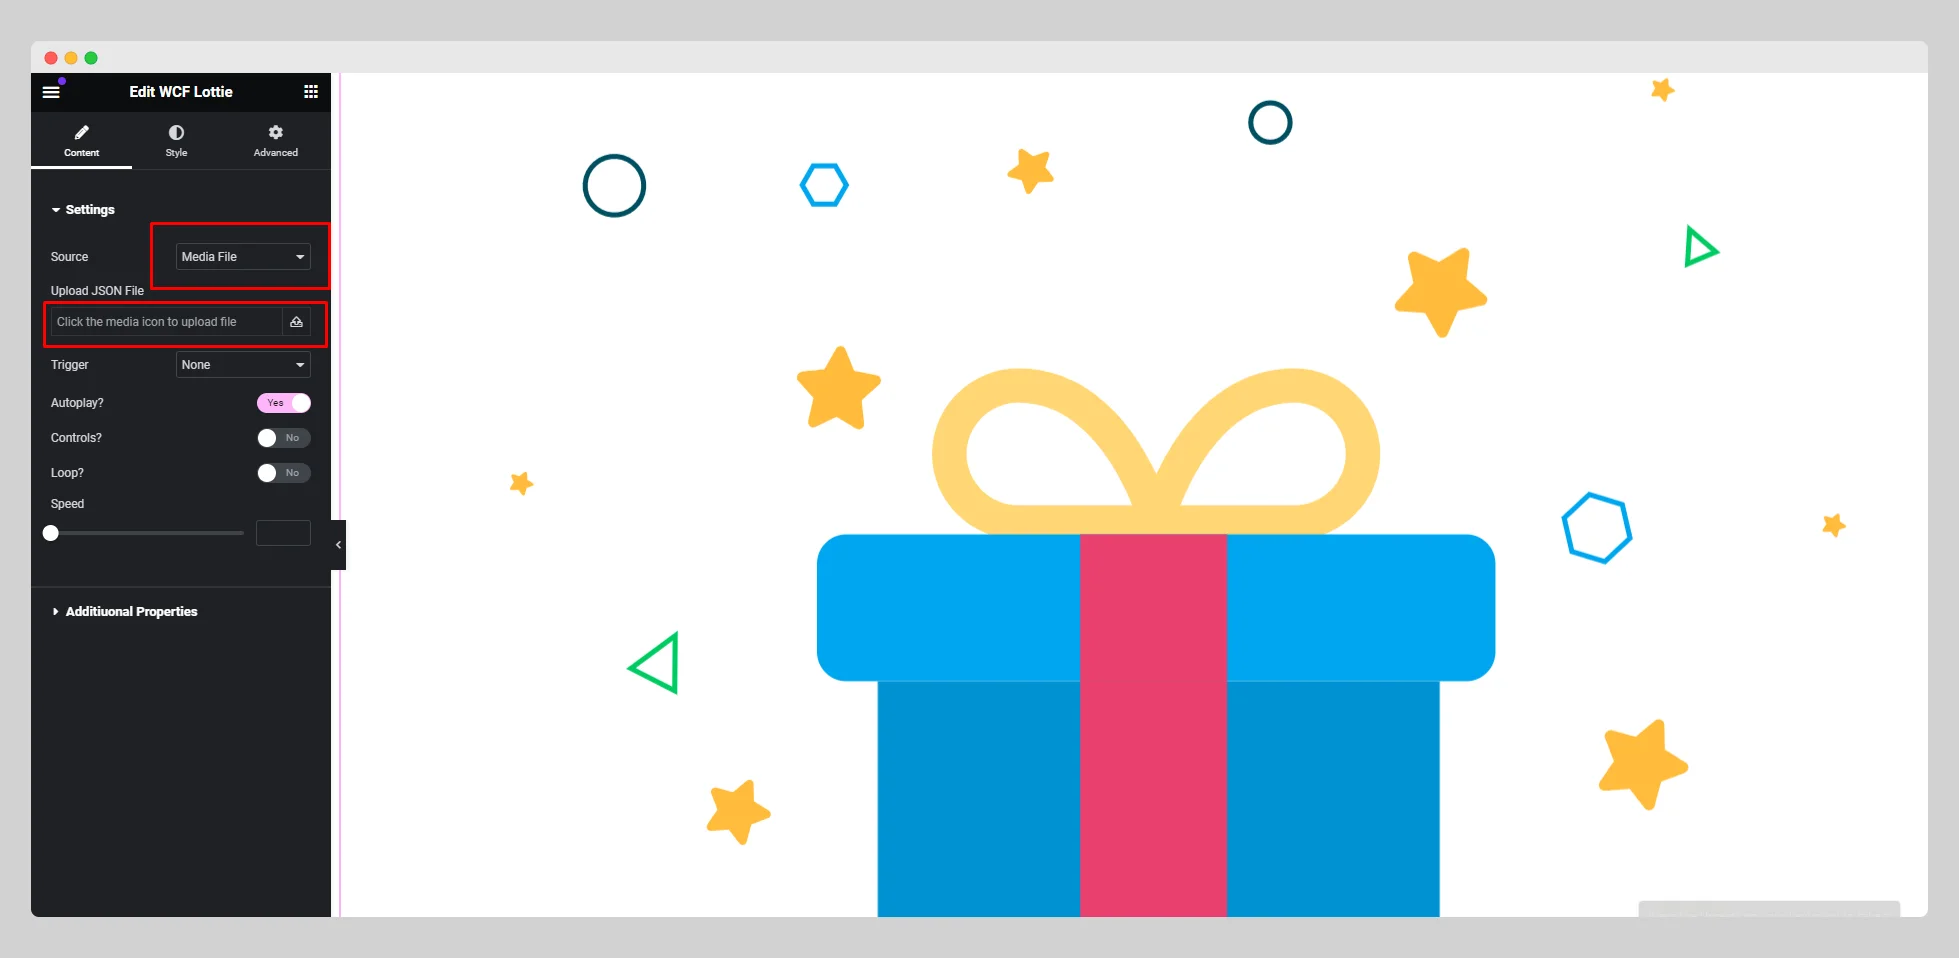
Under the “Settings” option, just click the drop-down menu located next to the “Source” option and choose either Media File or External URL.

Step – 3:
If you choose “Media File,” then upload a JSON media file by pressing the media icon found under the “Upload JSON File” option. Simply enter the lottie URL in the field under the “External URL” option if you select “External URL,“.

It’s worth noting that the lottie media file may not load seamlessly at times. It occurs due to the SSL issue.
Step – 4:
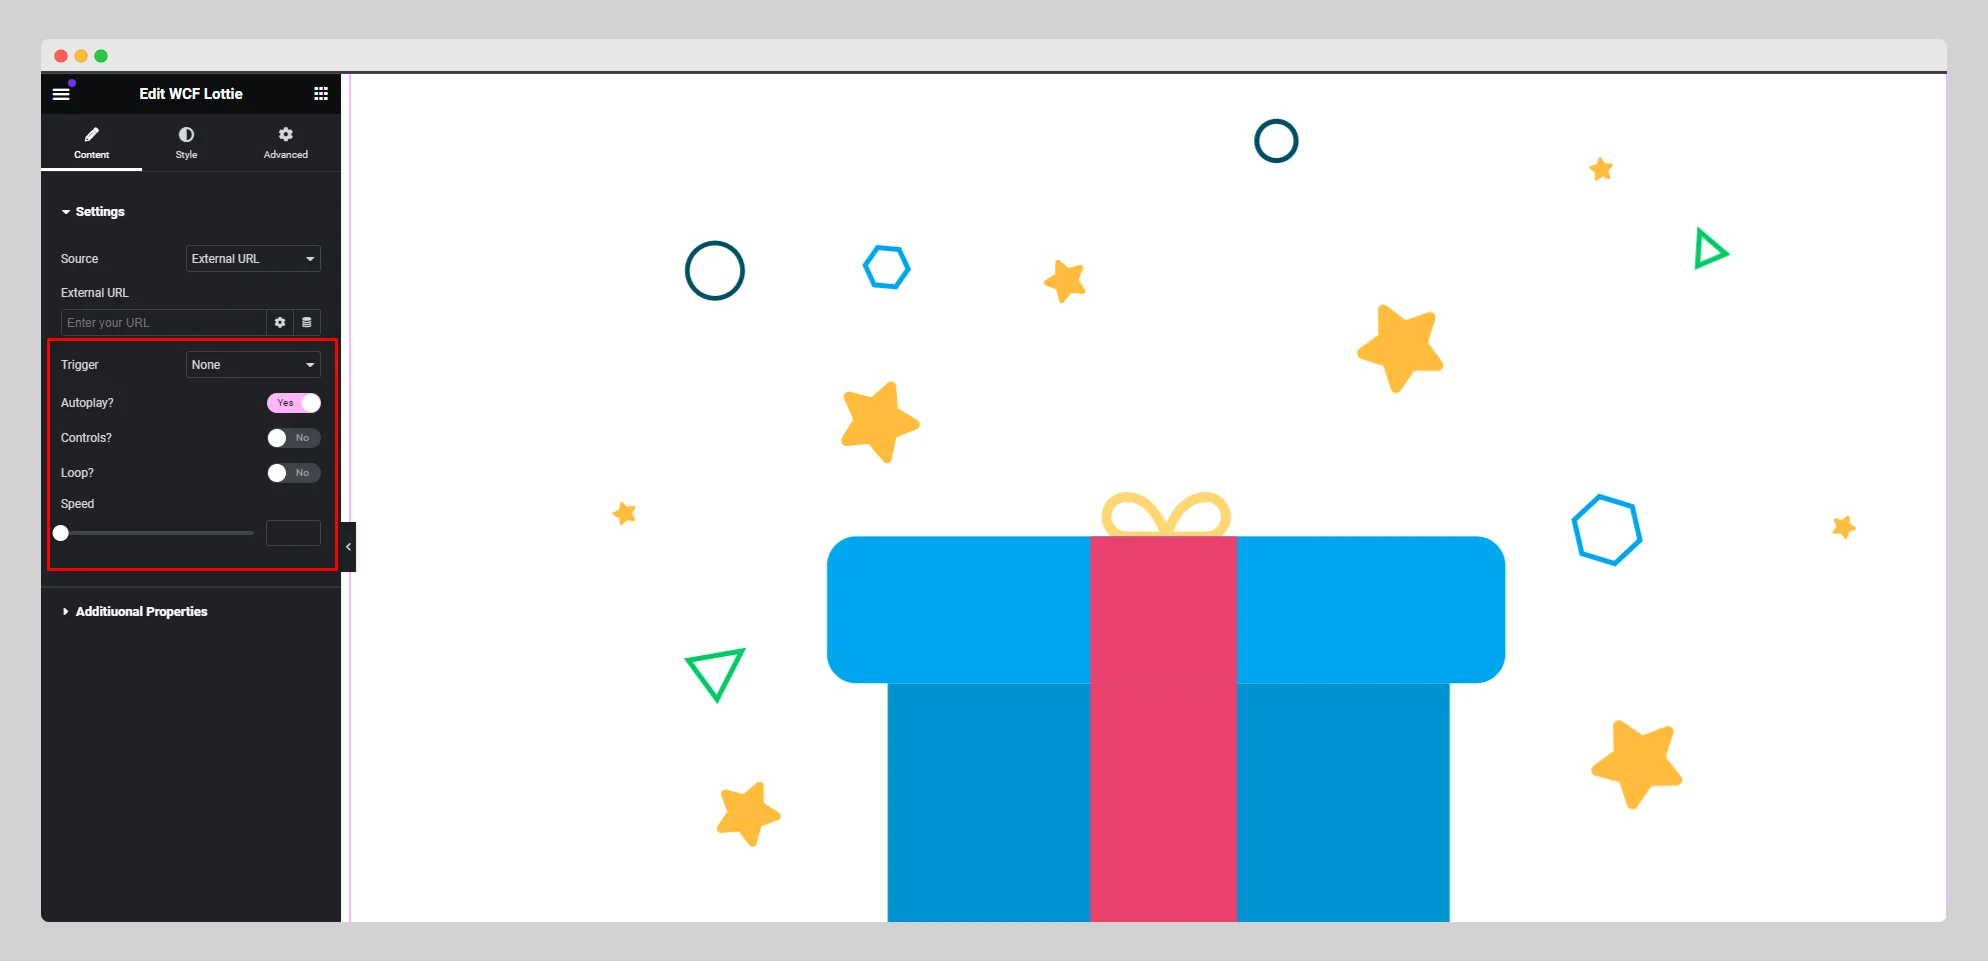
Now move to the “Trigger” option and pick a particular type of trigger. Turn on the “Autoplay.” button when the trigger is set to “None”. Then toggle the “Controls” and “Loop” buttons as per your requirements. Adjust the animation speed as well.

Step – 5:
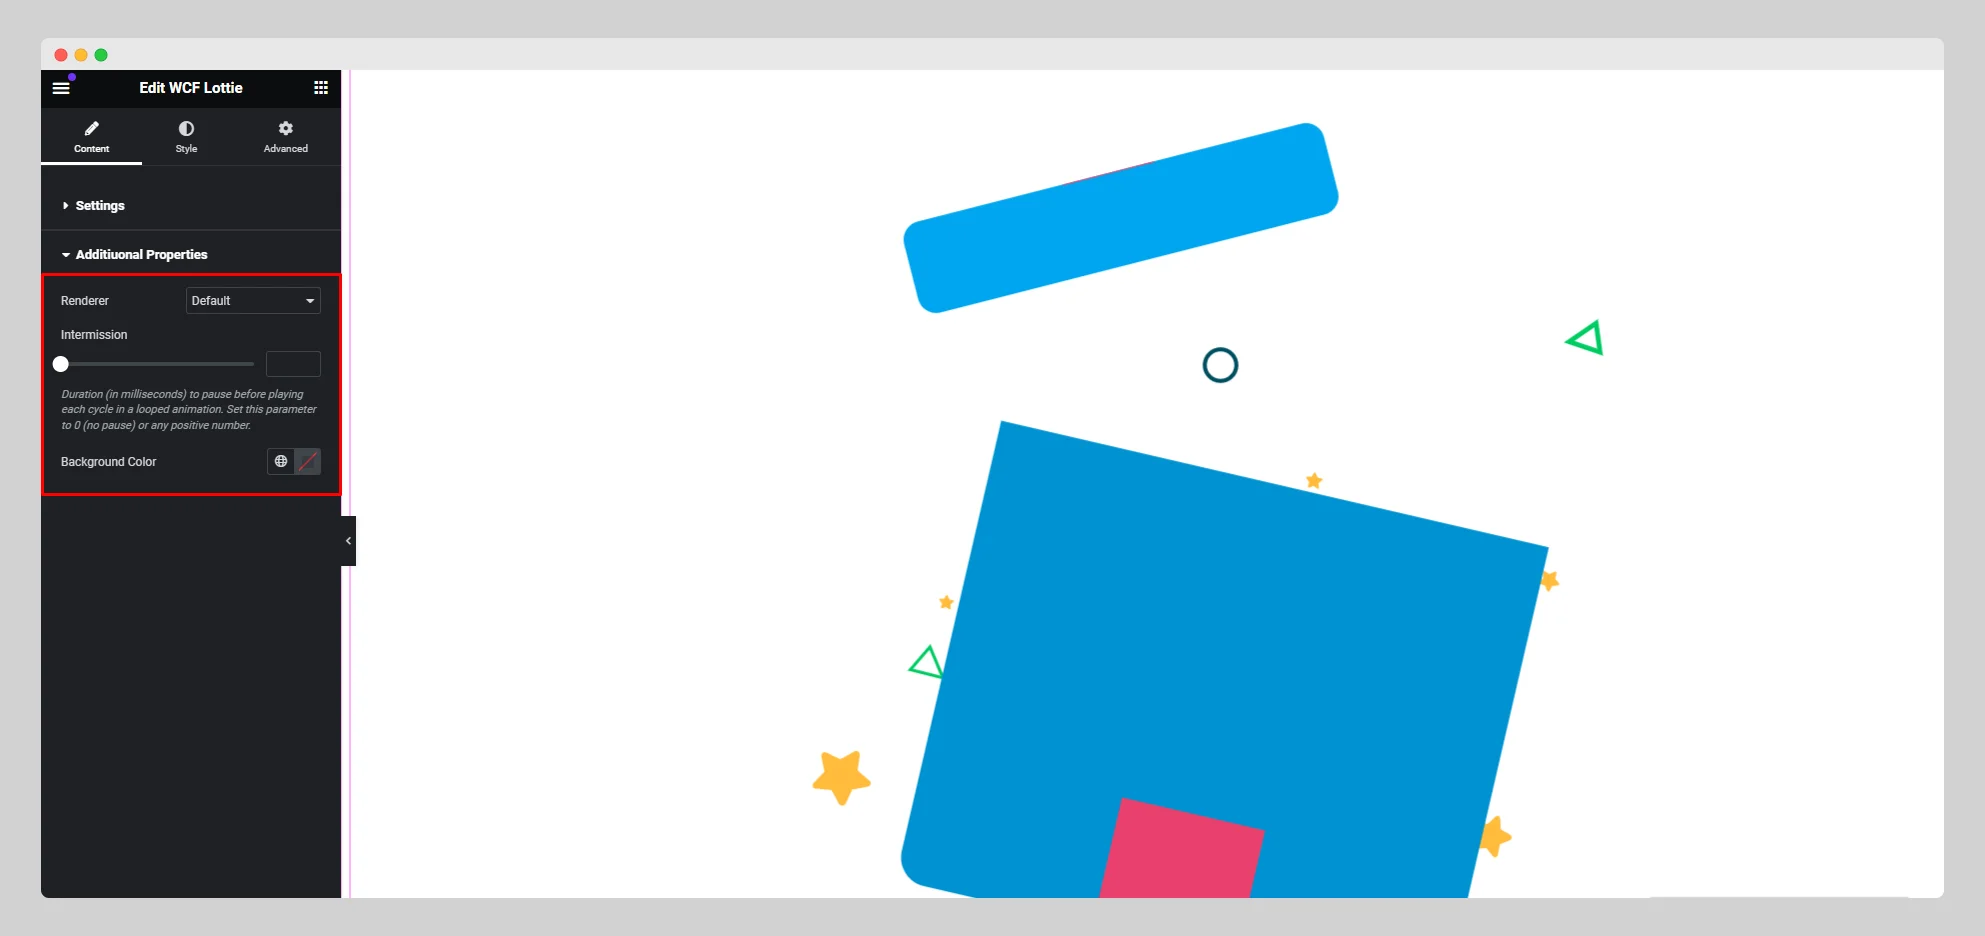
Under the “Additional Properties” option, select a renderer. In the “Intermission” option, set the duration to pause the lottie animation. Set a background color from the “Background Color” option.
