You can follow the below documentation to get an insight into how you can use the WCF Mailchimp widget:
Step-1:
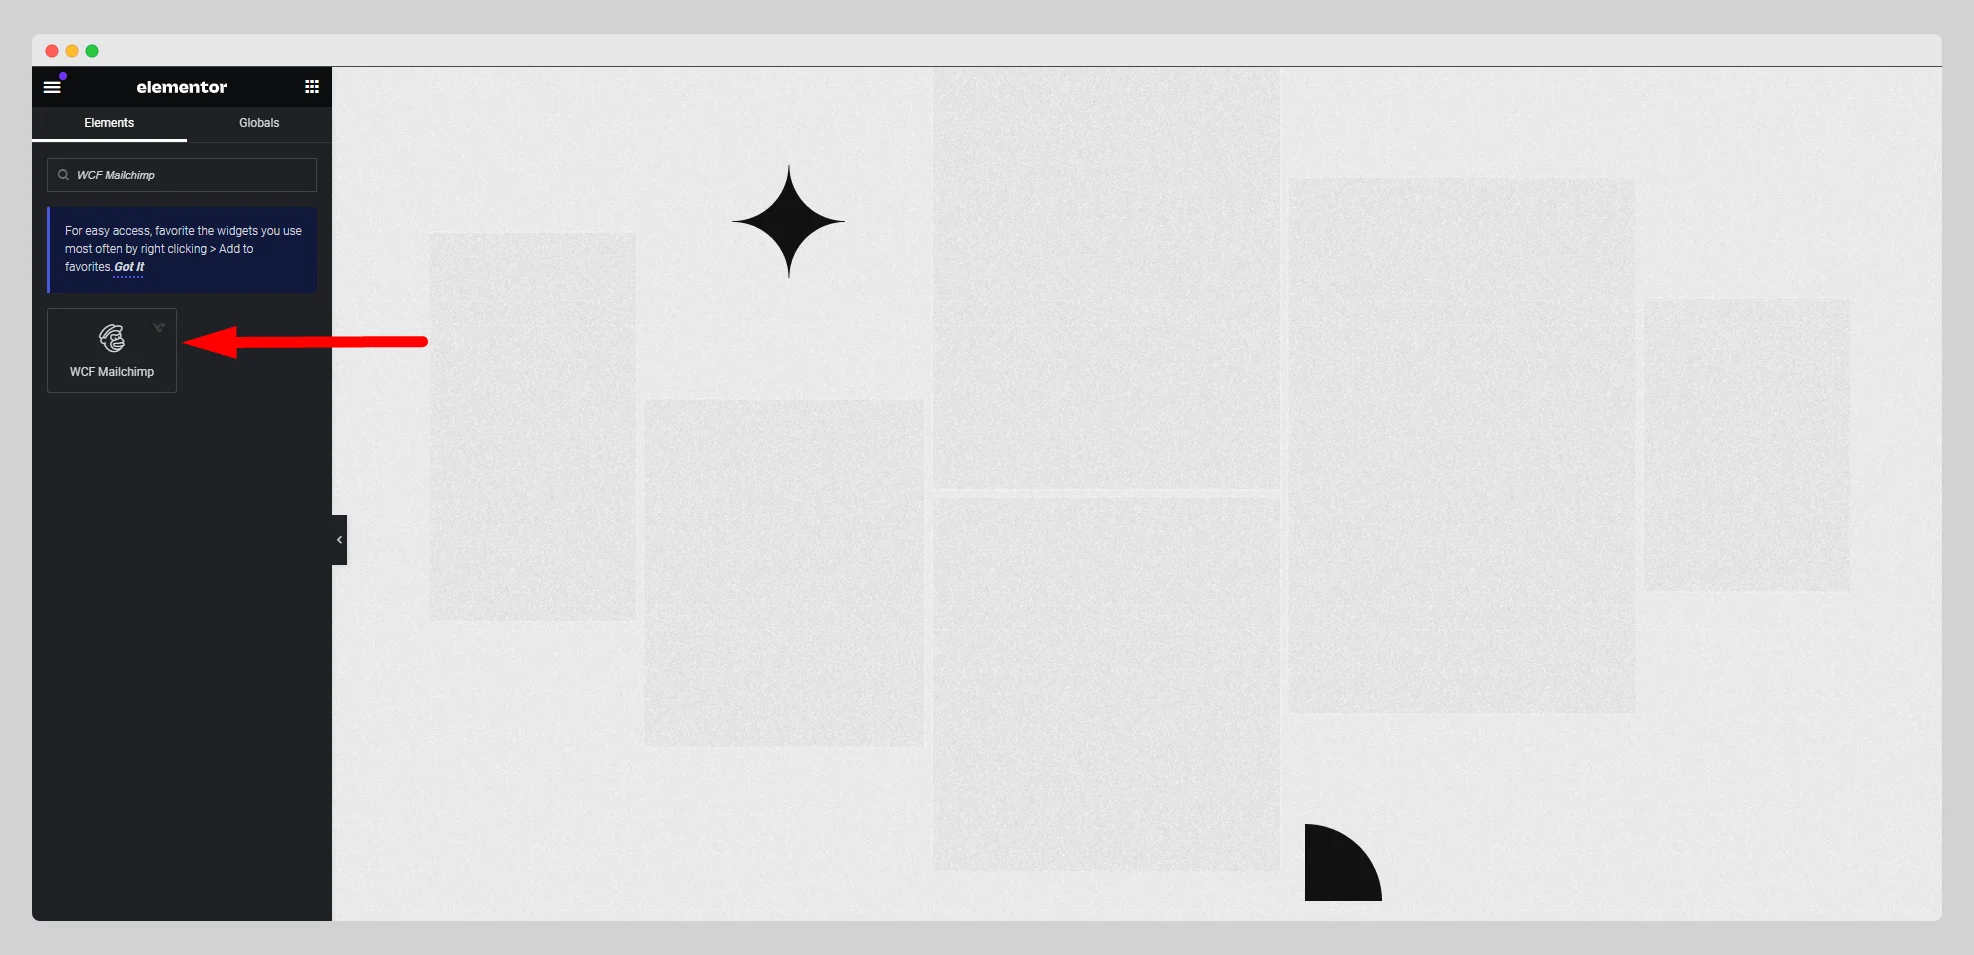
From the Elementor panel, drag the “WCF Mailchimp ” widget to a container on your page.

Step-2:
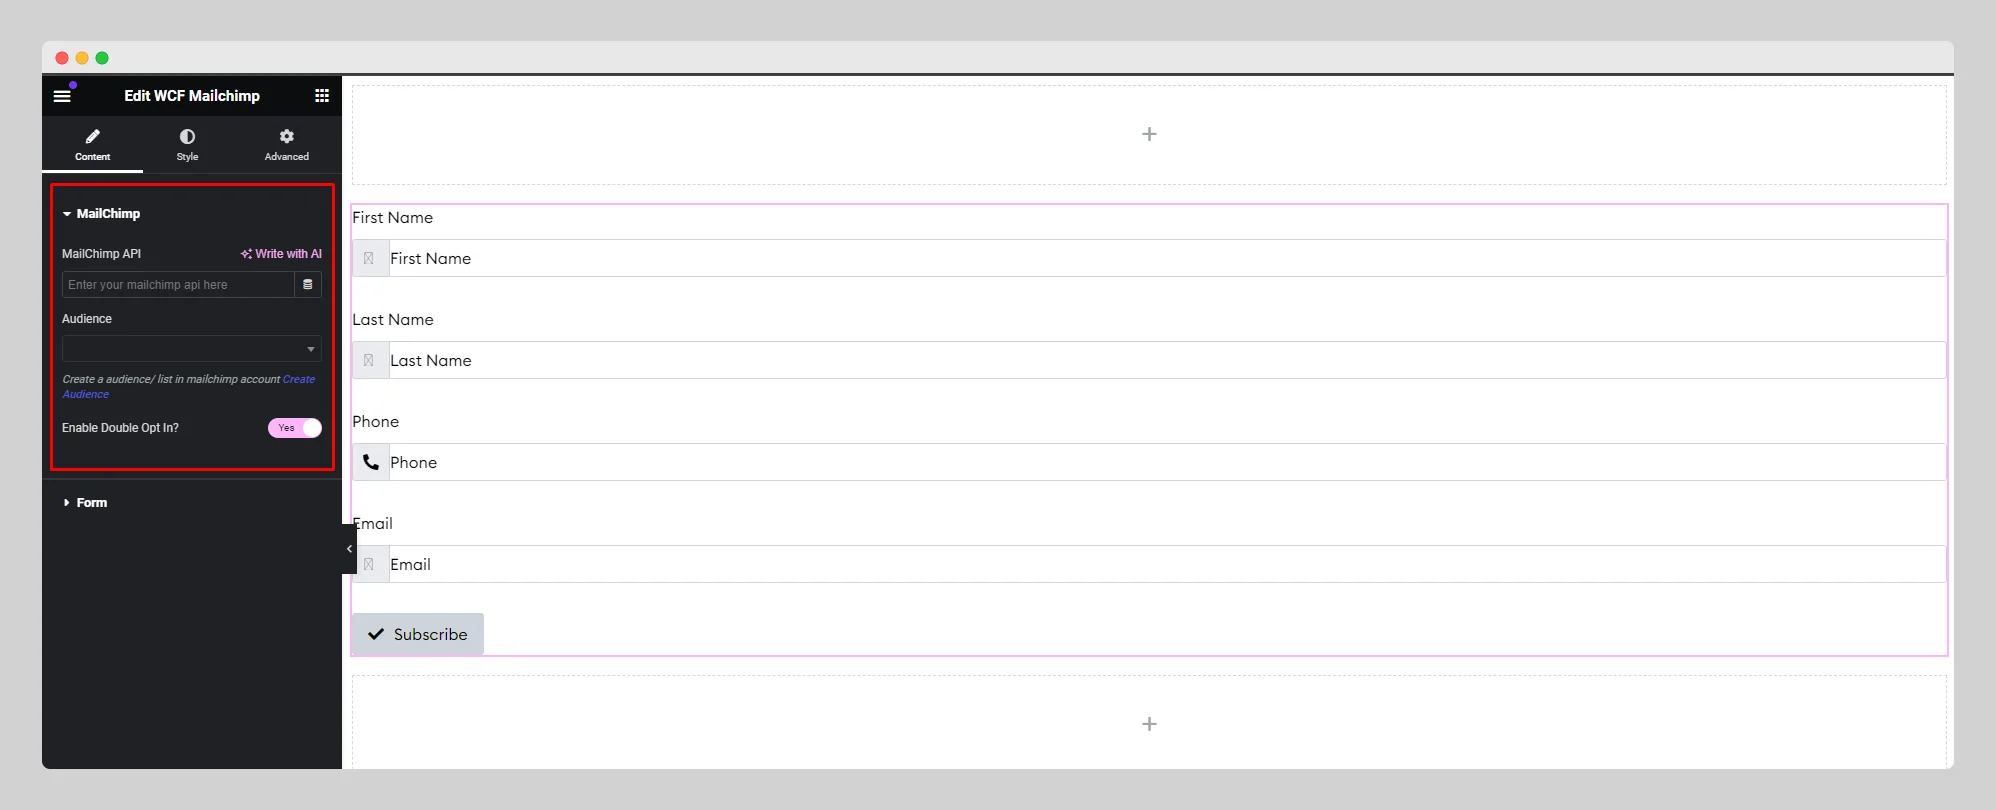
Under the “MailChimp” option, insert a Mailchimp API and an audience. Enable the “Enable Double Opt In” button.

Step-3:
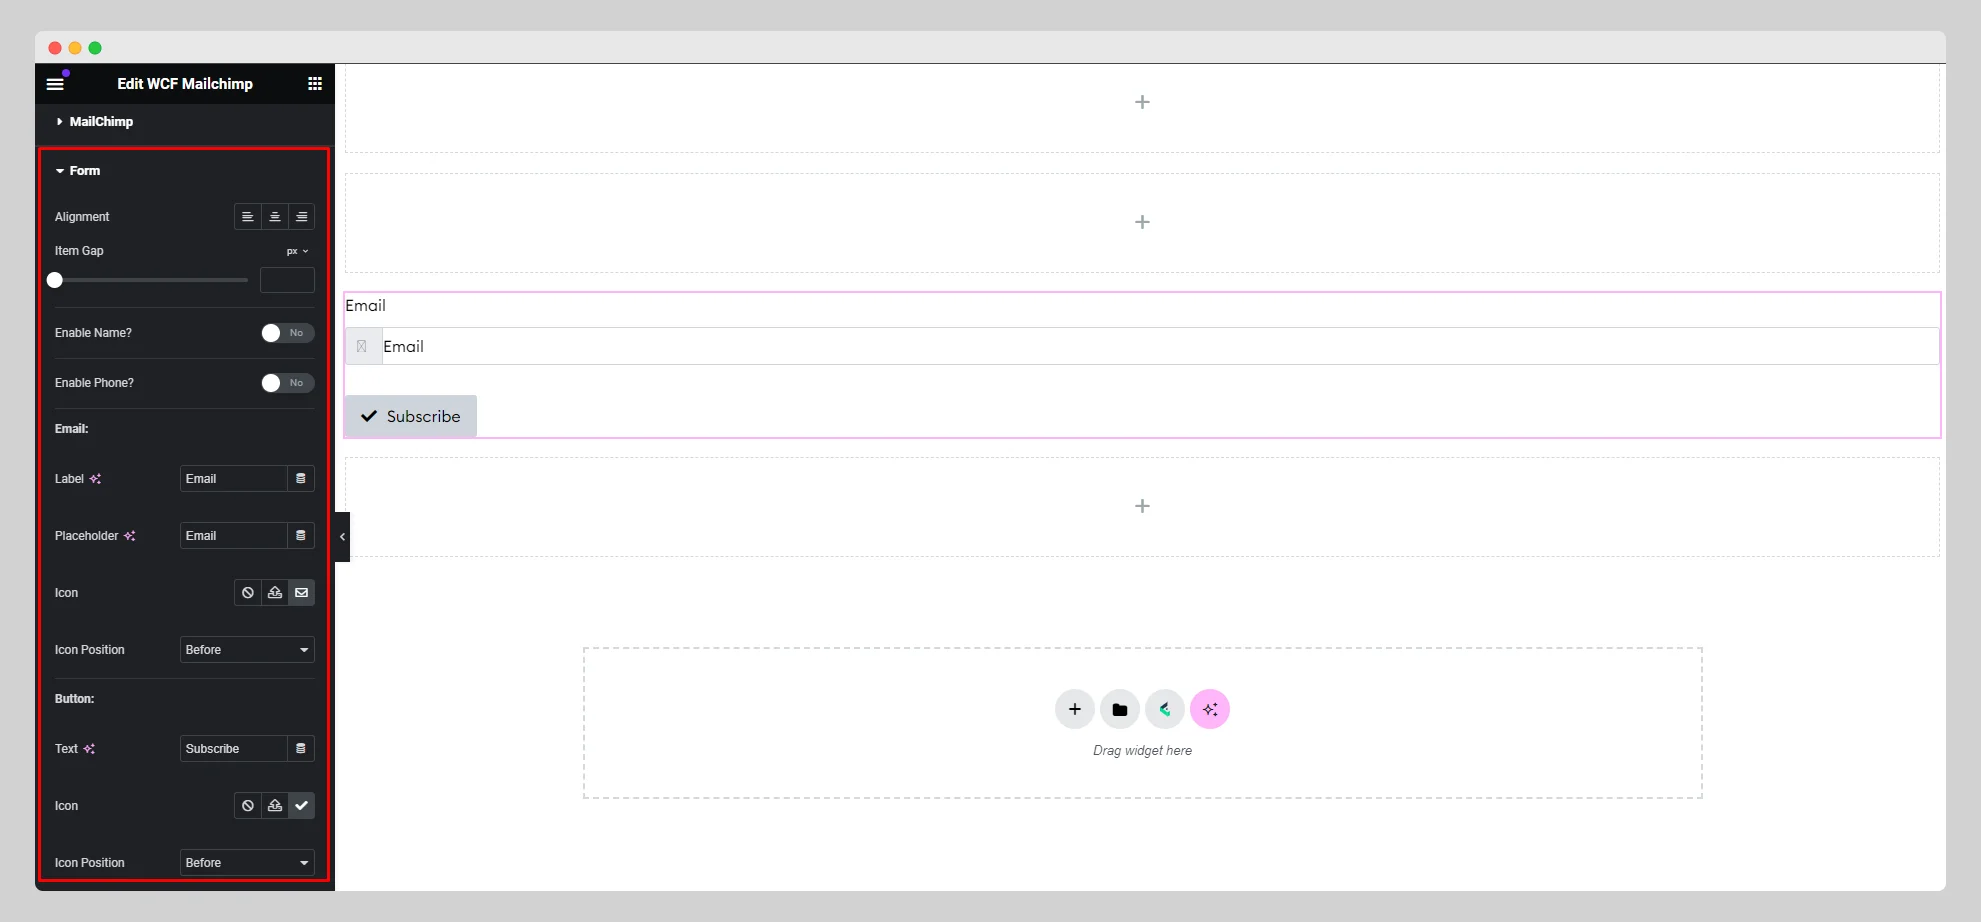
From the “Form” option, adjust the alignment, item gap, icon, icon position, label, placeholder, and other parameters for the form, email, and button. Enable the “Enable Name” and “Enable Phone” buttons.

Step-4:
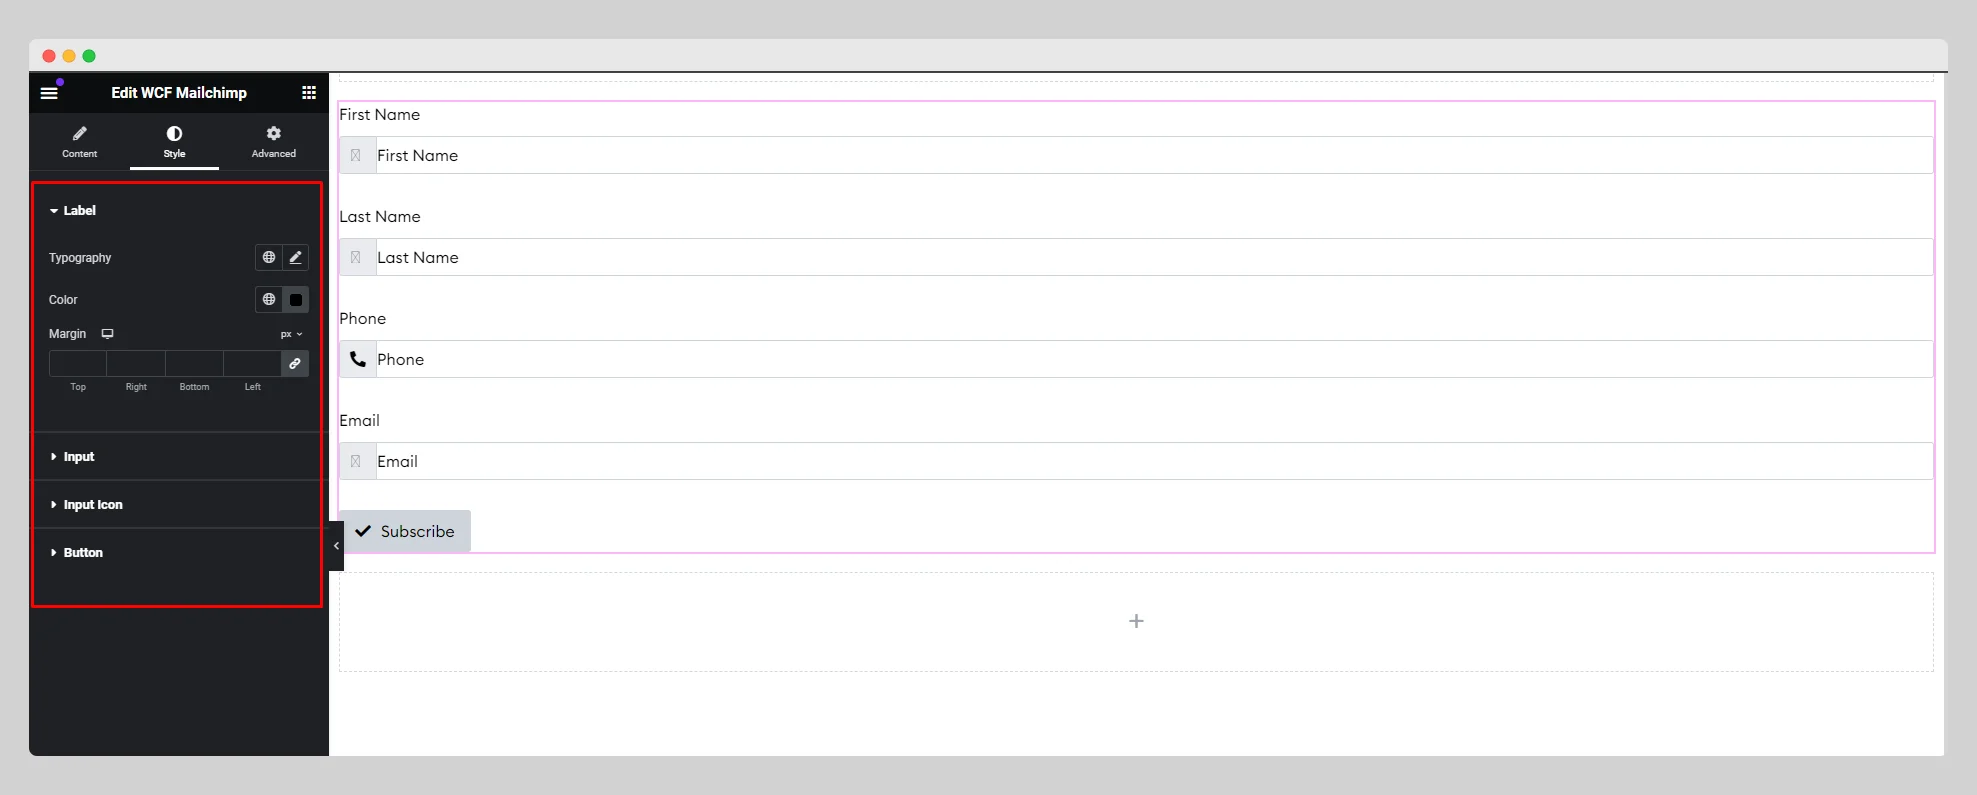
Under the “Style” section, customize the style for “Label,” “Input,” “Input Icon,” and “Button.”.
