Below are the steps on how to use the WCF Table of Contents widget:
Step – 1:
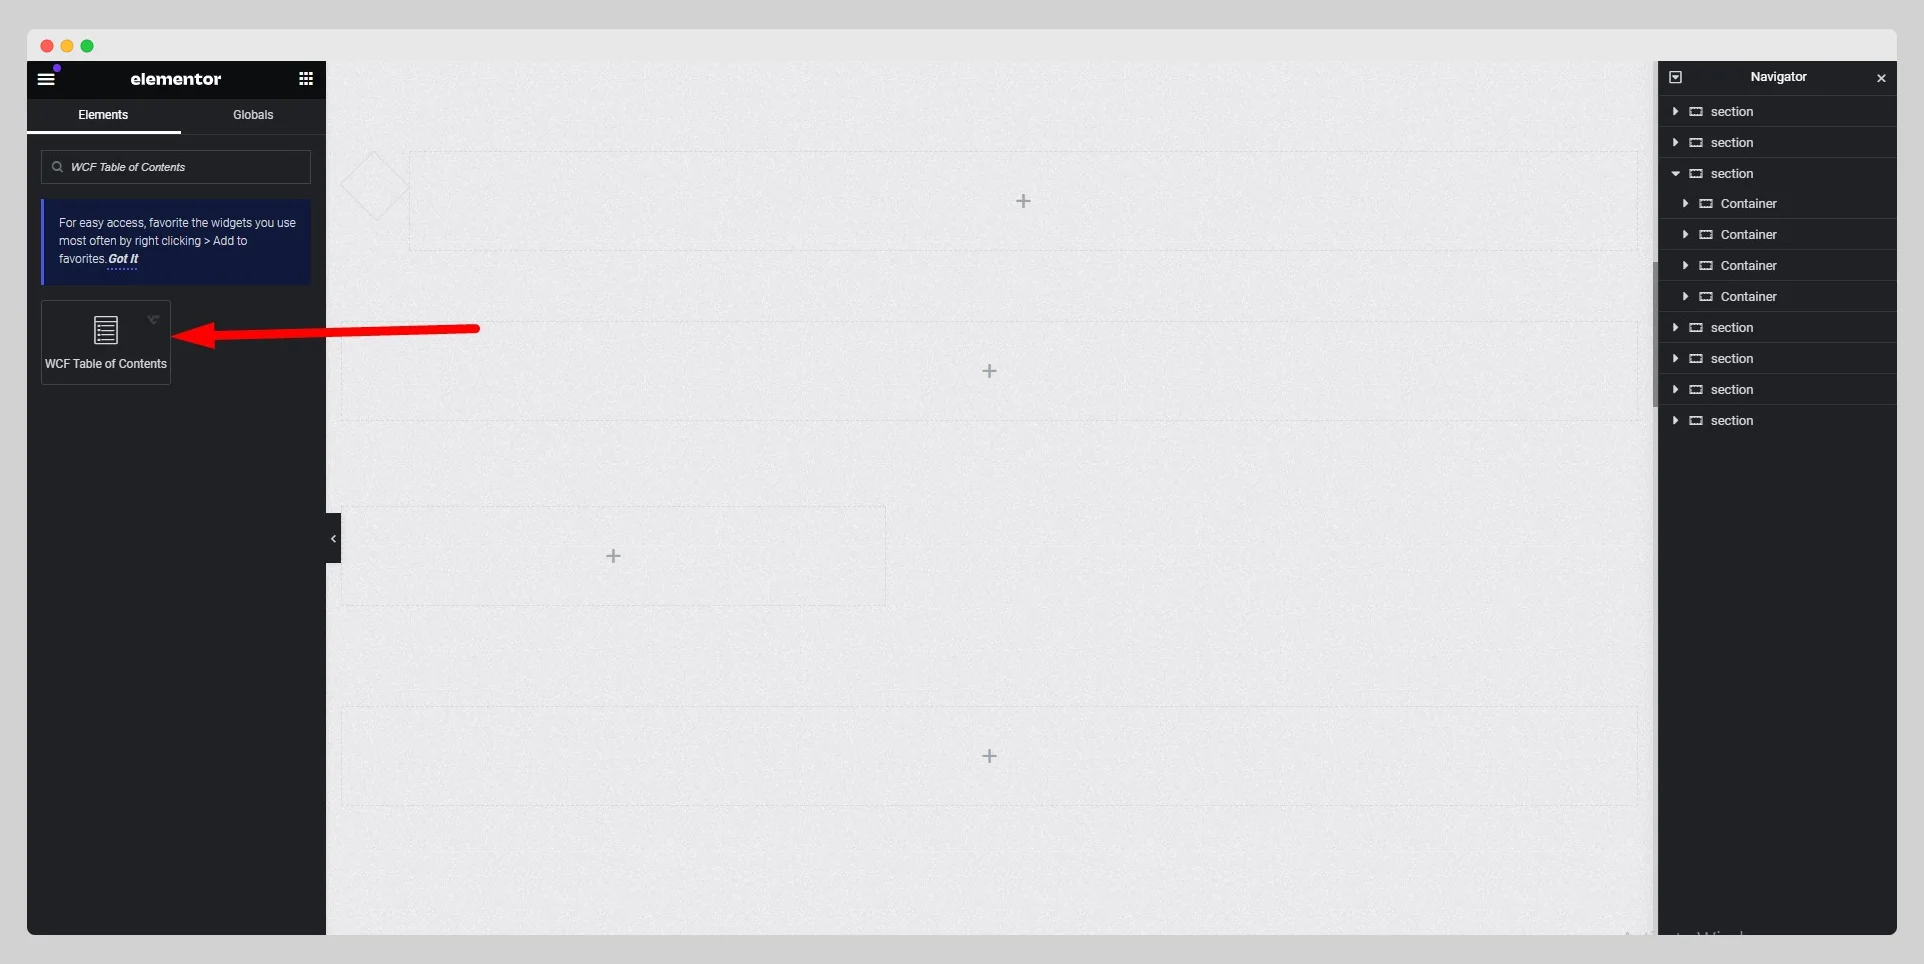
From the Elementor panel, drag the “WCF Table of Contents” widget to a container on your page.

Step – 2:
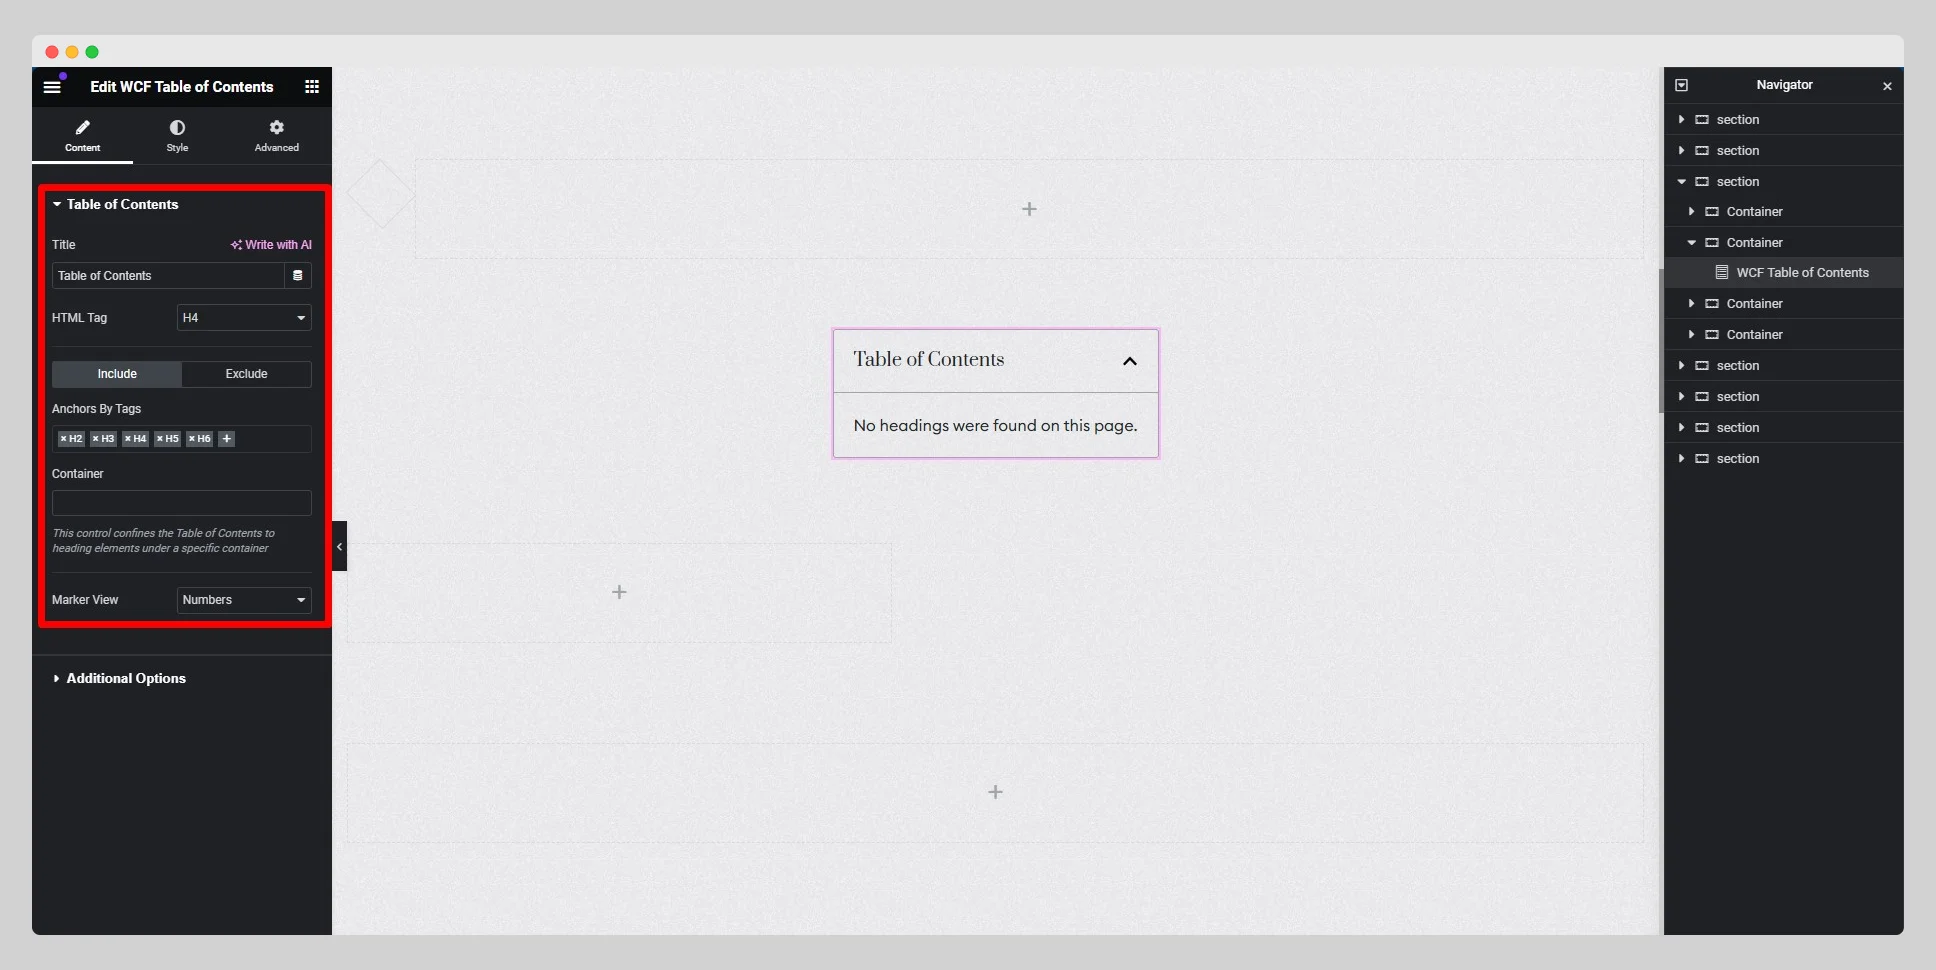
Under the “Content” section, write the title and set the HTML tag first. Then adjust the “Include” and “Exclude” options with anchors by tags, containers, and marker view.

Step – 3:
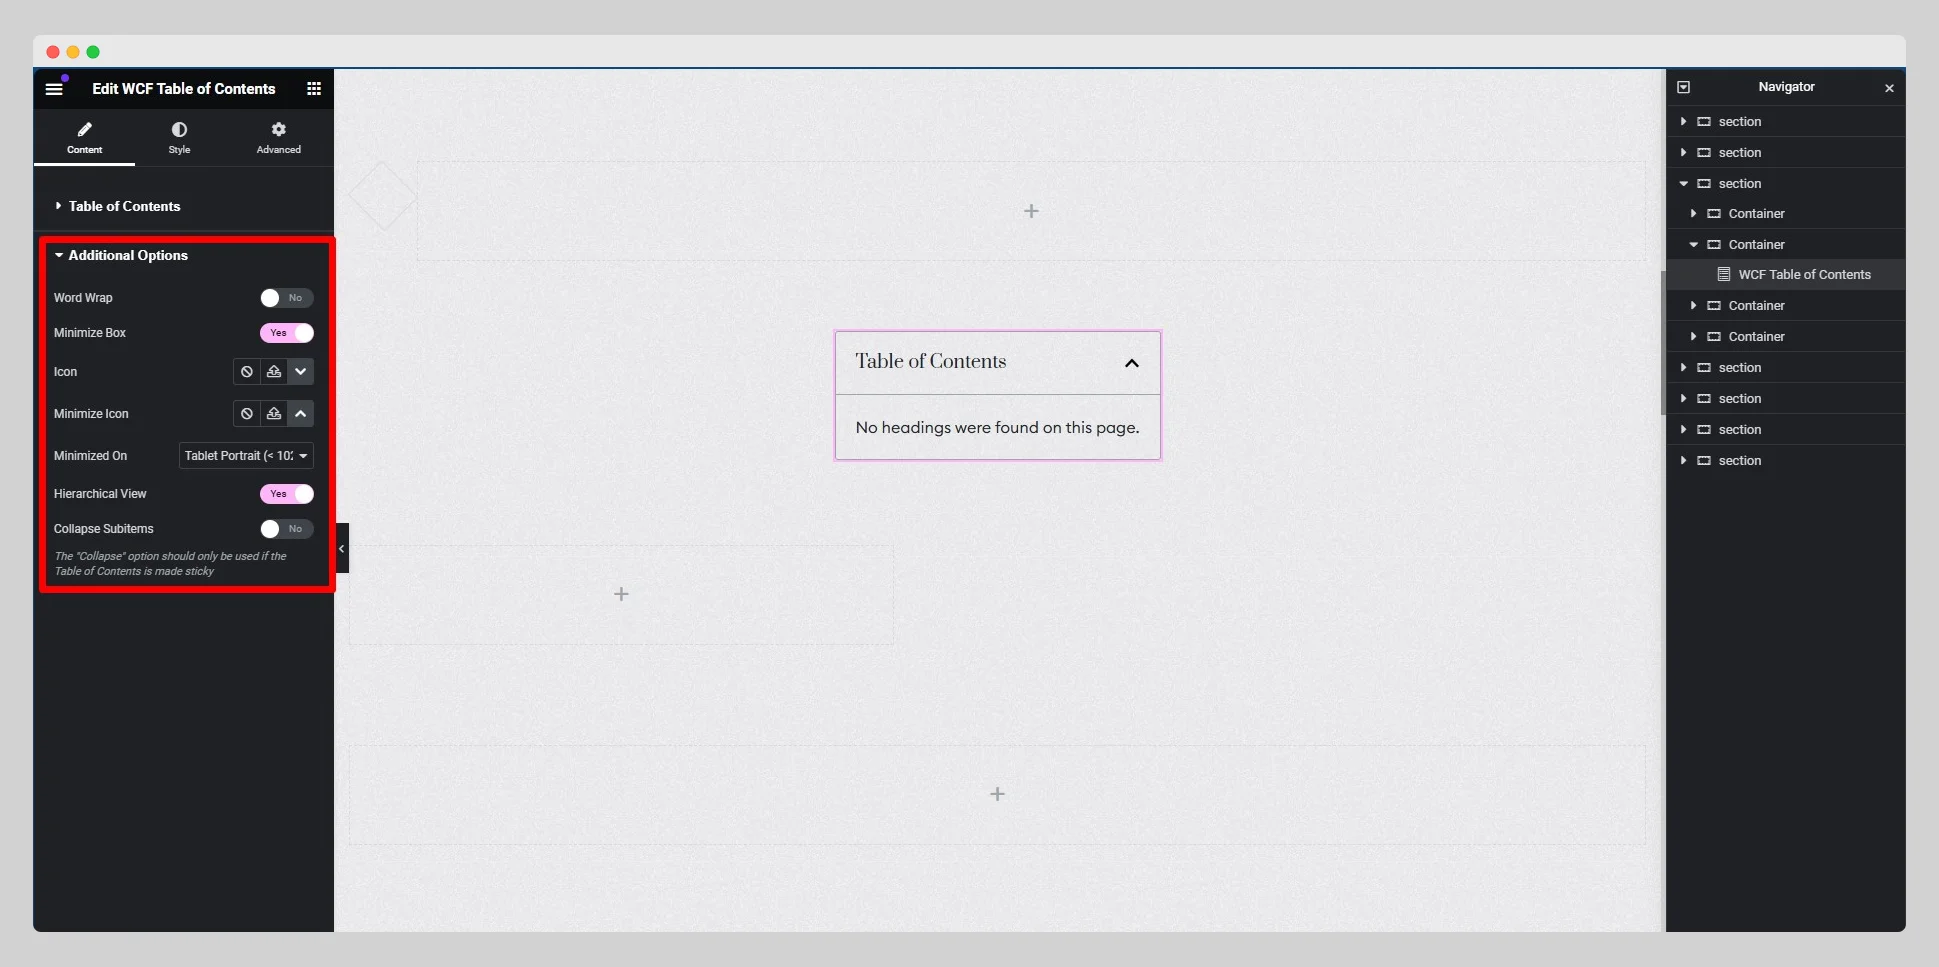
From the “Additional Options,” enable or disable the “Word Wrap,” “Minimize Box,” “Hierarchical View,” and “Collapse Subitems” buttons. Adjust the “Icon”, “Minimize icon”, and “Minimized On” options.

Step – 4:
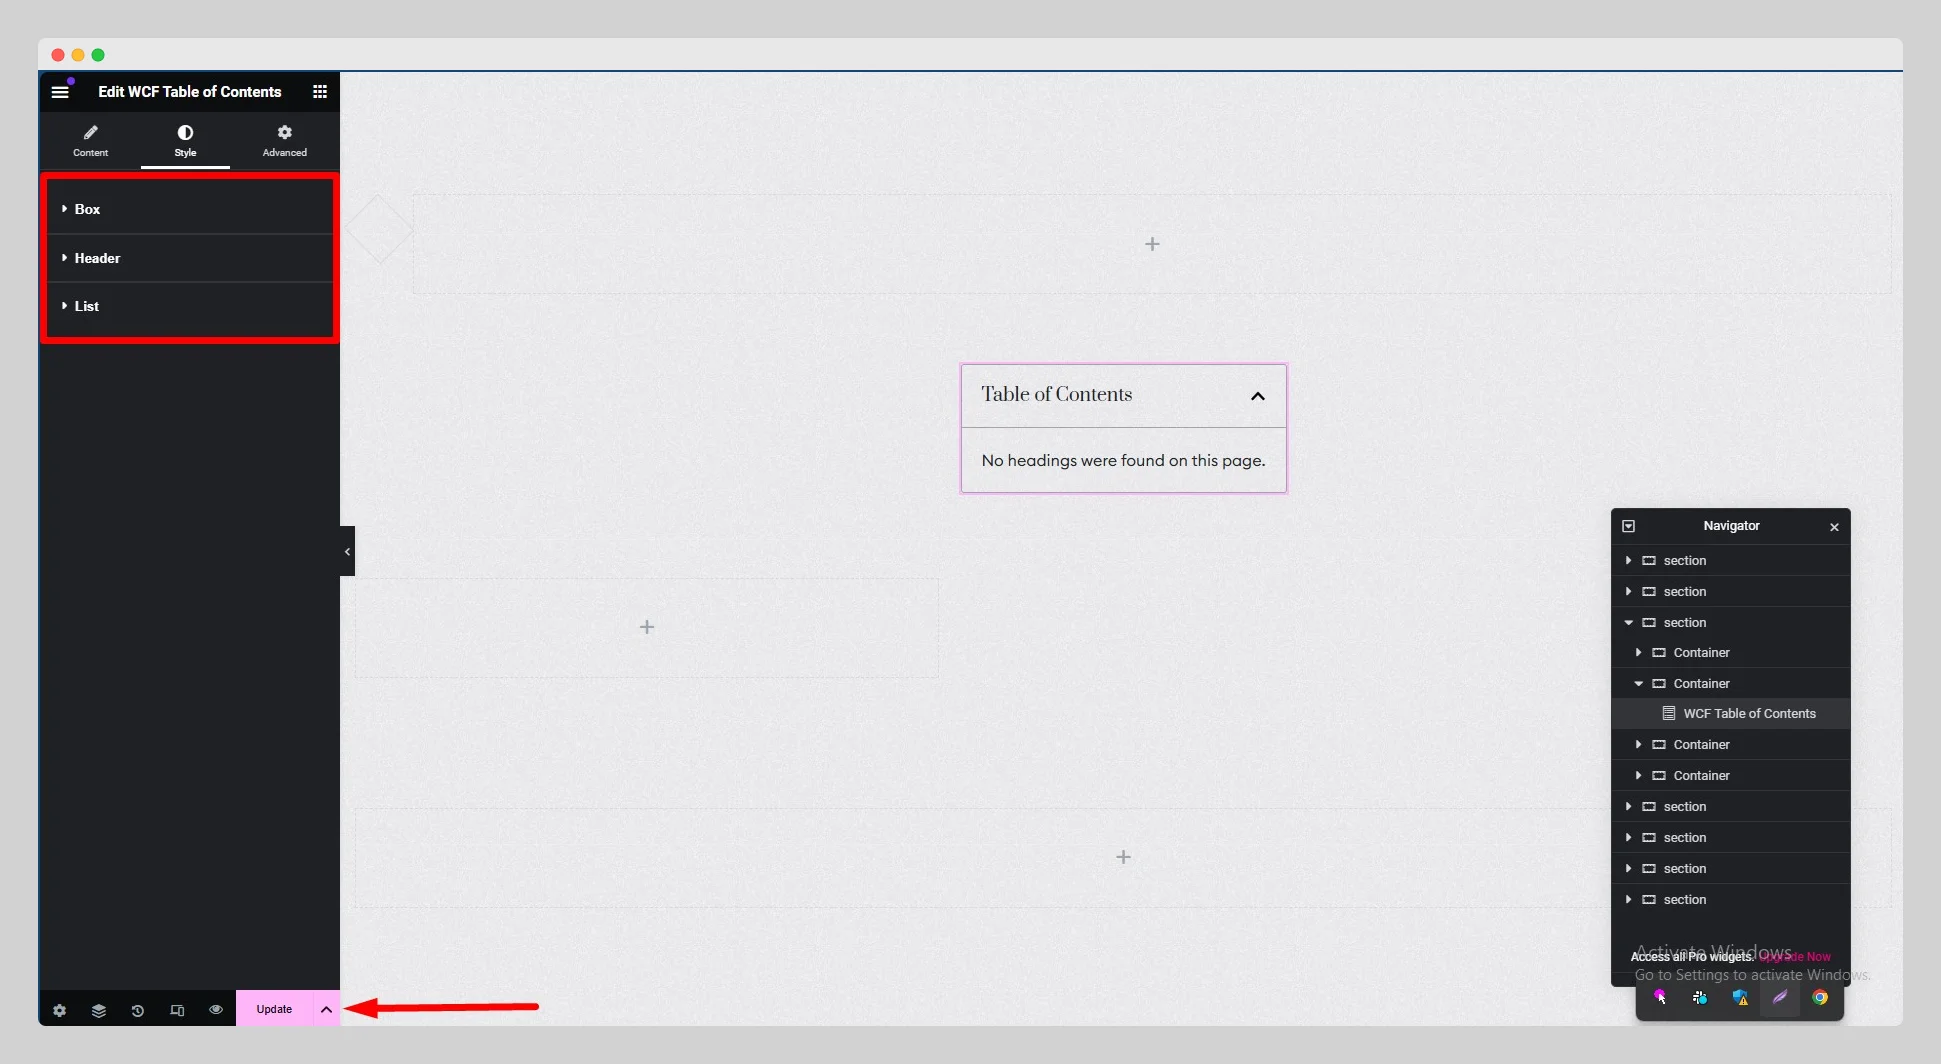
Under the “Style” section, customize the style for “Box,” “Header,” and “List.” Finally, hit the “Update” button.
