Take a look at the following WCF Testimonial widget documentation to create different testimonial sections for your webpage:
Step-1:
From the Elementor panel, drag the “WCF Testimonial” widget to a container on your page.

Step-2:
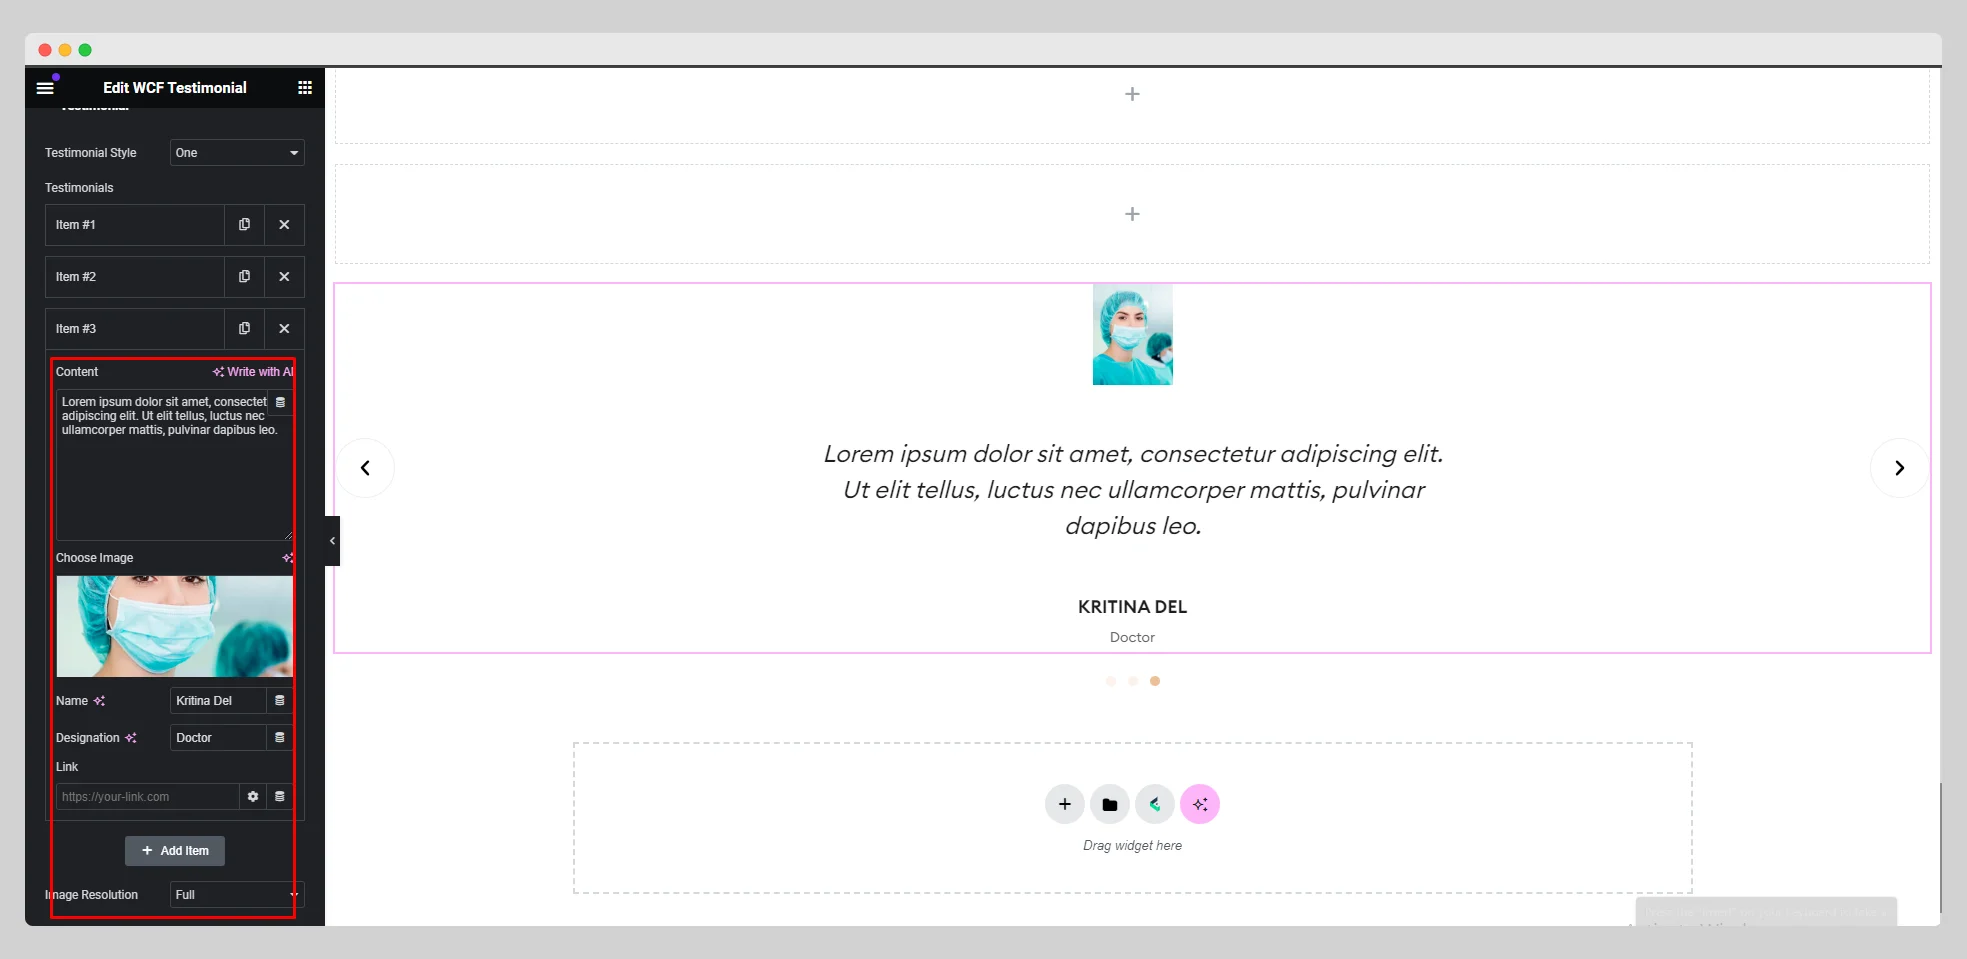
Under the “Testimonial” option, choose a testimonial style first. Then click on the “Add Item” button to add a testimonial.

Step-3:
Write the testimonial content and pick a particular image. Add a name, designation, and link. Then set an image resolution from the “Image Resolution” option.

Step-4:
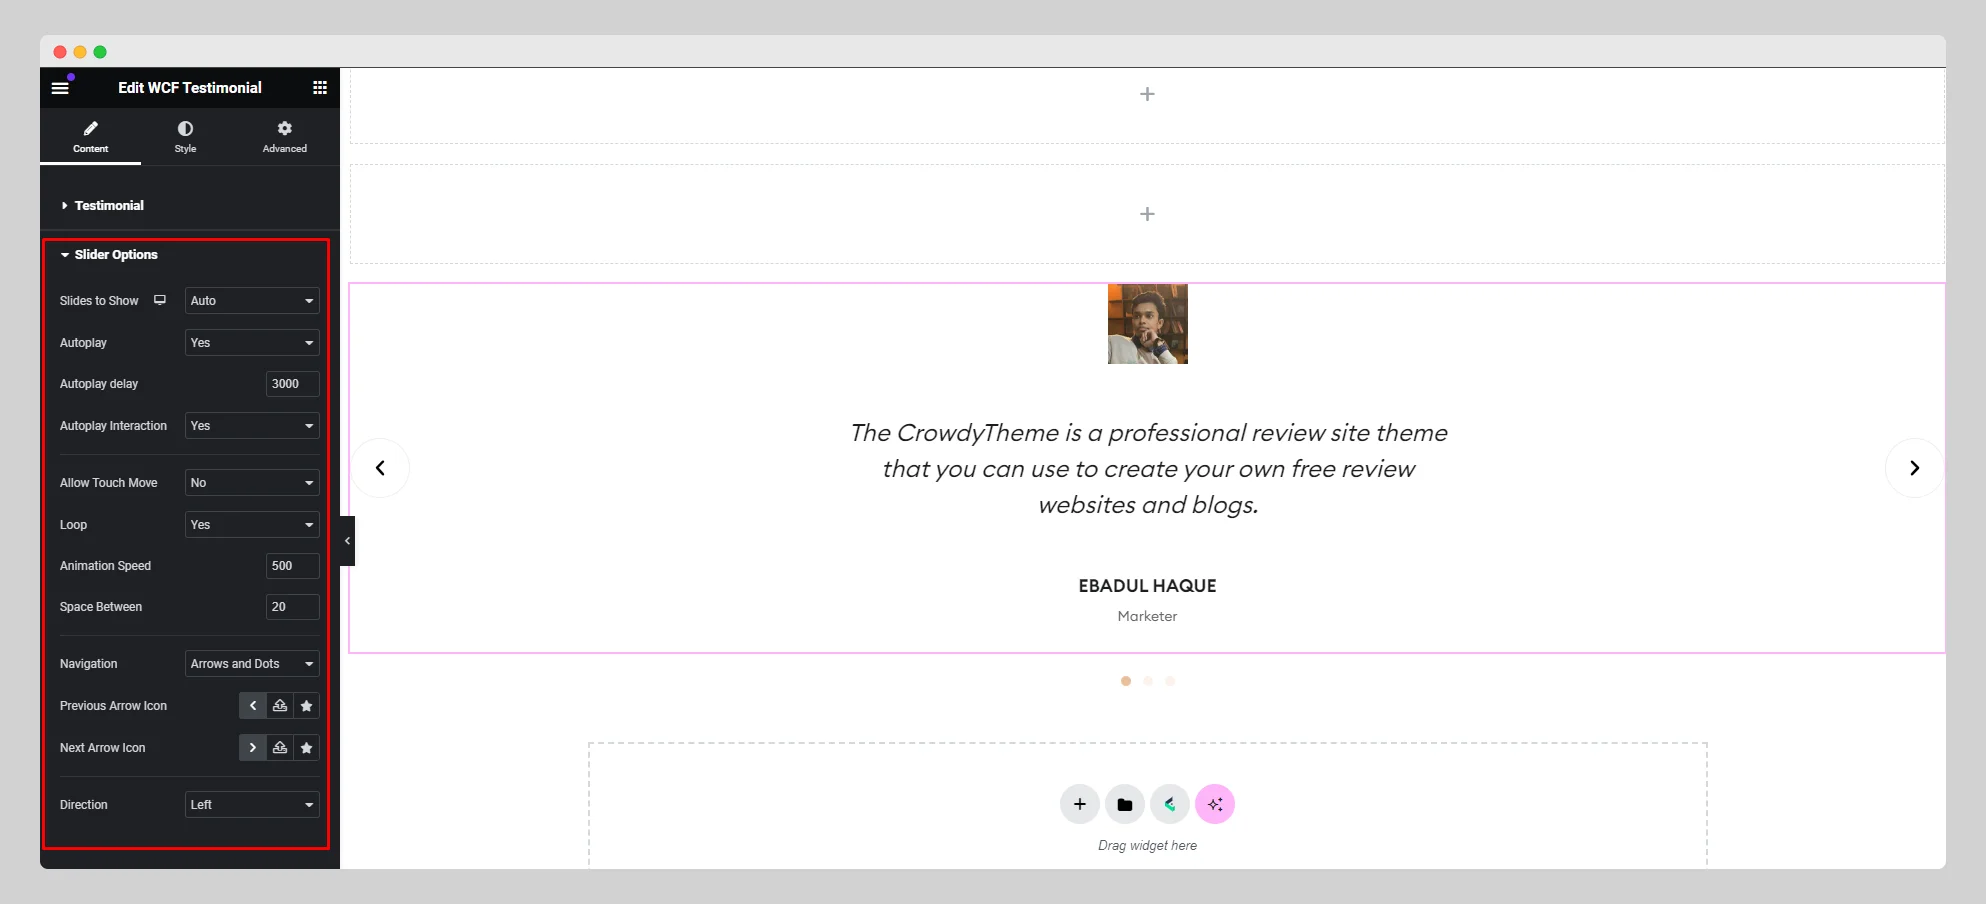
From the “Slider Options,” adjust the slide to show, autoplay, autoplay delay, autoplay interaction, loop, animation speed, navigation, arrow, direction, and other parameters for the testimonial slider.

Step-5:
Move to the “Style” section and customize the style for the “Slide,” “Navigation,” “Image,” “Content,” “Name,” and “Designation.”.
